Onboarding steps
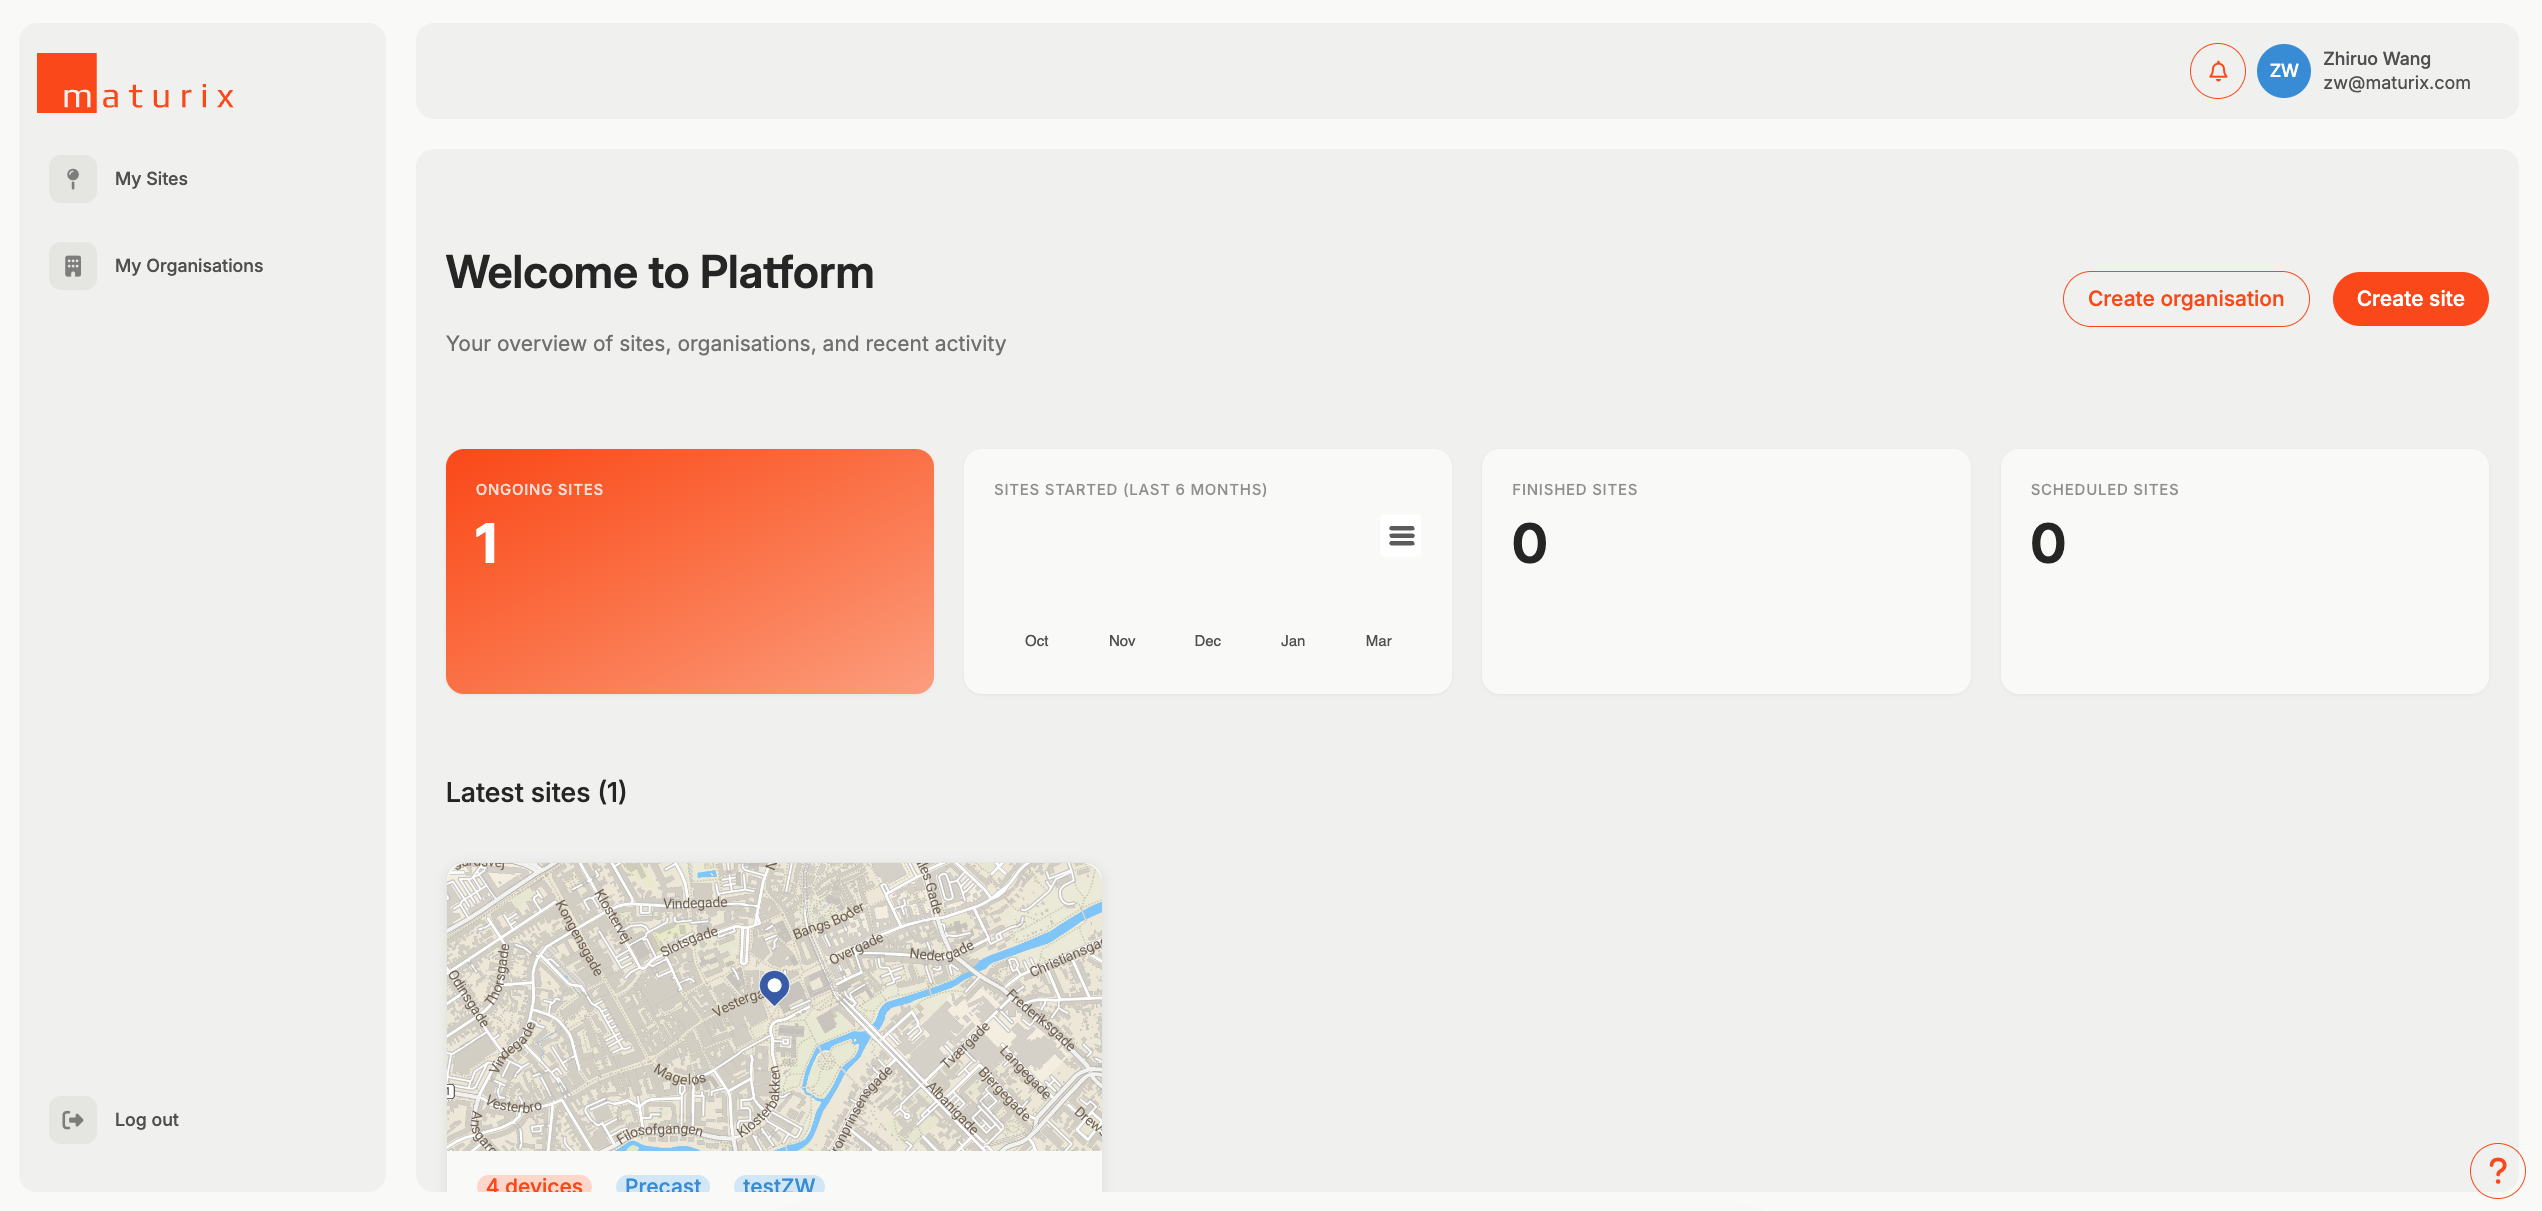
Welcome to MyMaturix
This guided onboarding will help you set up your site and start monitoring concrete.
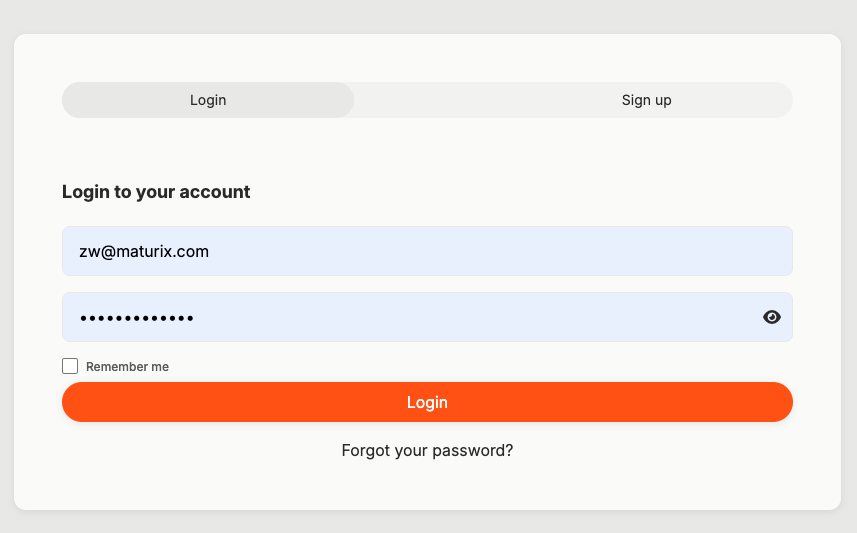
Do you have access to MyMaturix?
Let’s create an account
Please fill out the form as instructed, then you account should be created
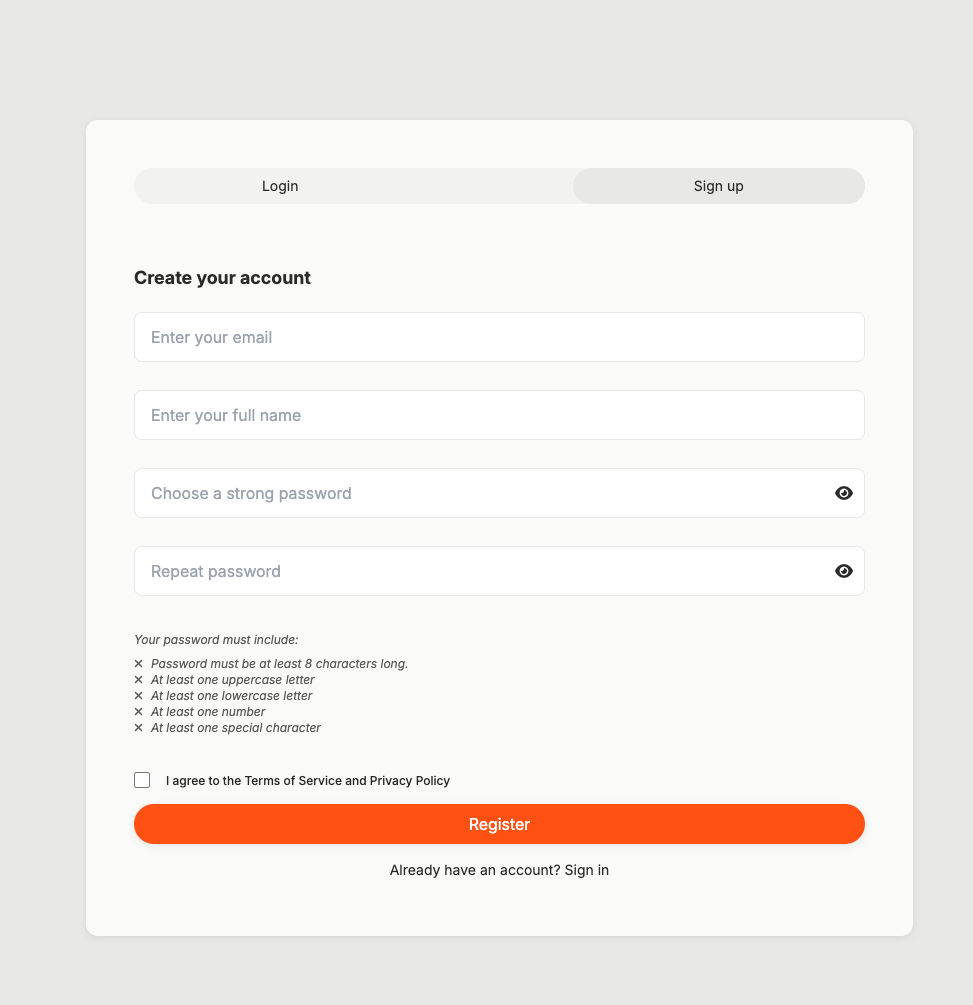
If you run into any issues, please contact [email protected]
Do you need to create an organisation?
The organisation usually refers to your company, and it is linked to your company's billing information.
Let's create an organisation together!
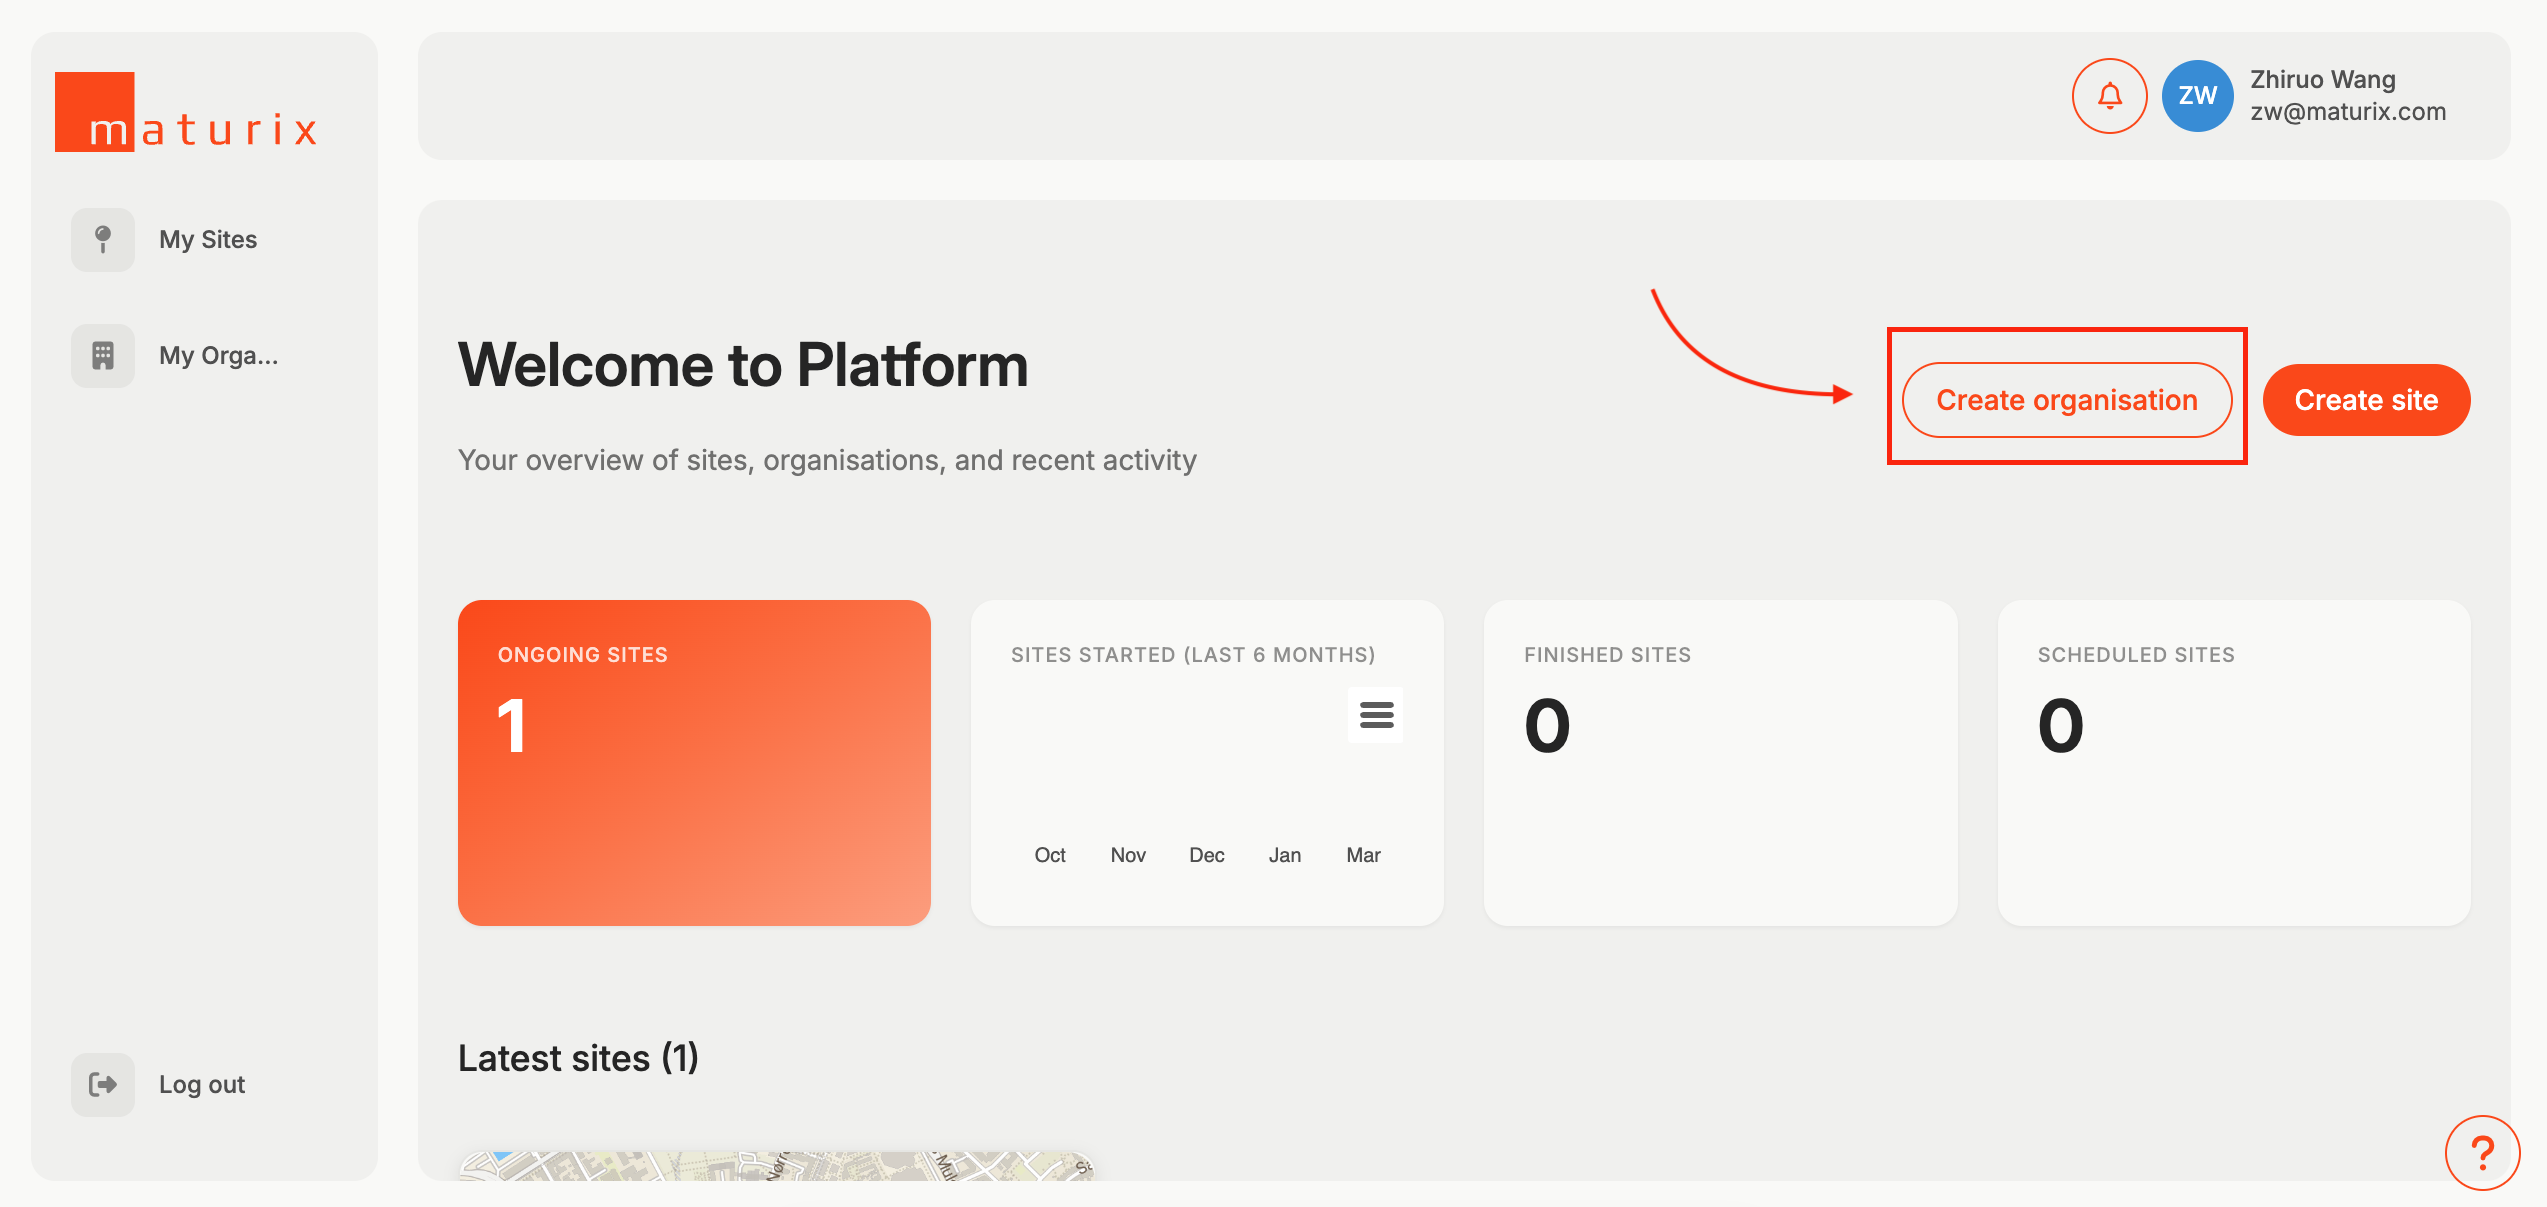
Step 1: Click on 'Create Organisation' on the top right corner
If this is your first time logging in, you should land on the this page by default.
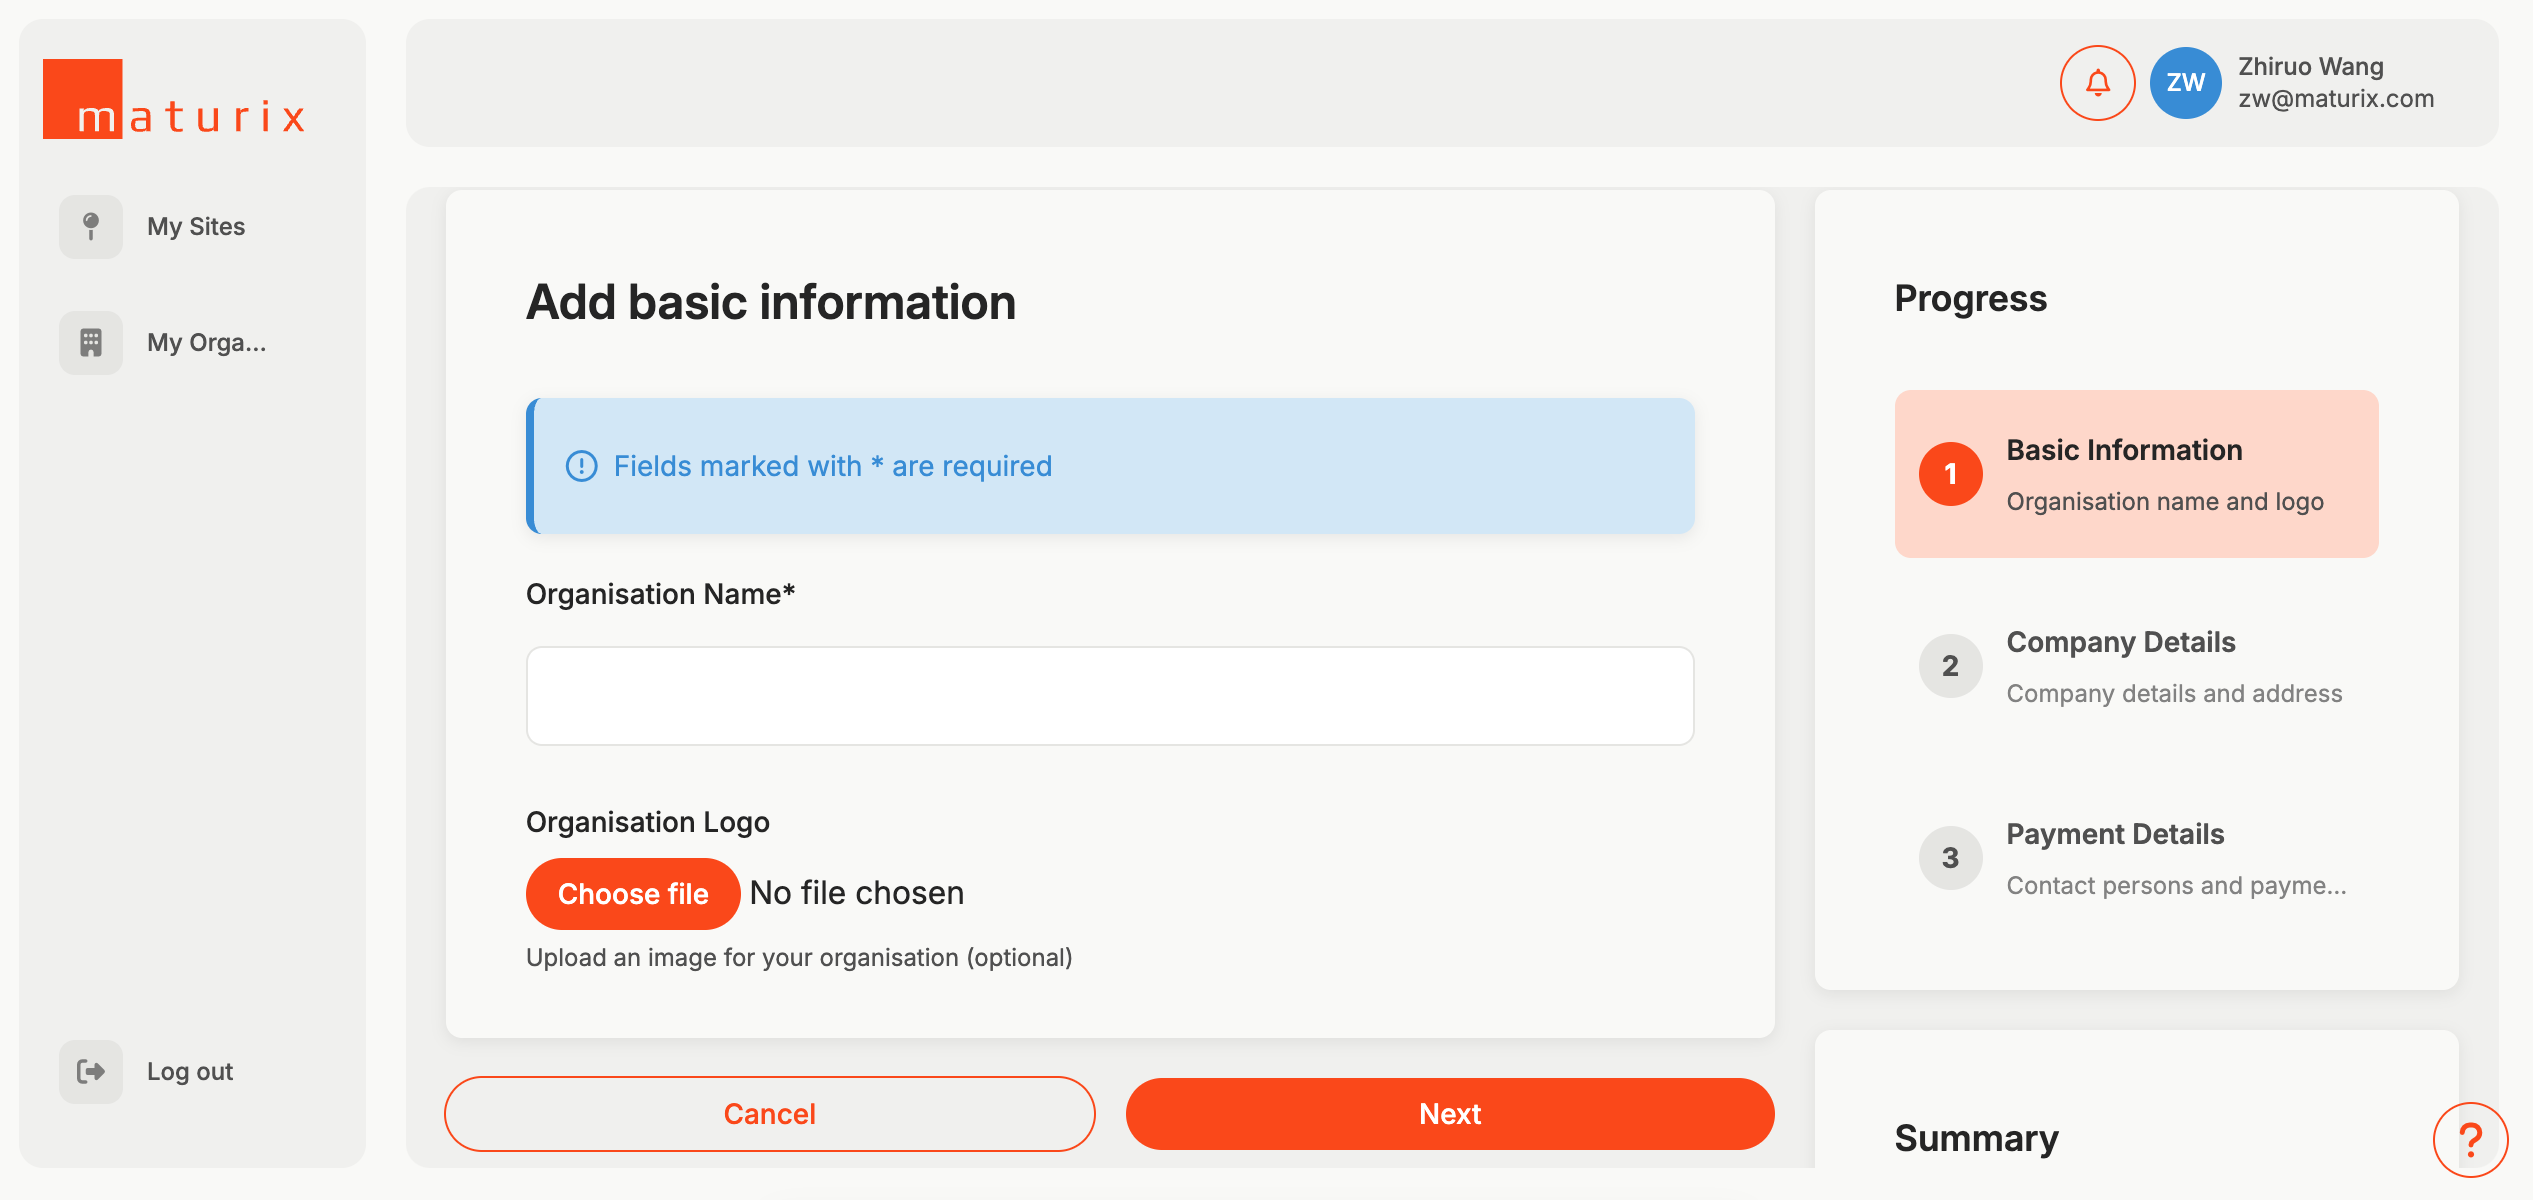
Step 2: Fill the form with correct information
- Organisation Name: Name of your company
- Organisation Logo: Add your company logo as the cover (Optional)
- Company Details: Address and information about your company
- Payment Details: Provide contact person details and select payment terms
Let's input the calibration data into the platform
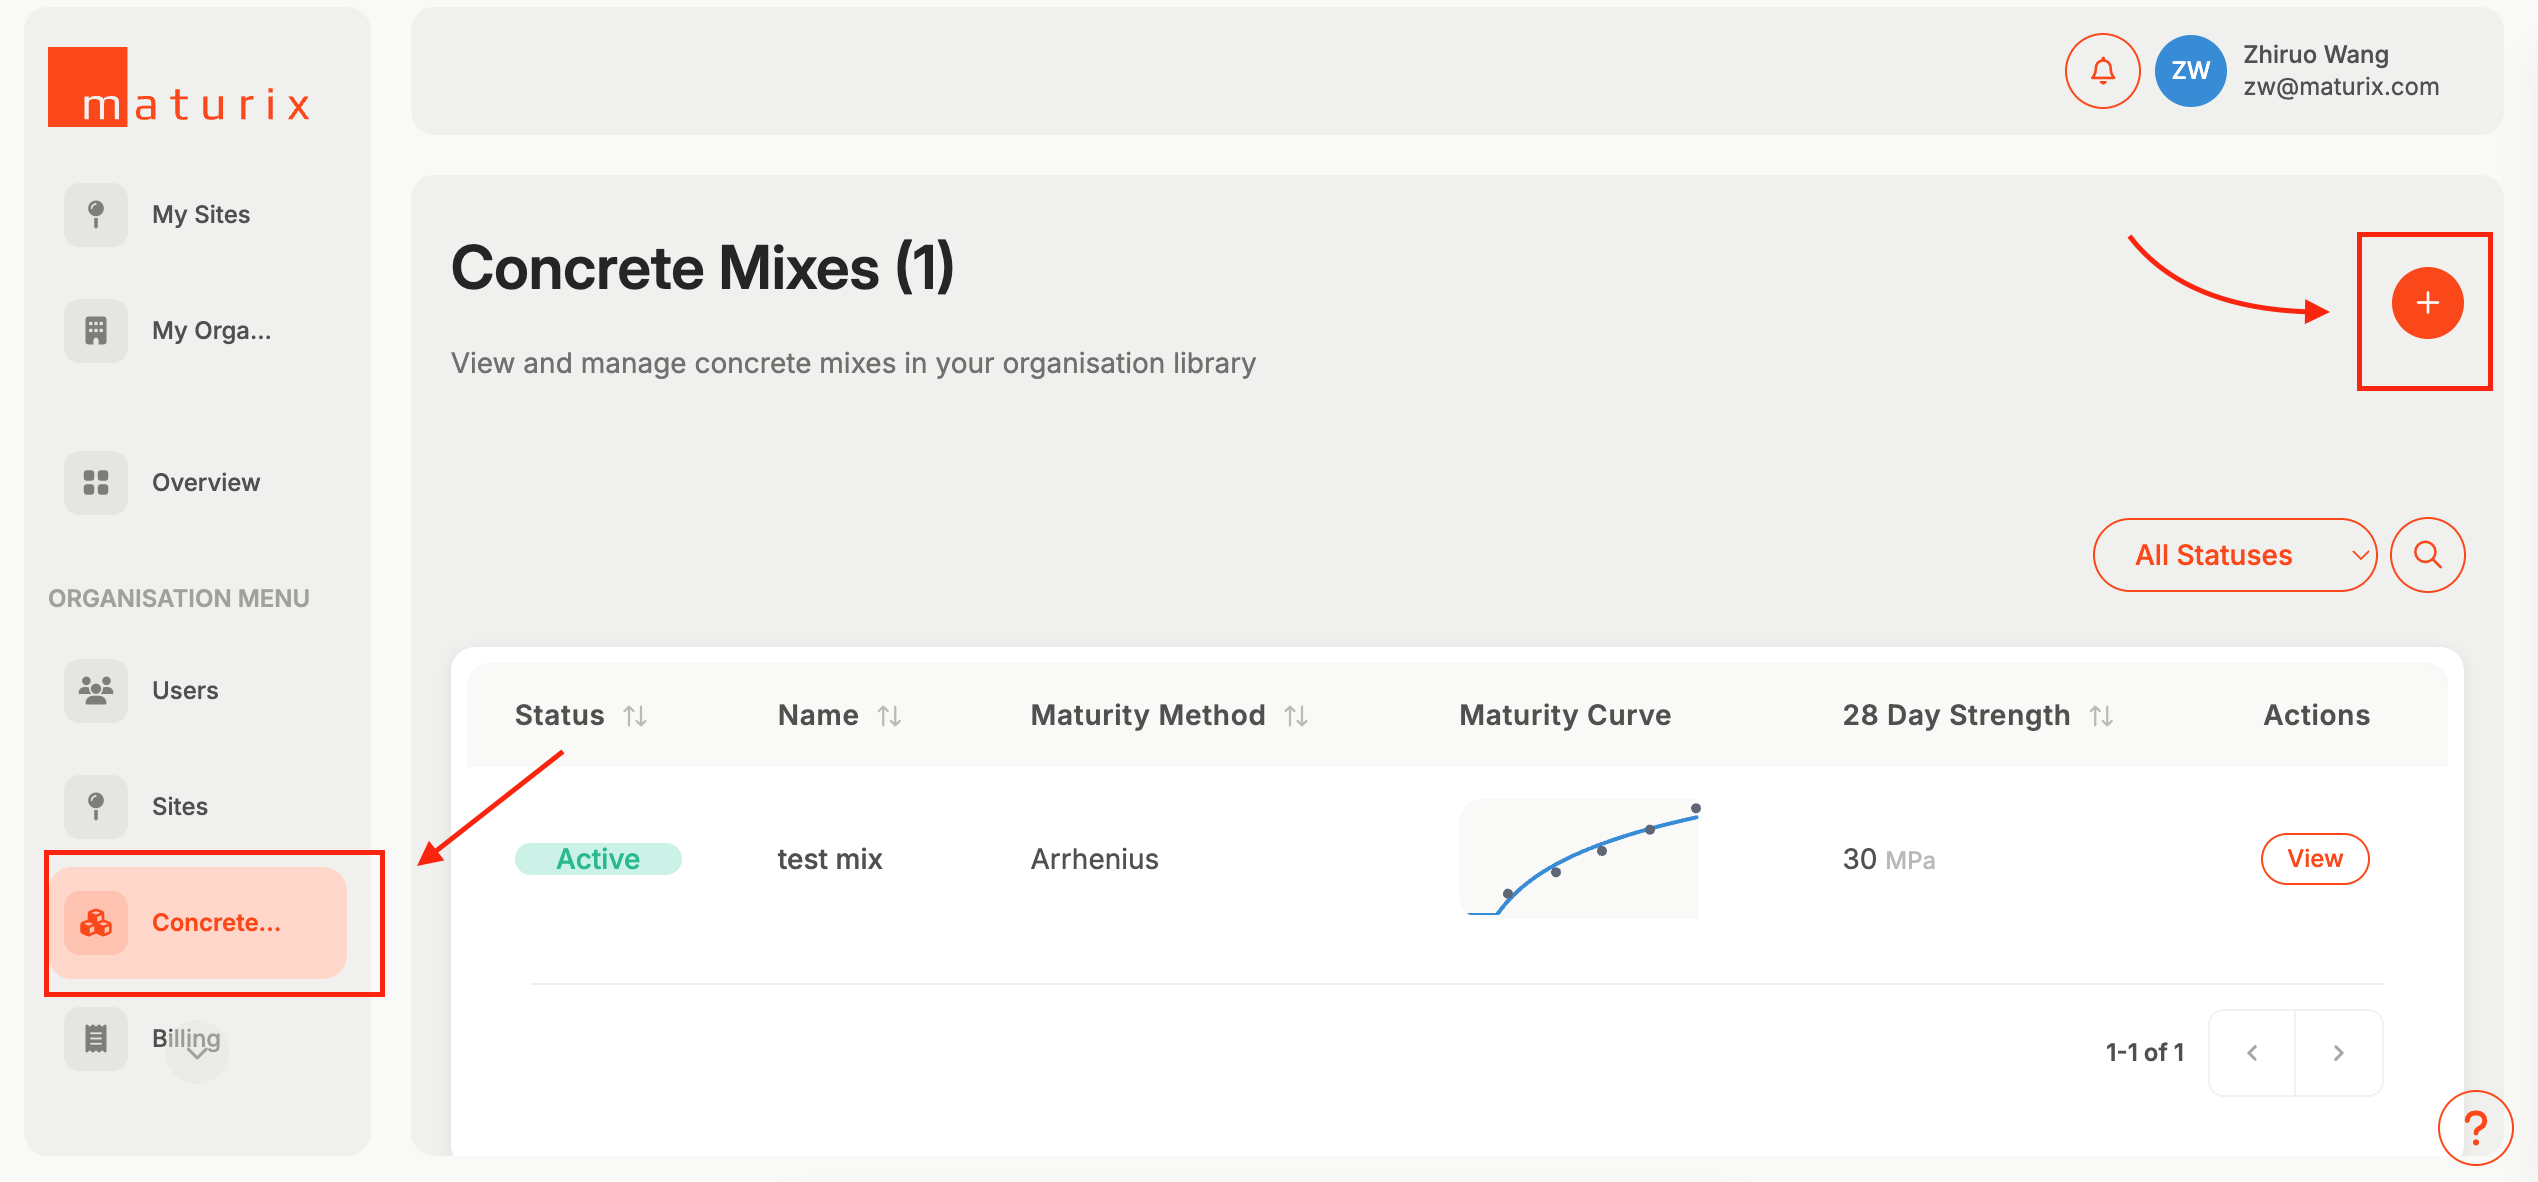
Step 1: Open the Concrete Library menu and click on the '+' on the top right corner
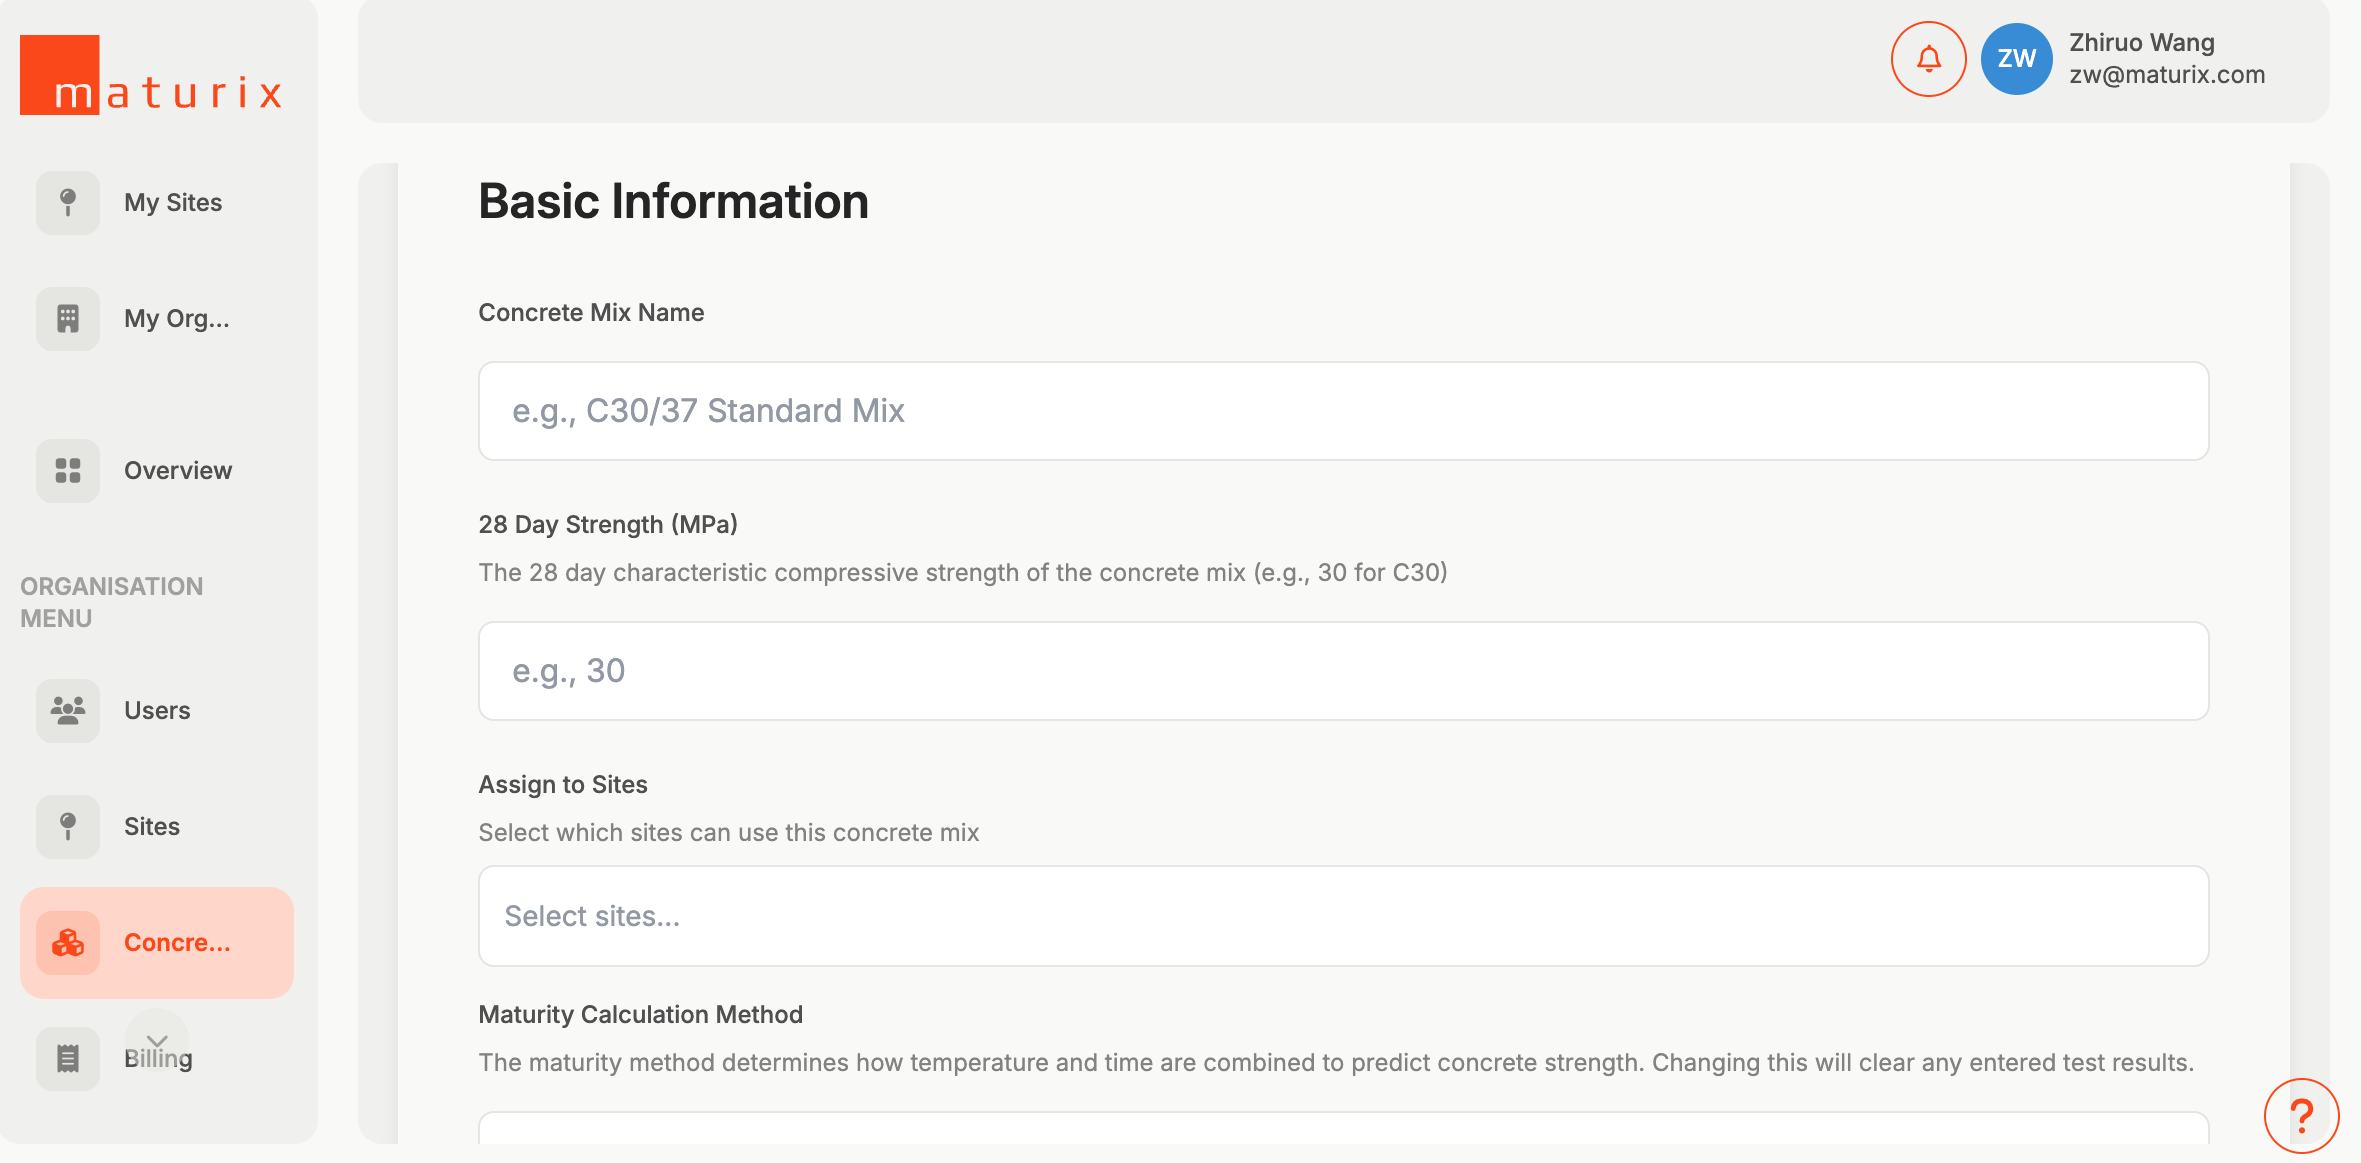
Step 2: Fill out the form
- Enter the Concrete Name
- Choose the Maturity Function
- Add the strength–maturity relationship (see ASTM C1074) under Data Points
It is time to create your first site!
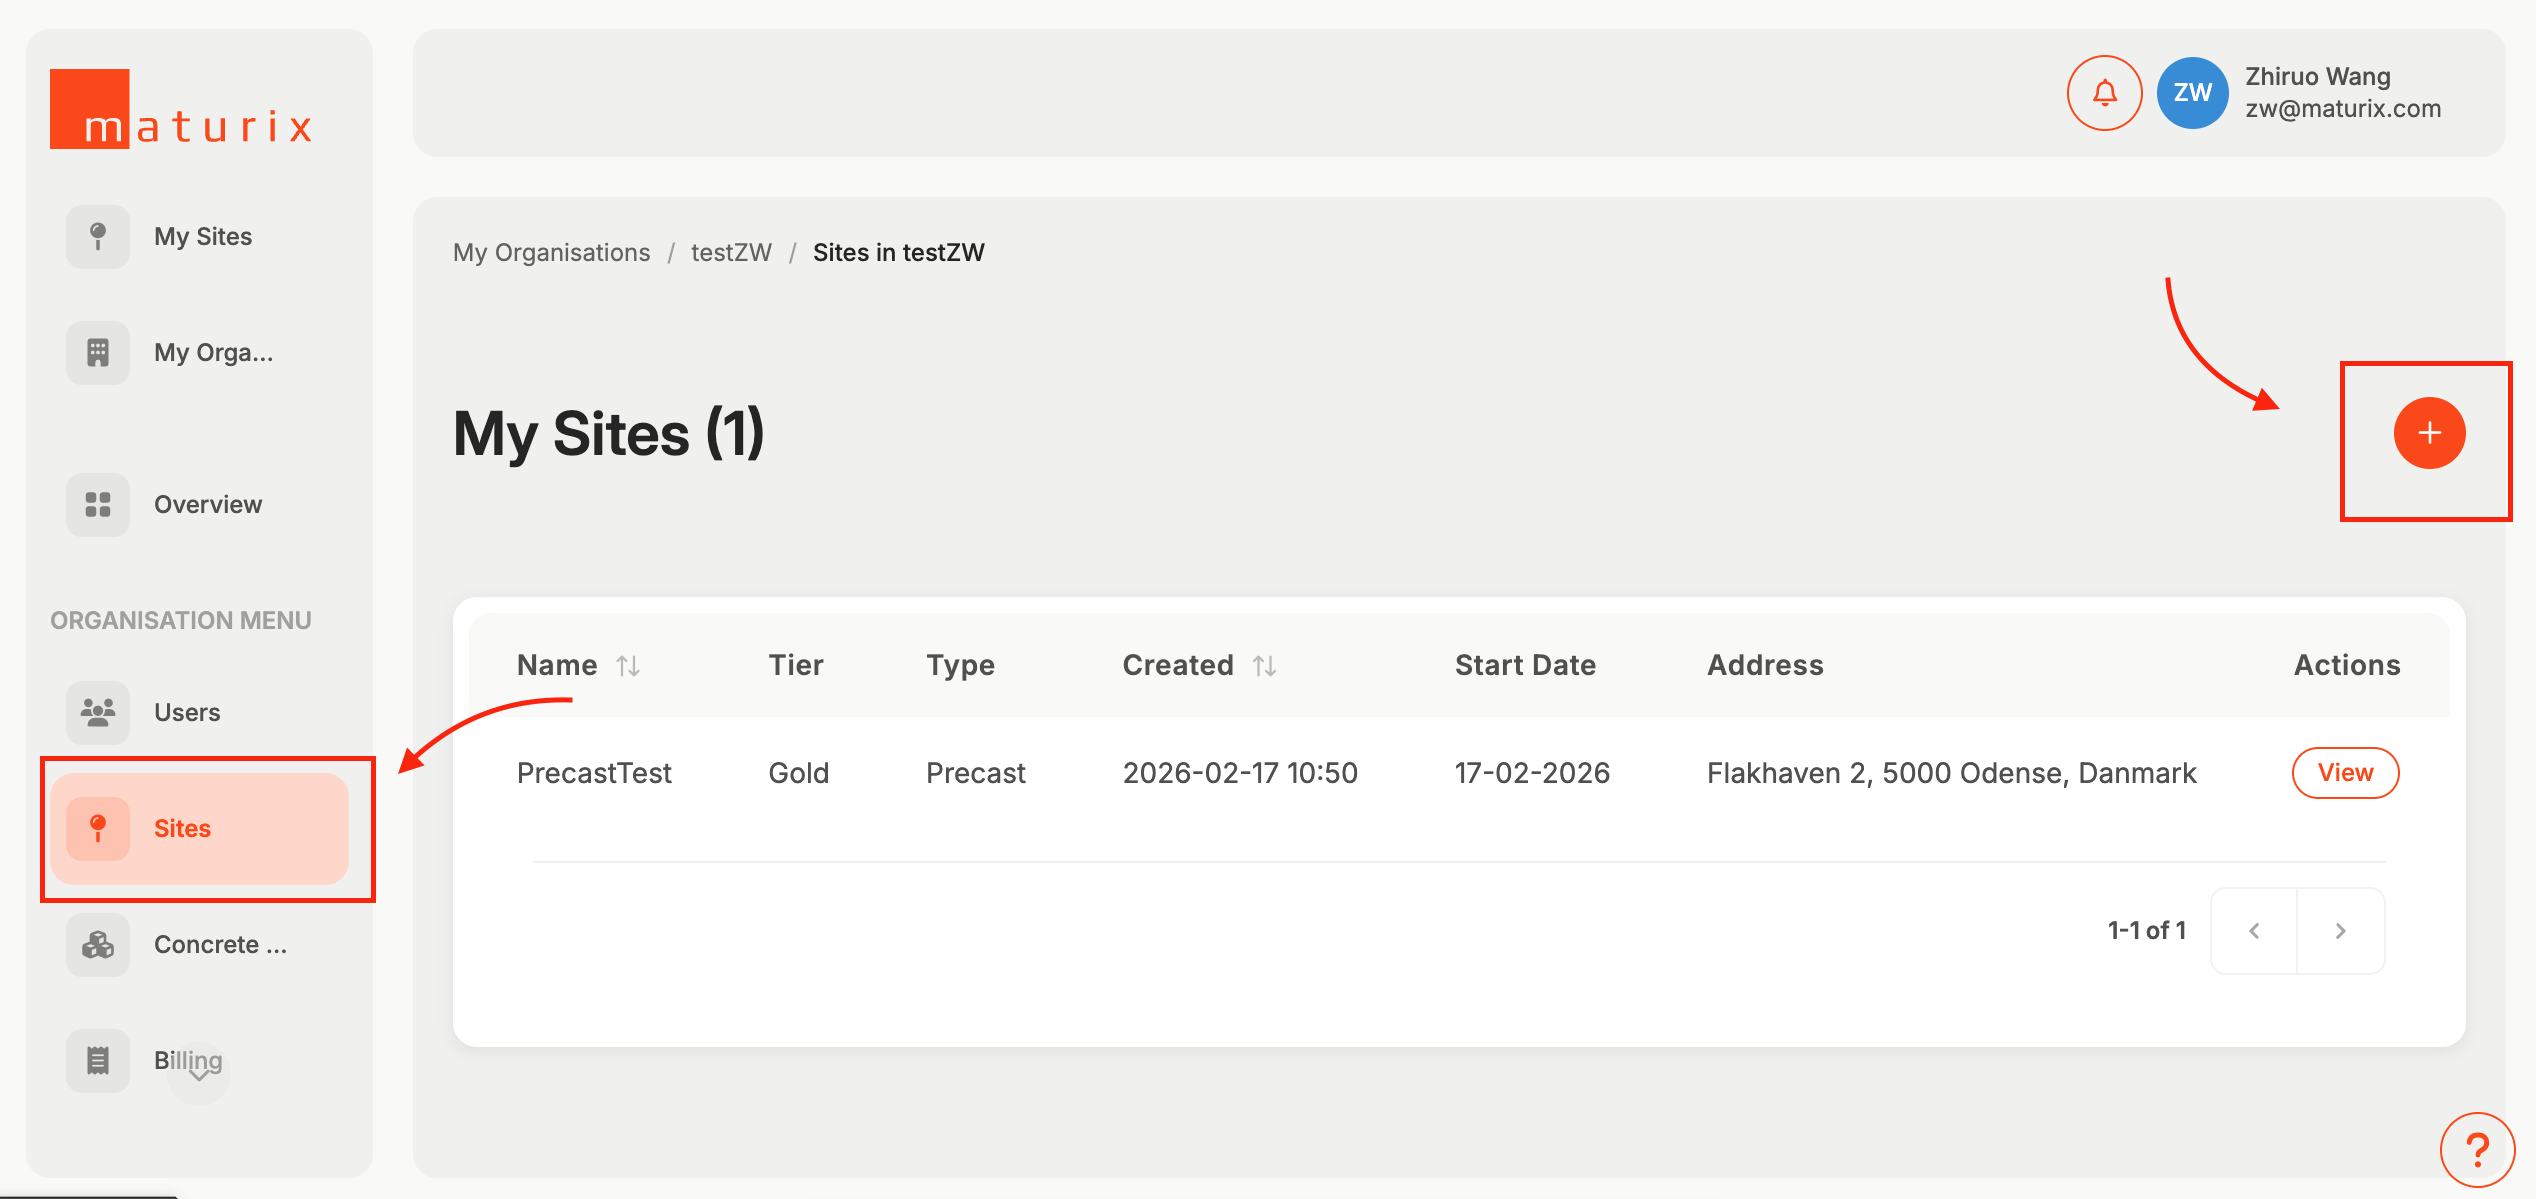
Step 1: Go to your current organisation, and go to 'Sites'. Then click on the '+' on the top right.
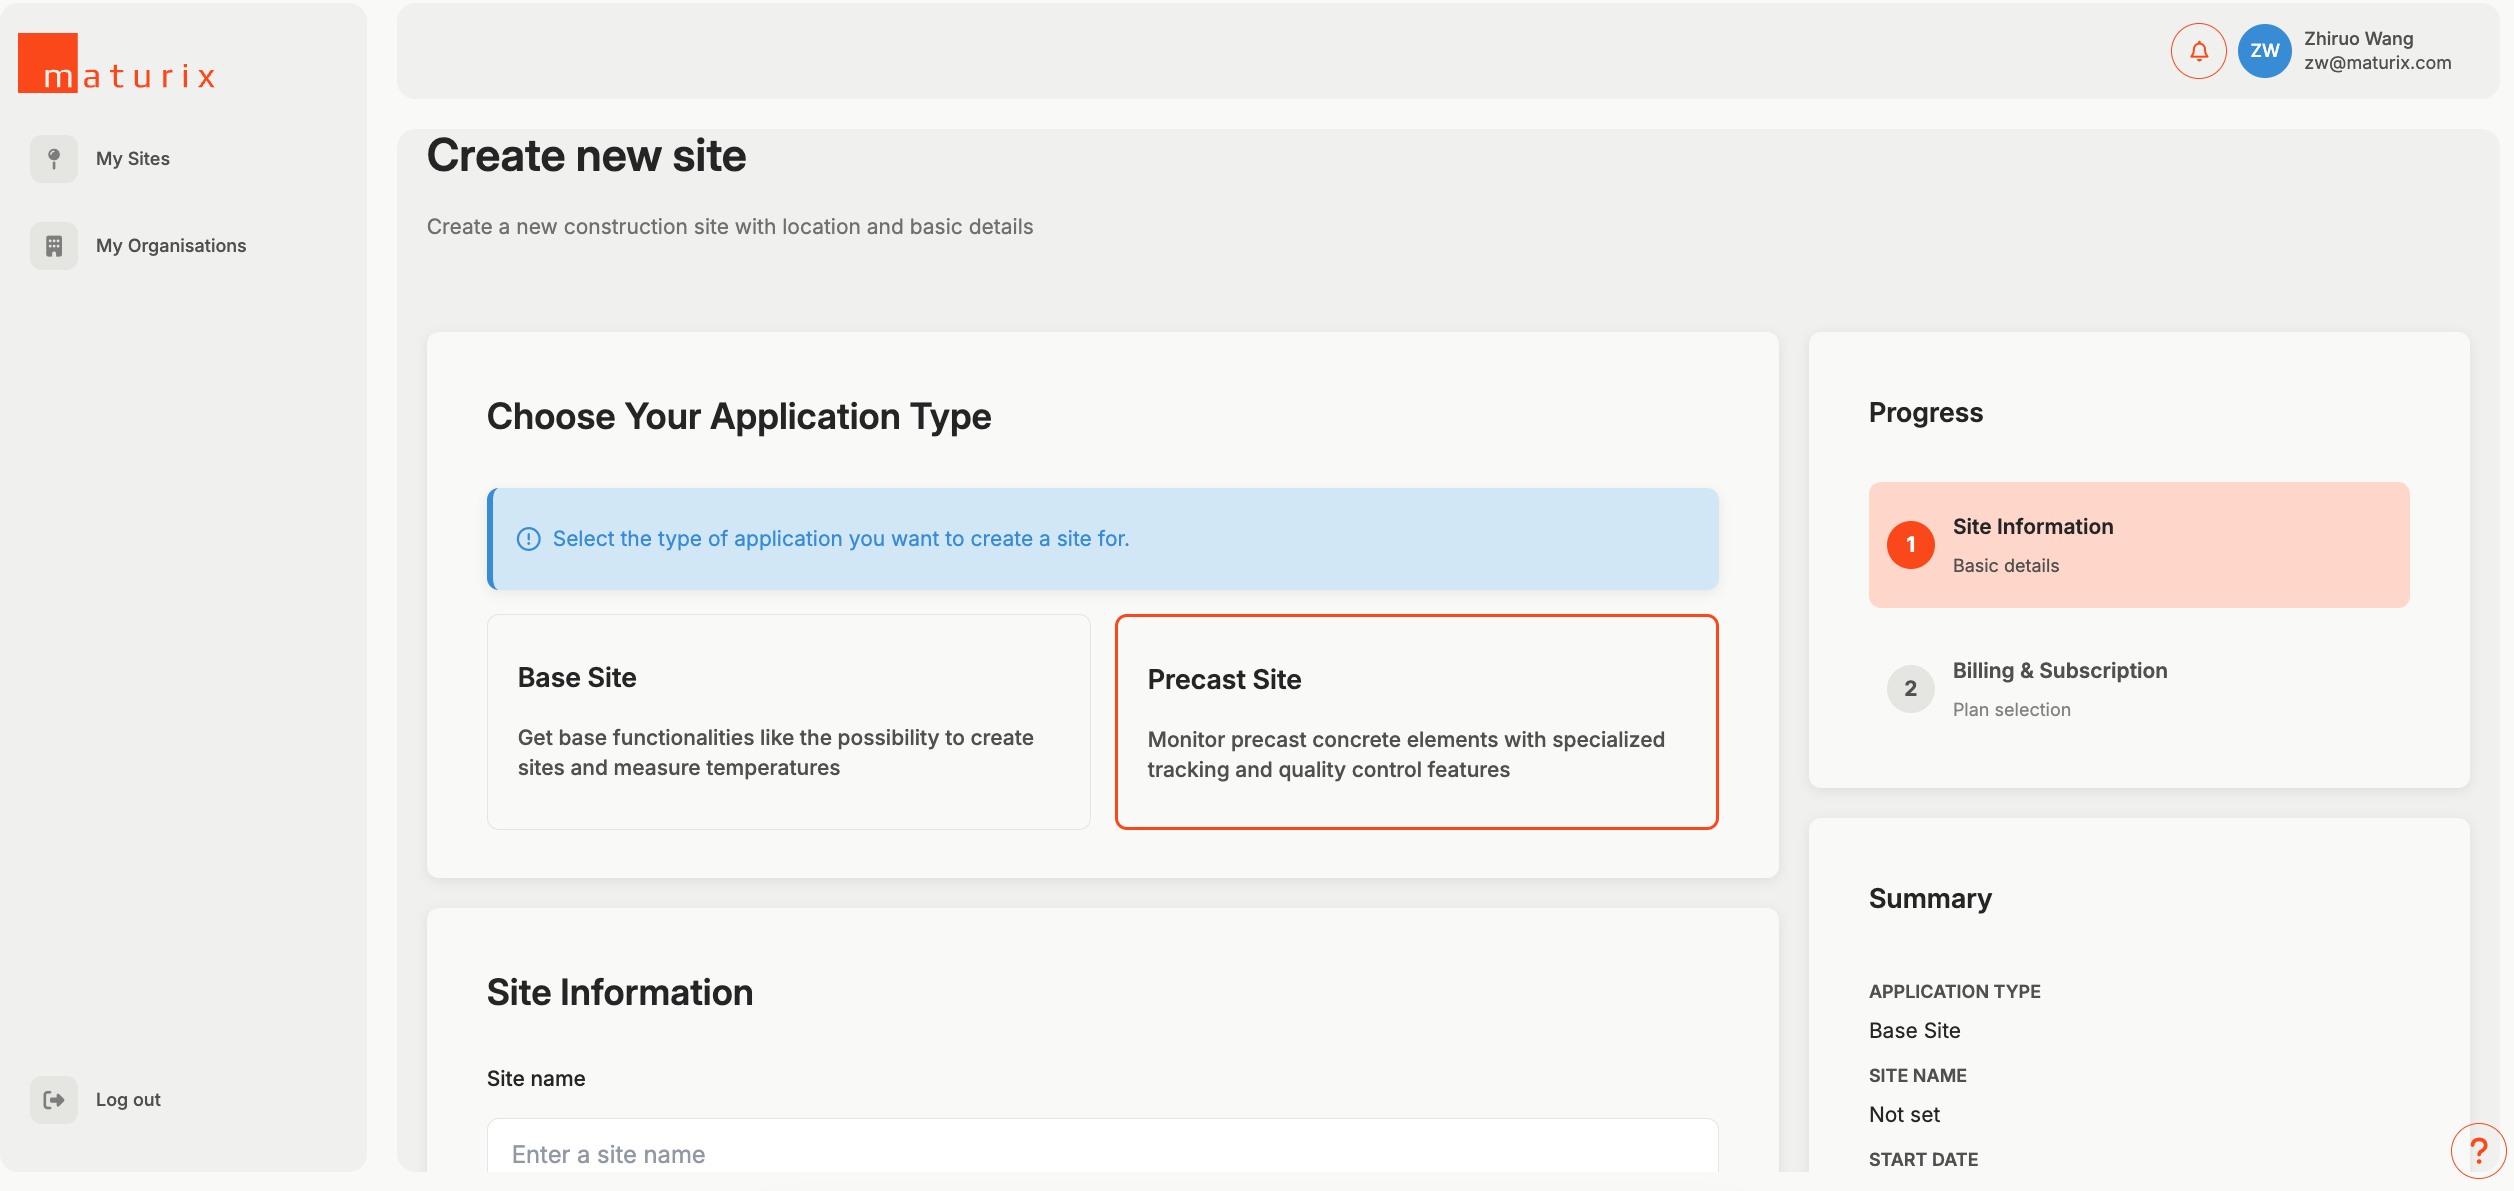
Step 2: Fill out the form. Give the site a name, pick a start date, put in the location.

Step 3: Input billing information. Choose the billing plan that suits you the most. If you have more than 20 devices, please write to us for a custom price.
Awesome! Now we are ready to redeem the devices you have purchased!
Redeem devices
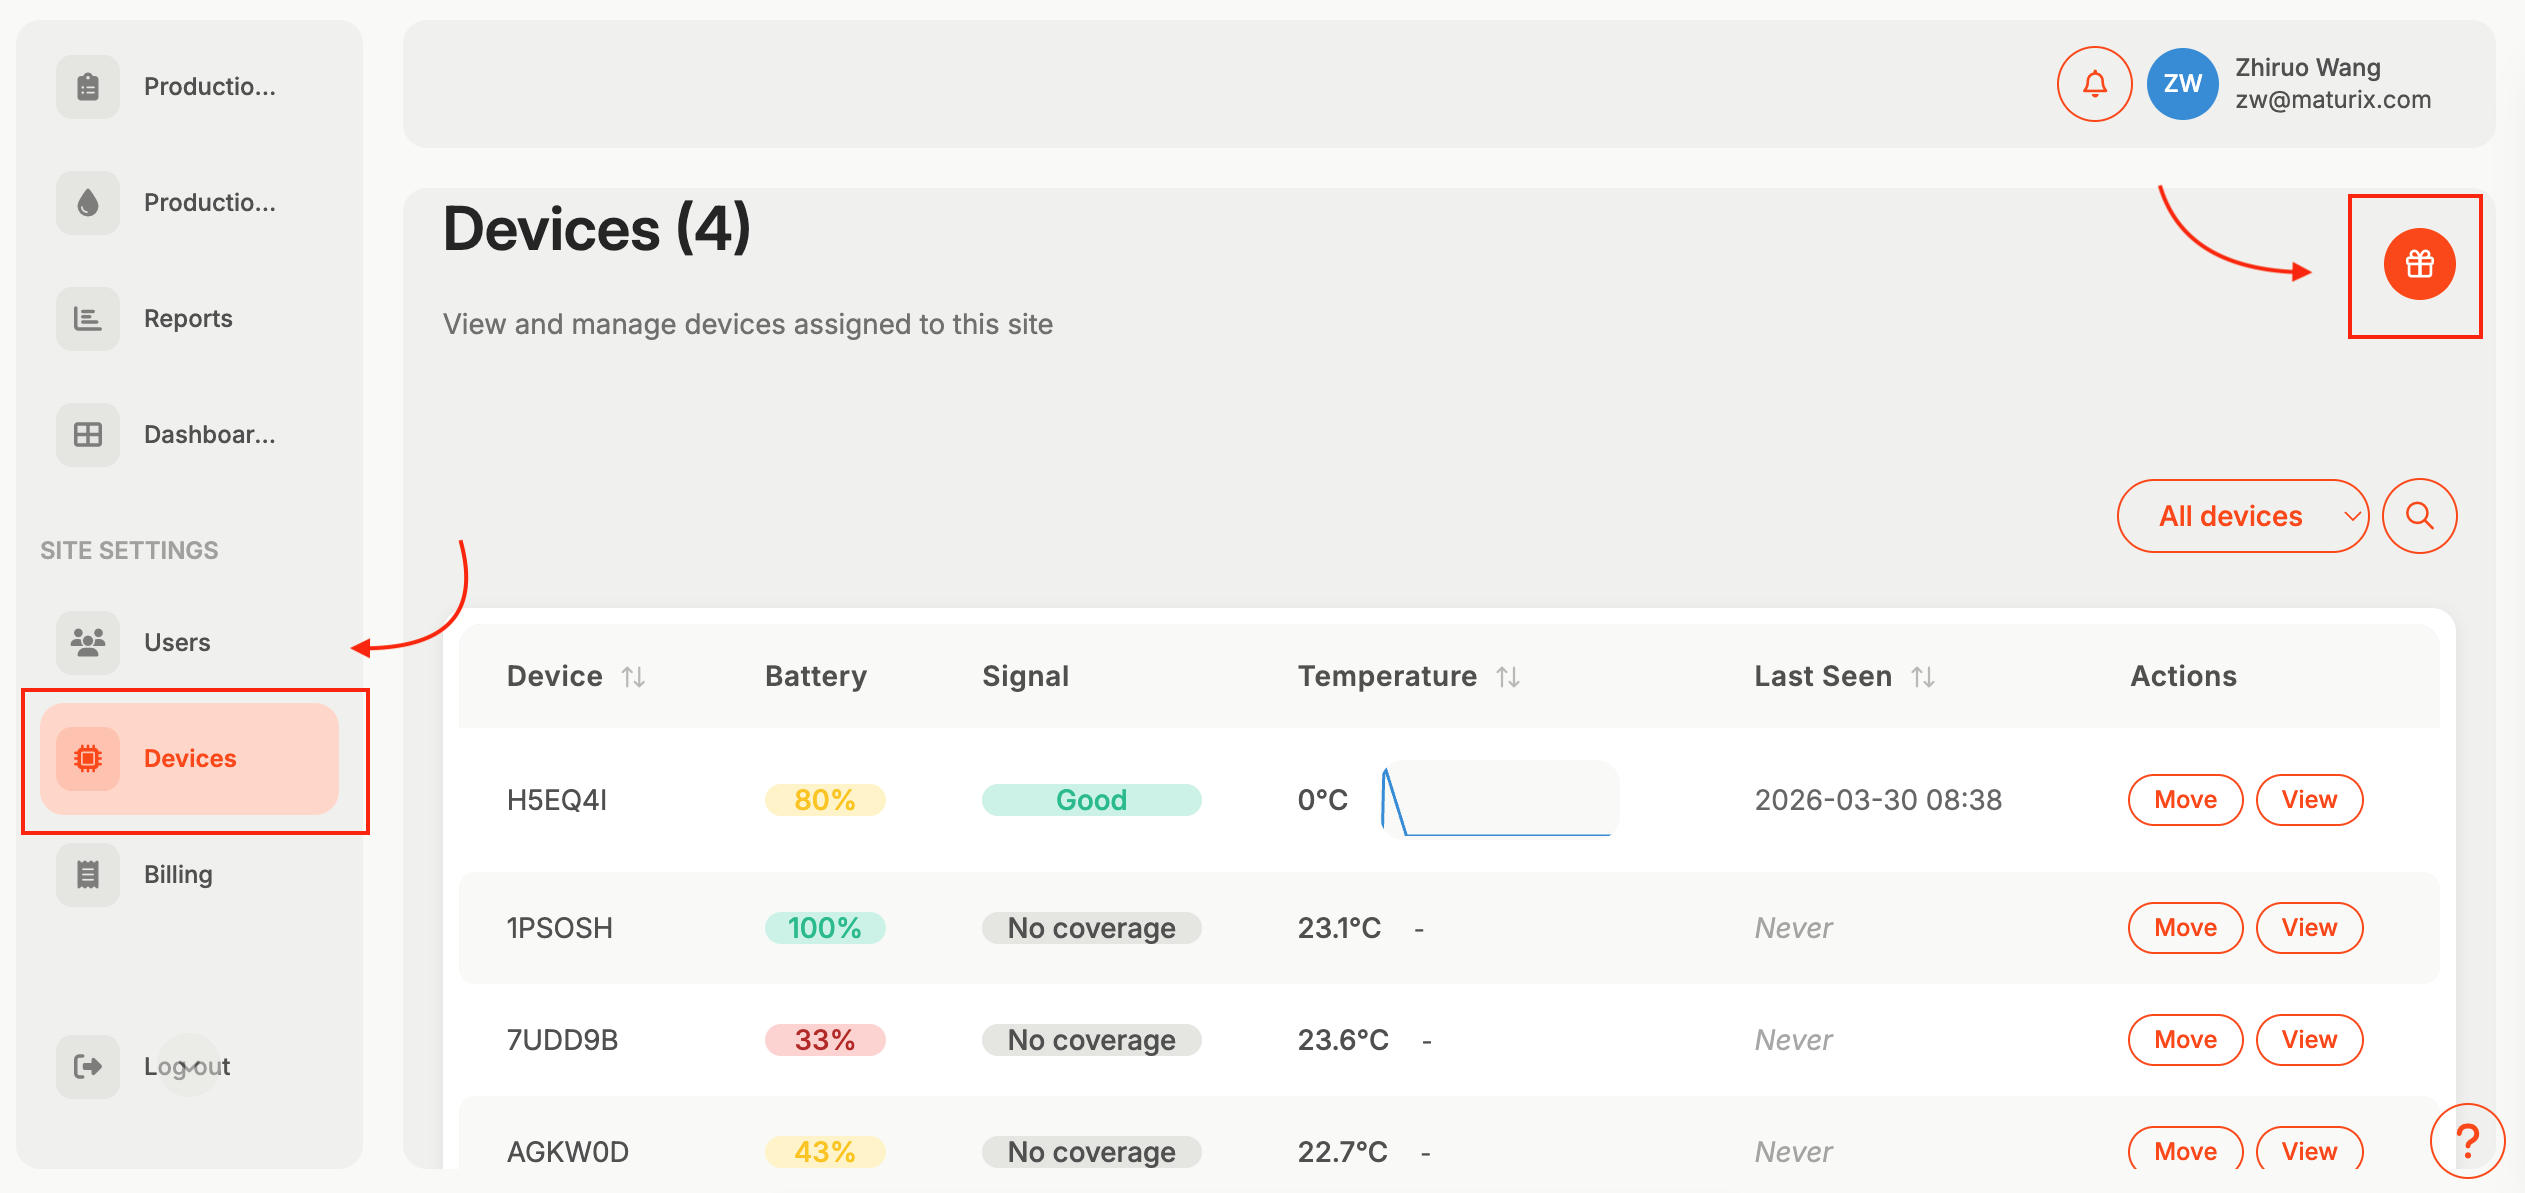
Step 1: Go to 'Devices', click on the gift icon in the top right corner
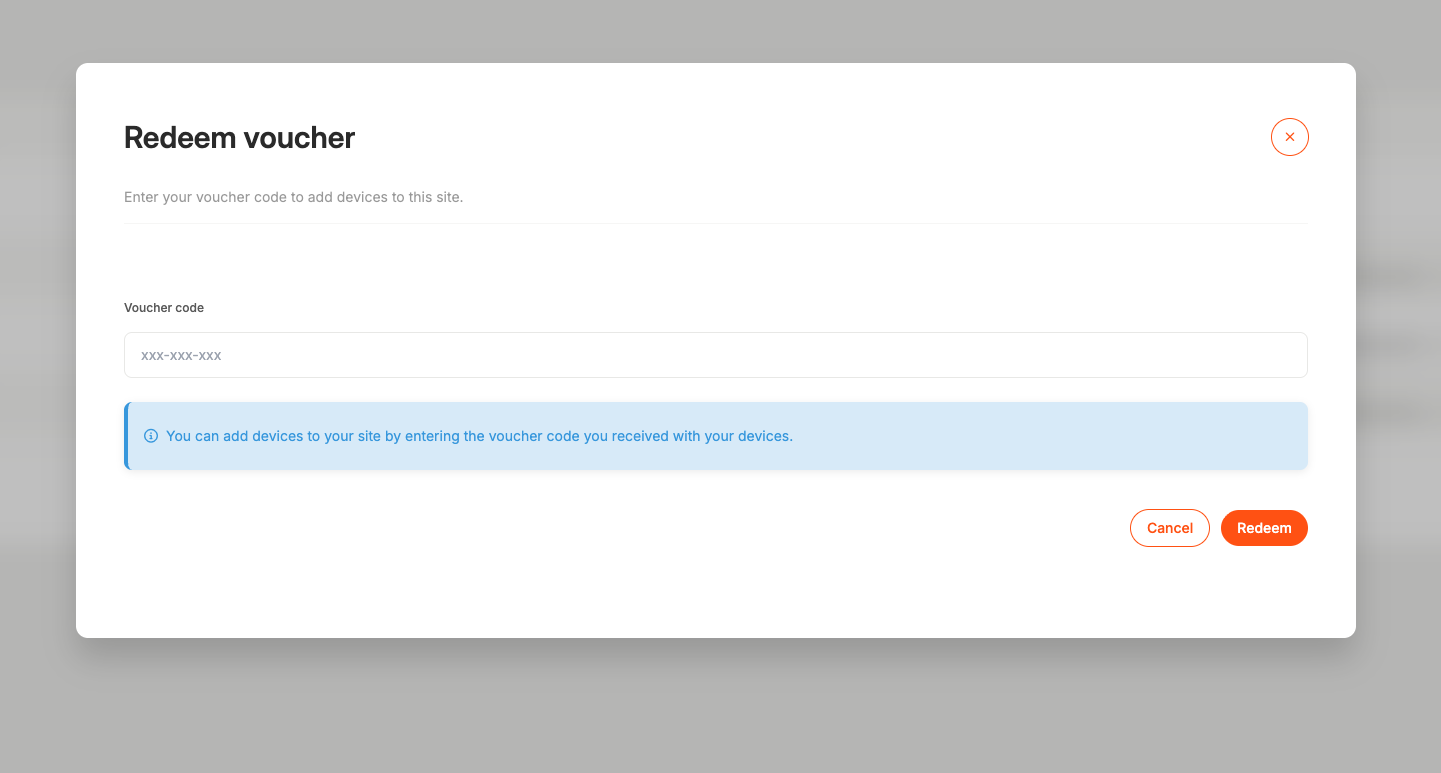
Step 2: Put in the redeem code
You will get the redeem code from us when you first purchased the devices
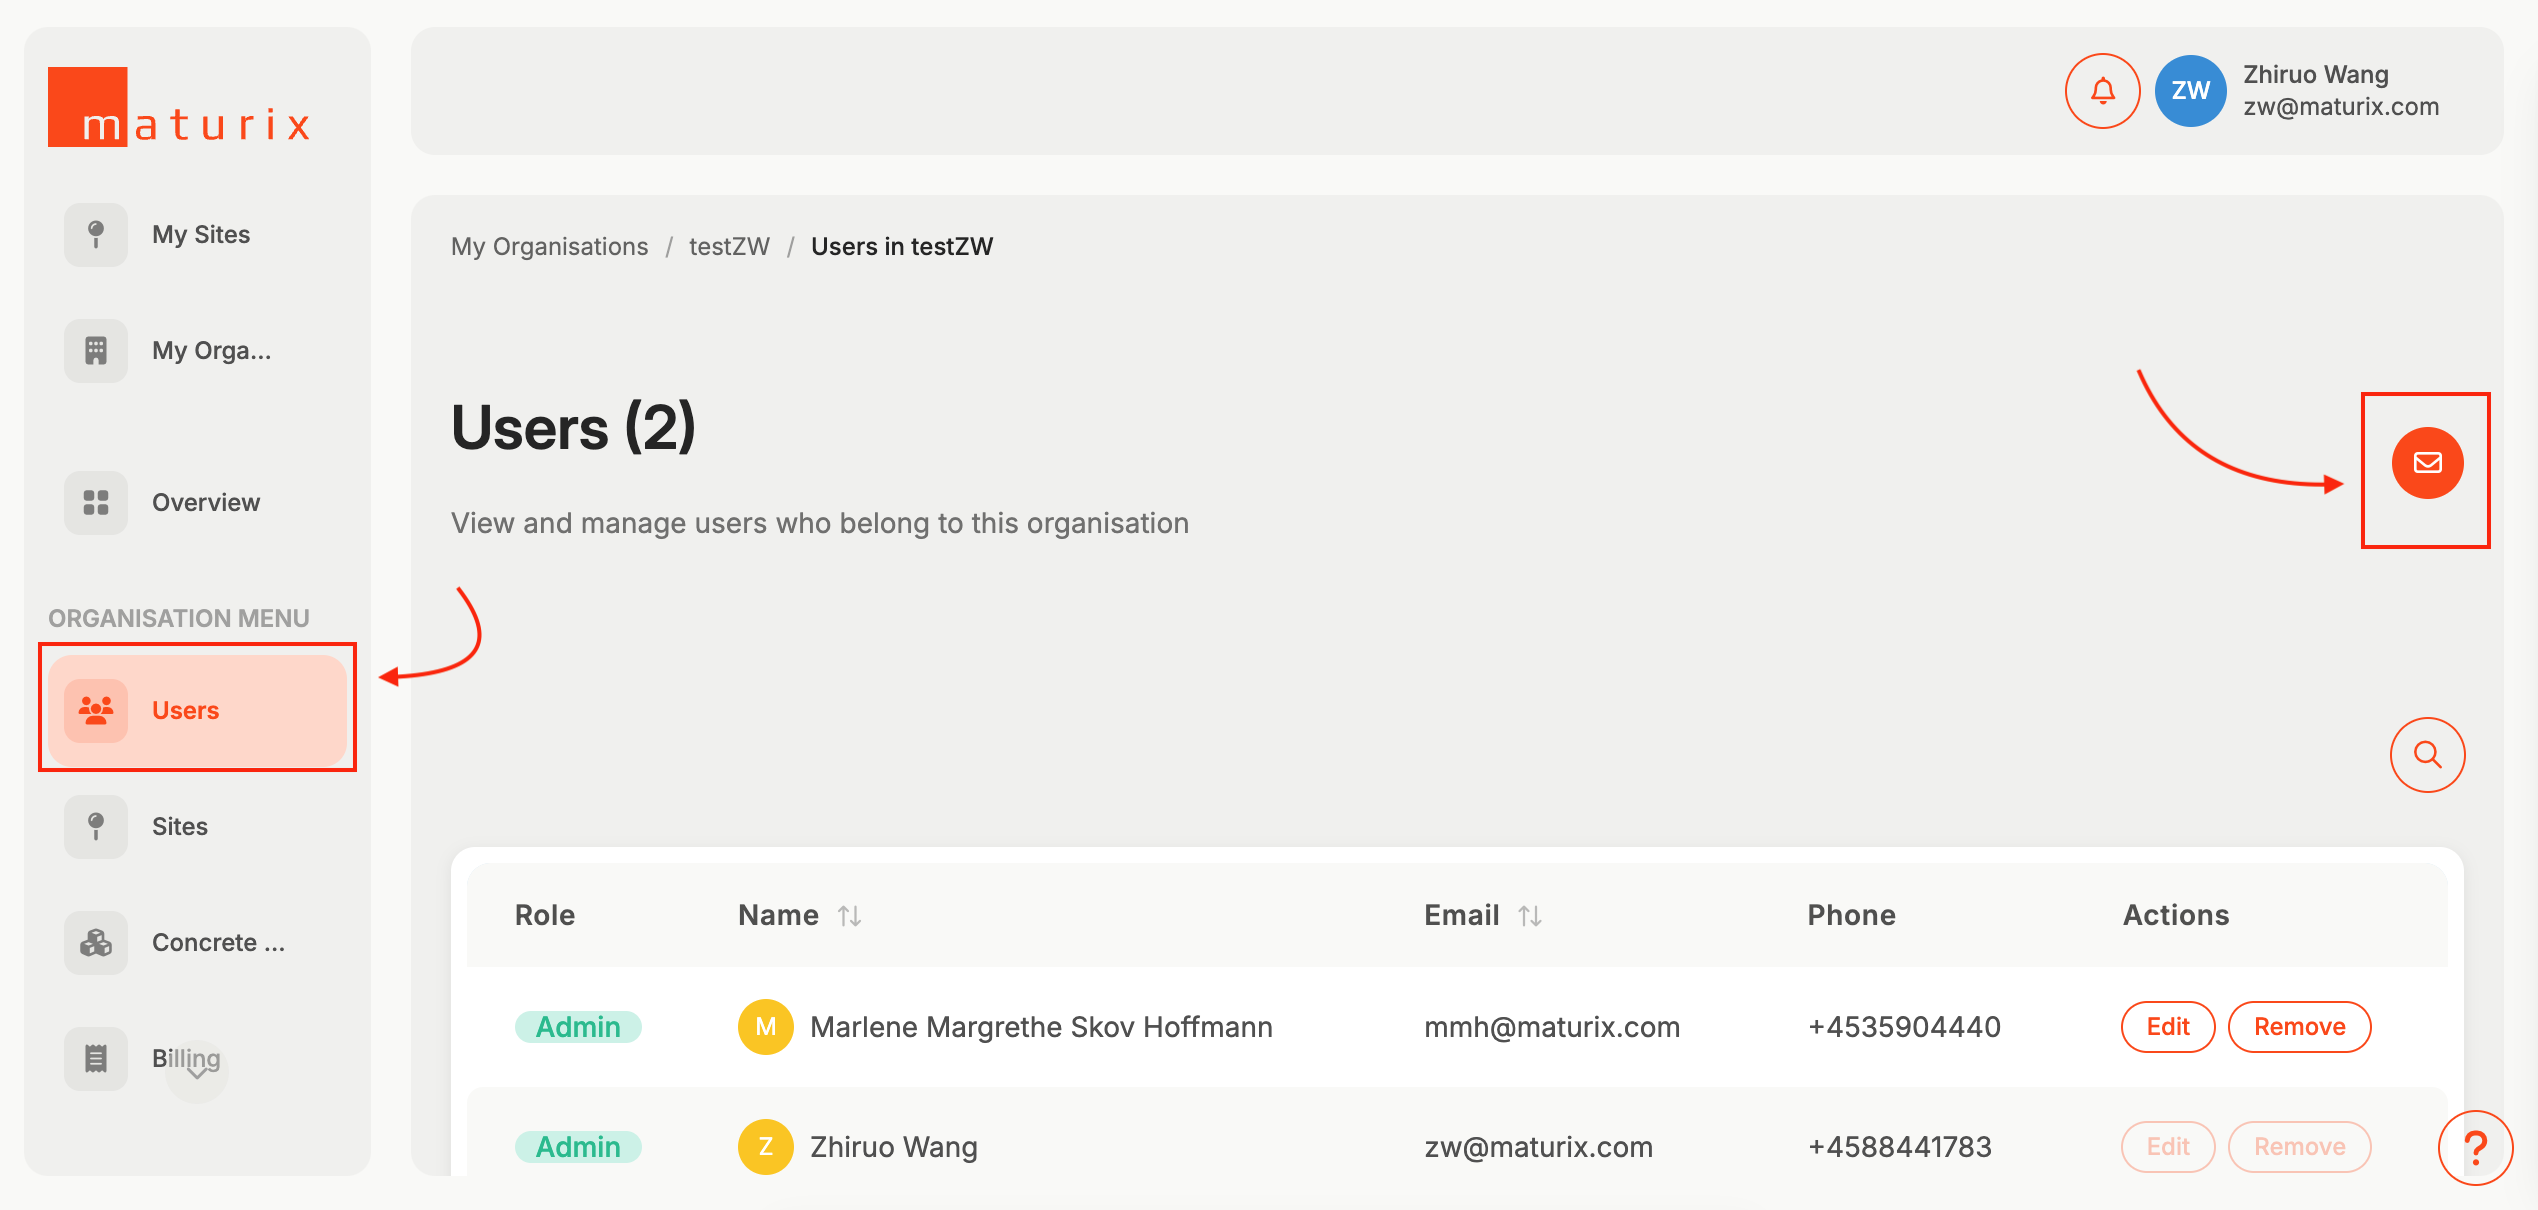
Let's add users for your site!
This is where you can give access to your colleagues!
- Go into the site you just created.
- Go to Users, and click on the mail icon on the top right corner. Simply put in the emails address and which roles you want to assign them to
Let's set up site management!
Site Management

Here you can follow the in-platform onboarding flow to manage your first site, we will also go through each step here
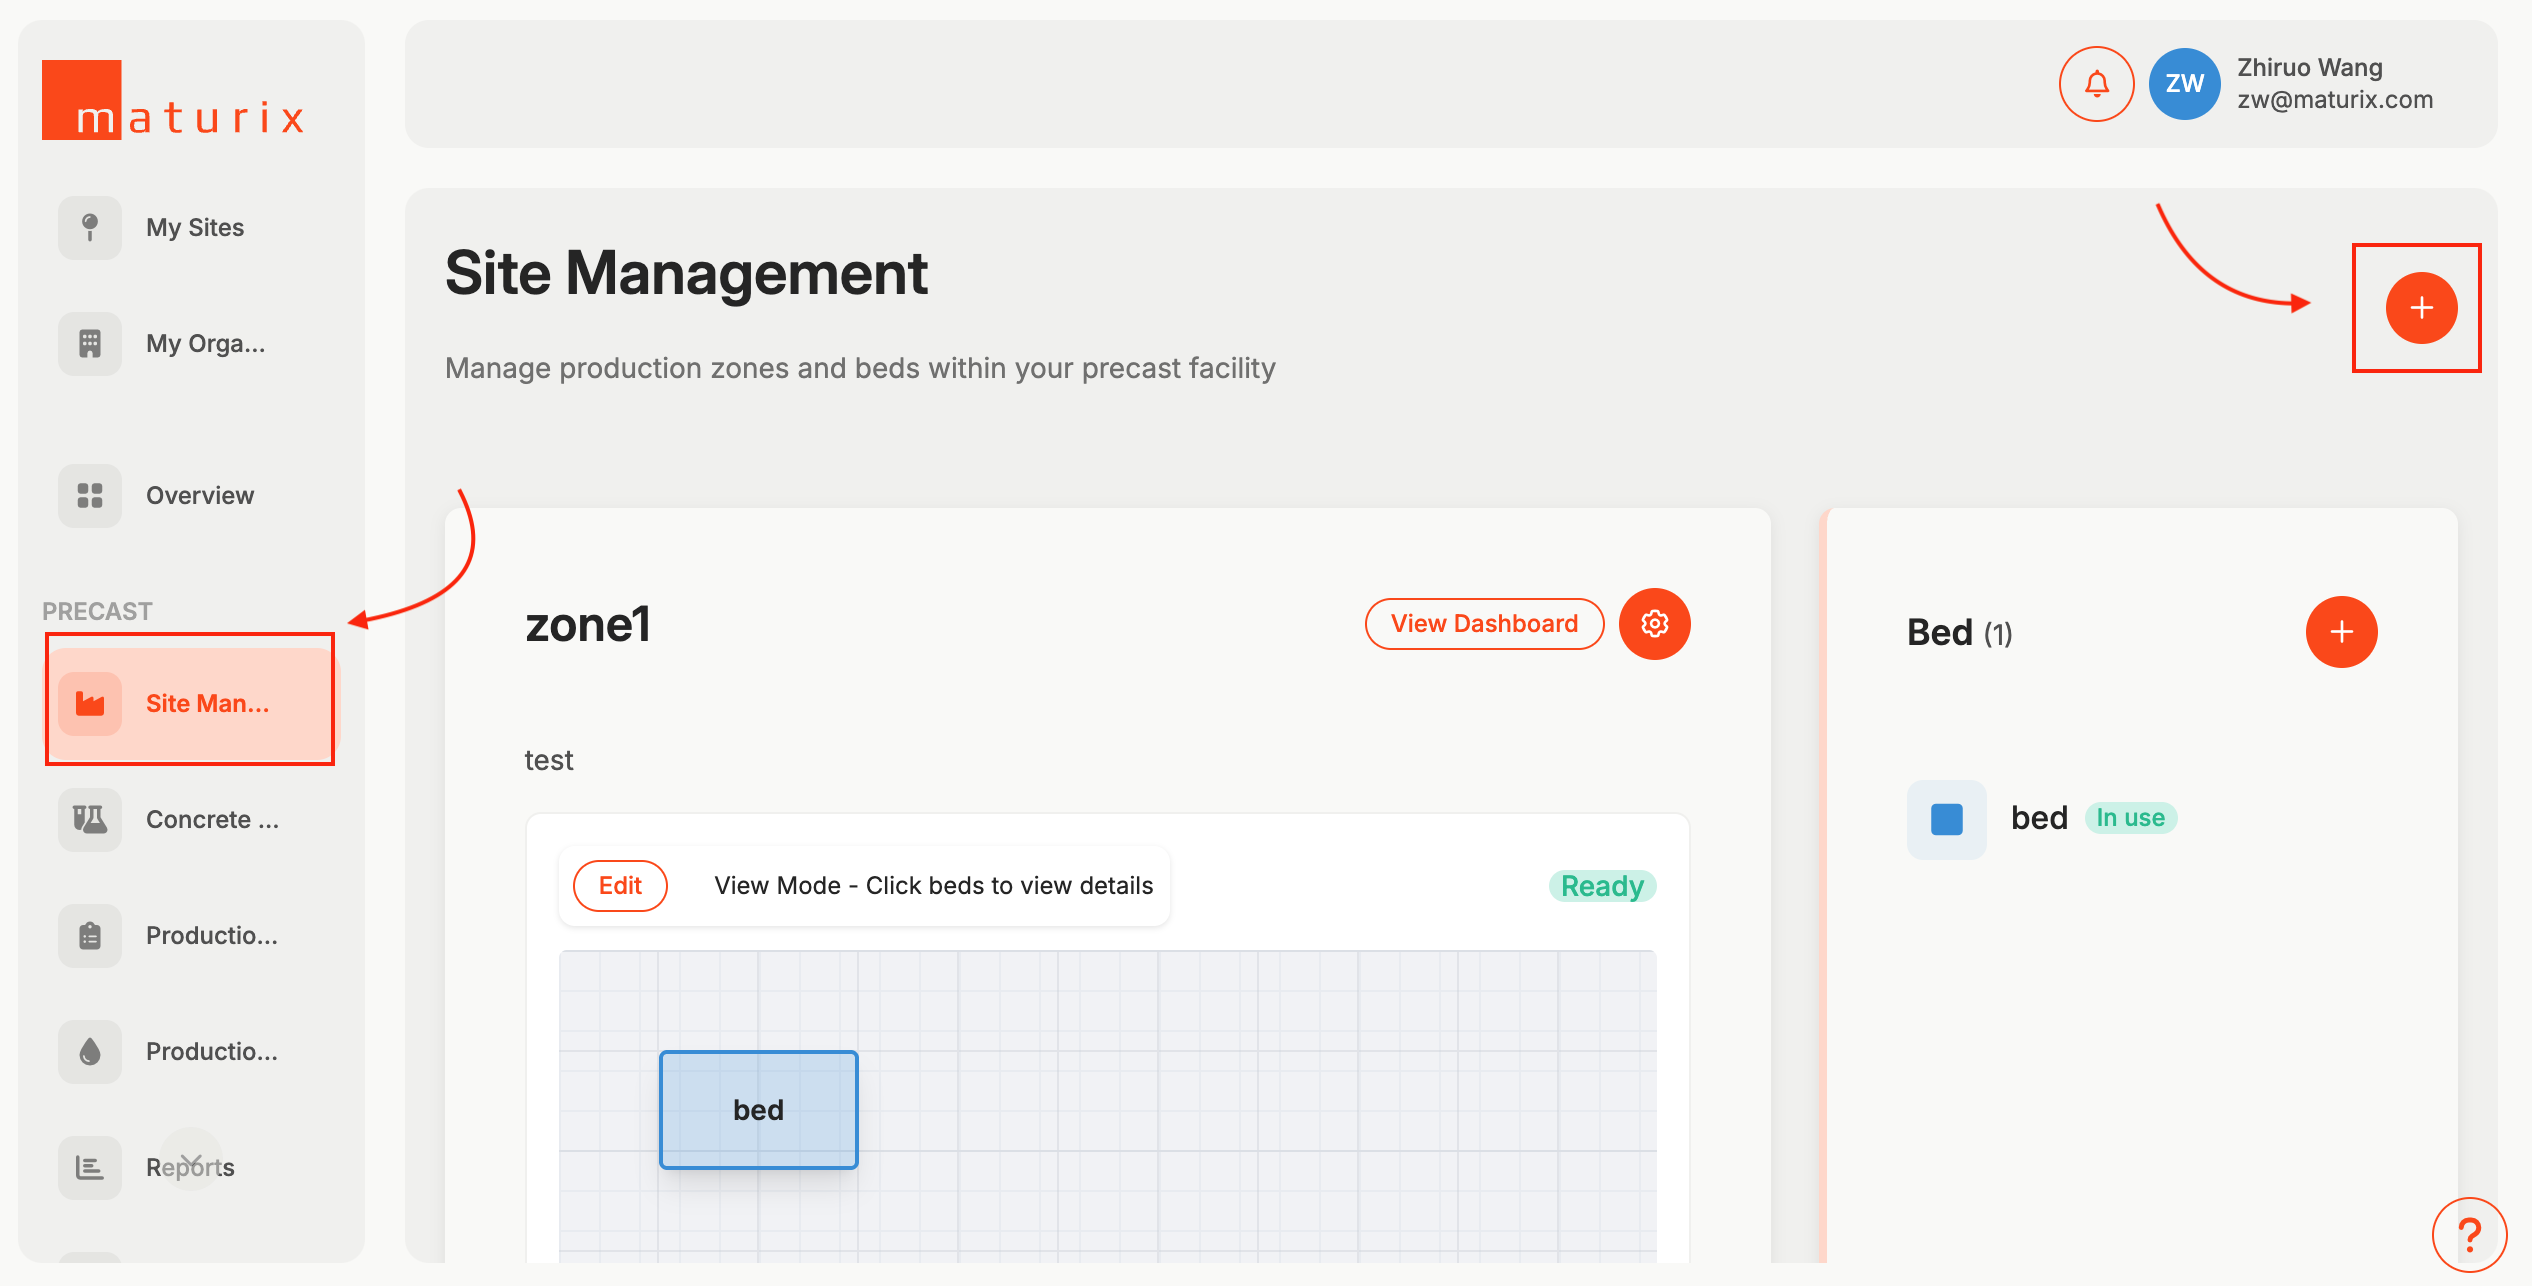
Step 1: Create zones and beds by clicking the '+'
This is where you can create different zones and customize the beds
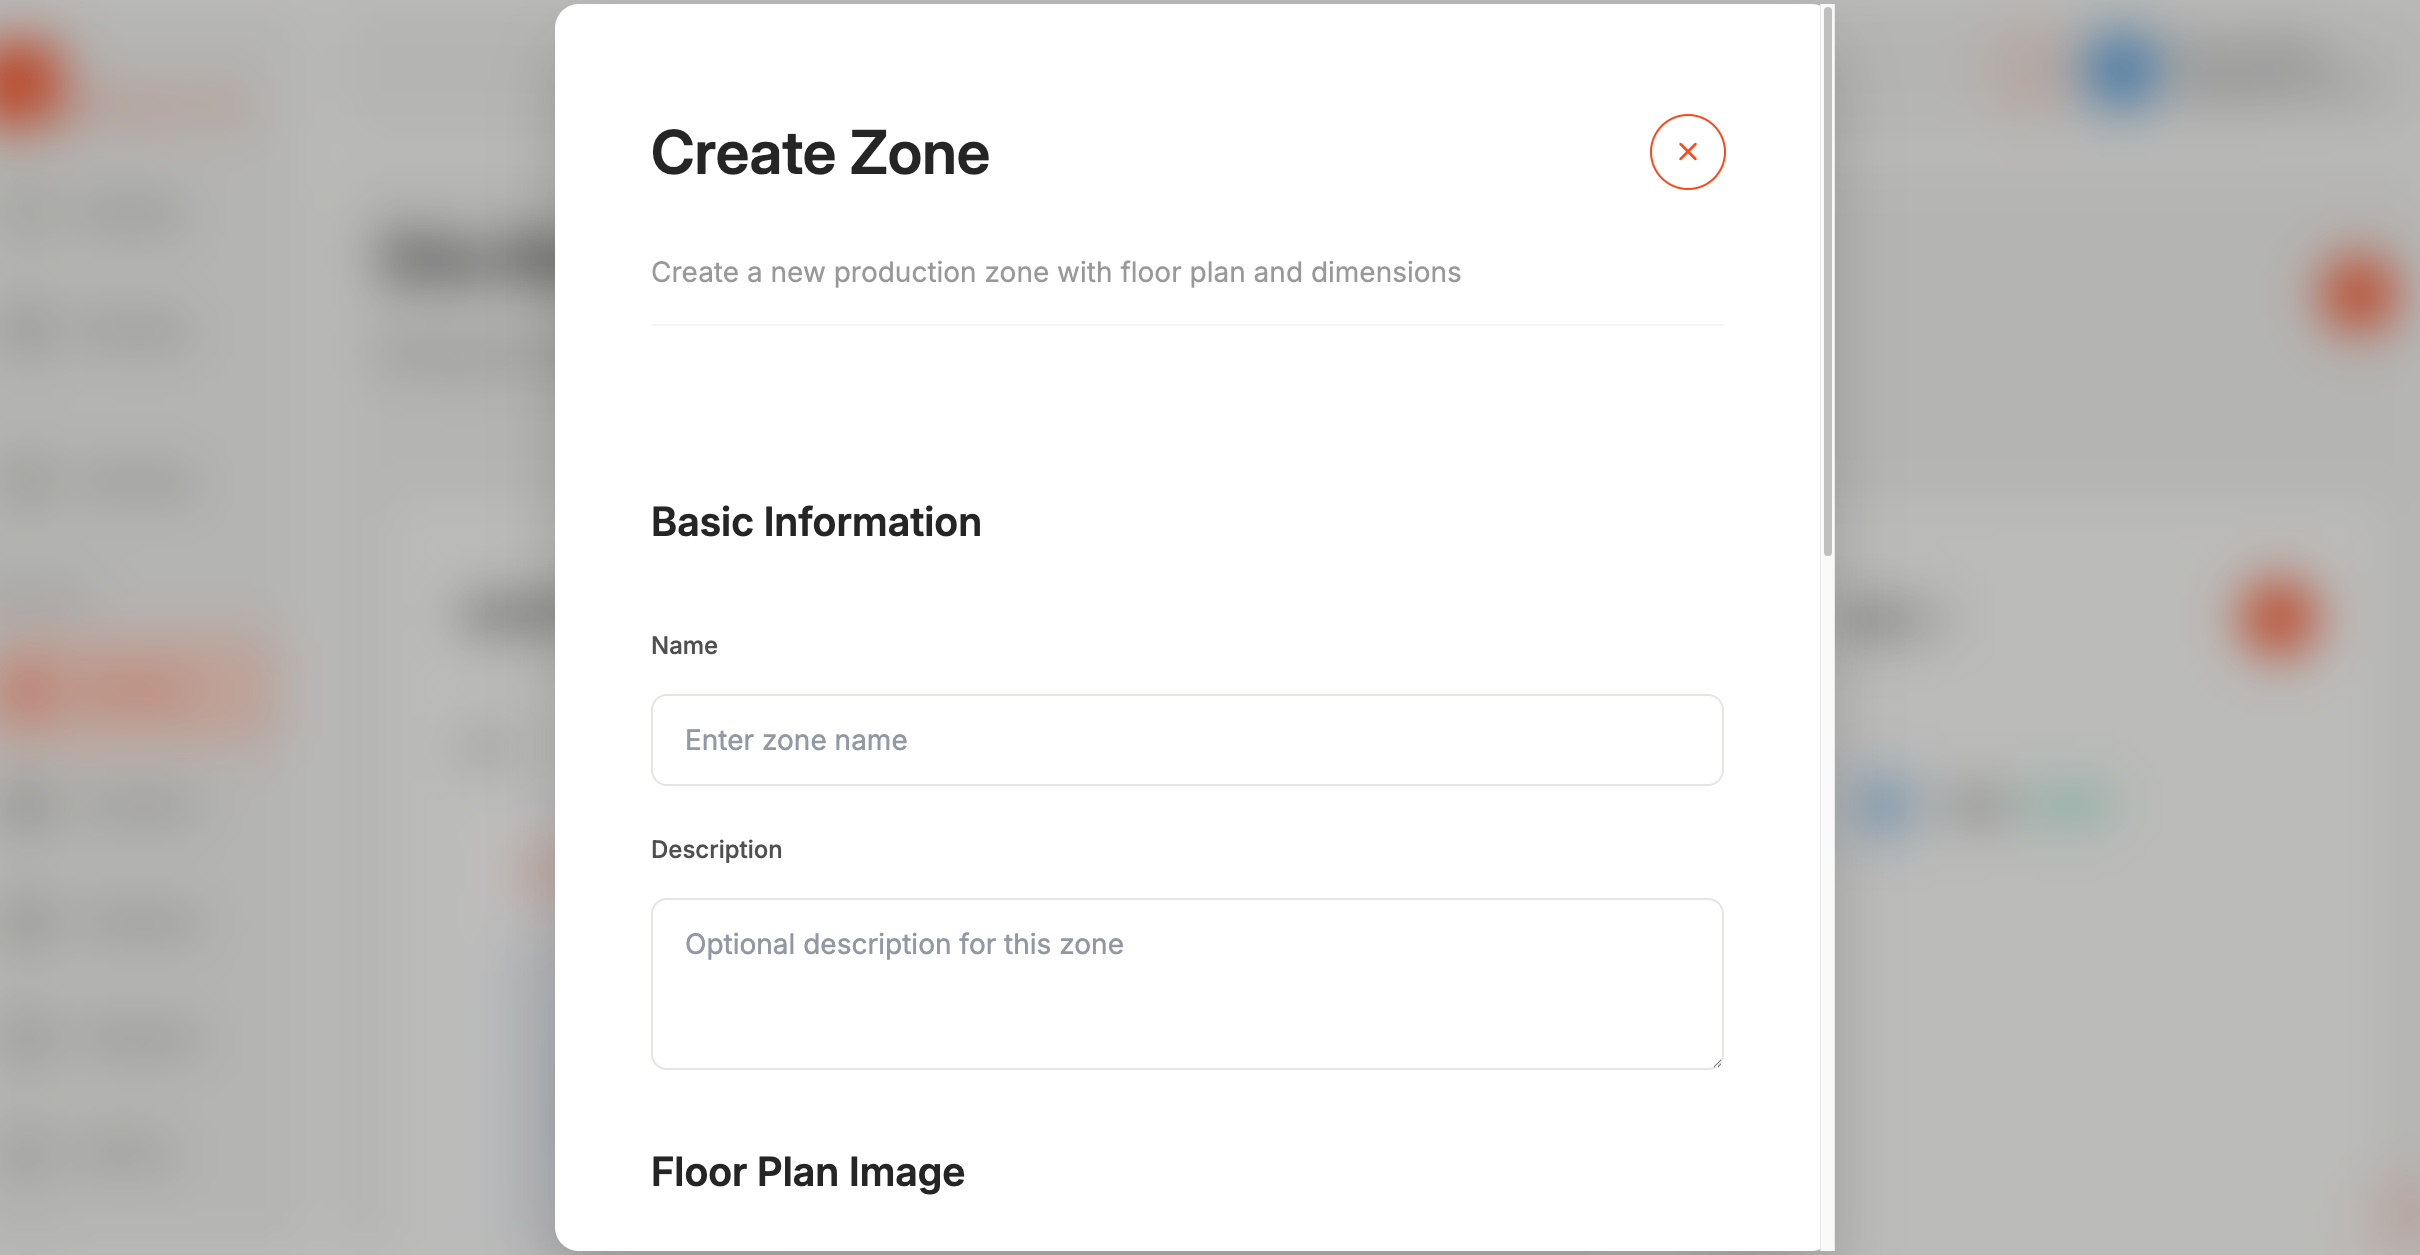
Step 2: Create your first zone by filling out the information and upload your floor plan
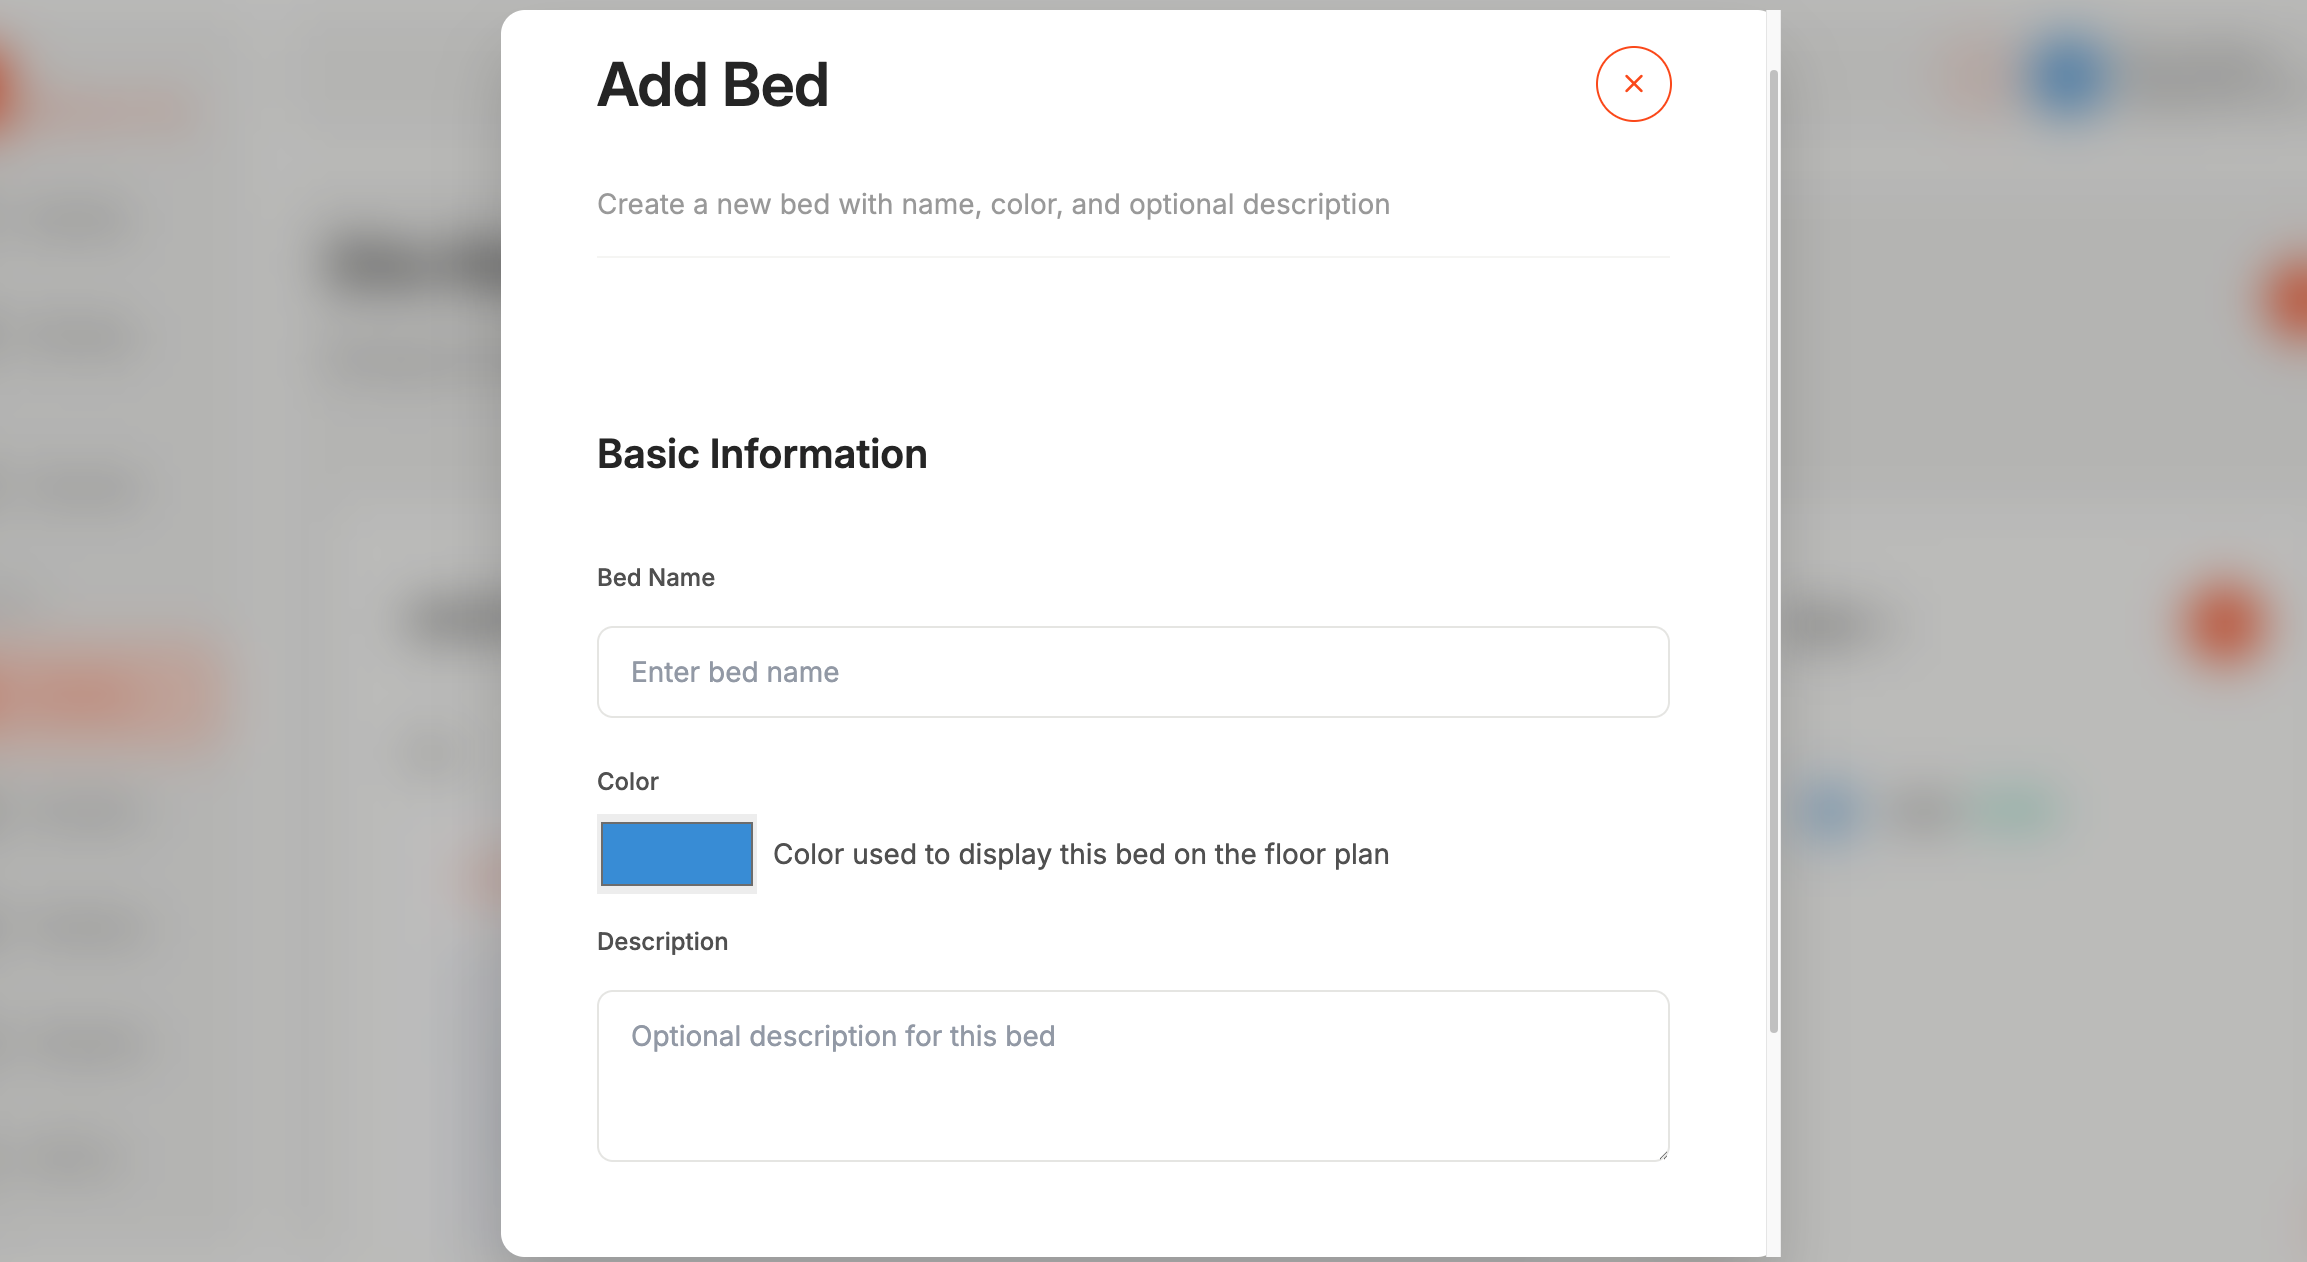
Step 3: Create beds, and you can easily adjust the shape and size freely to fit your floor plan
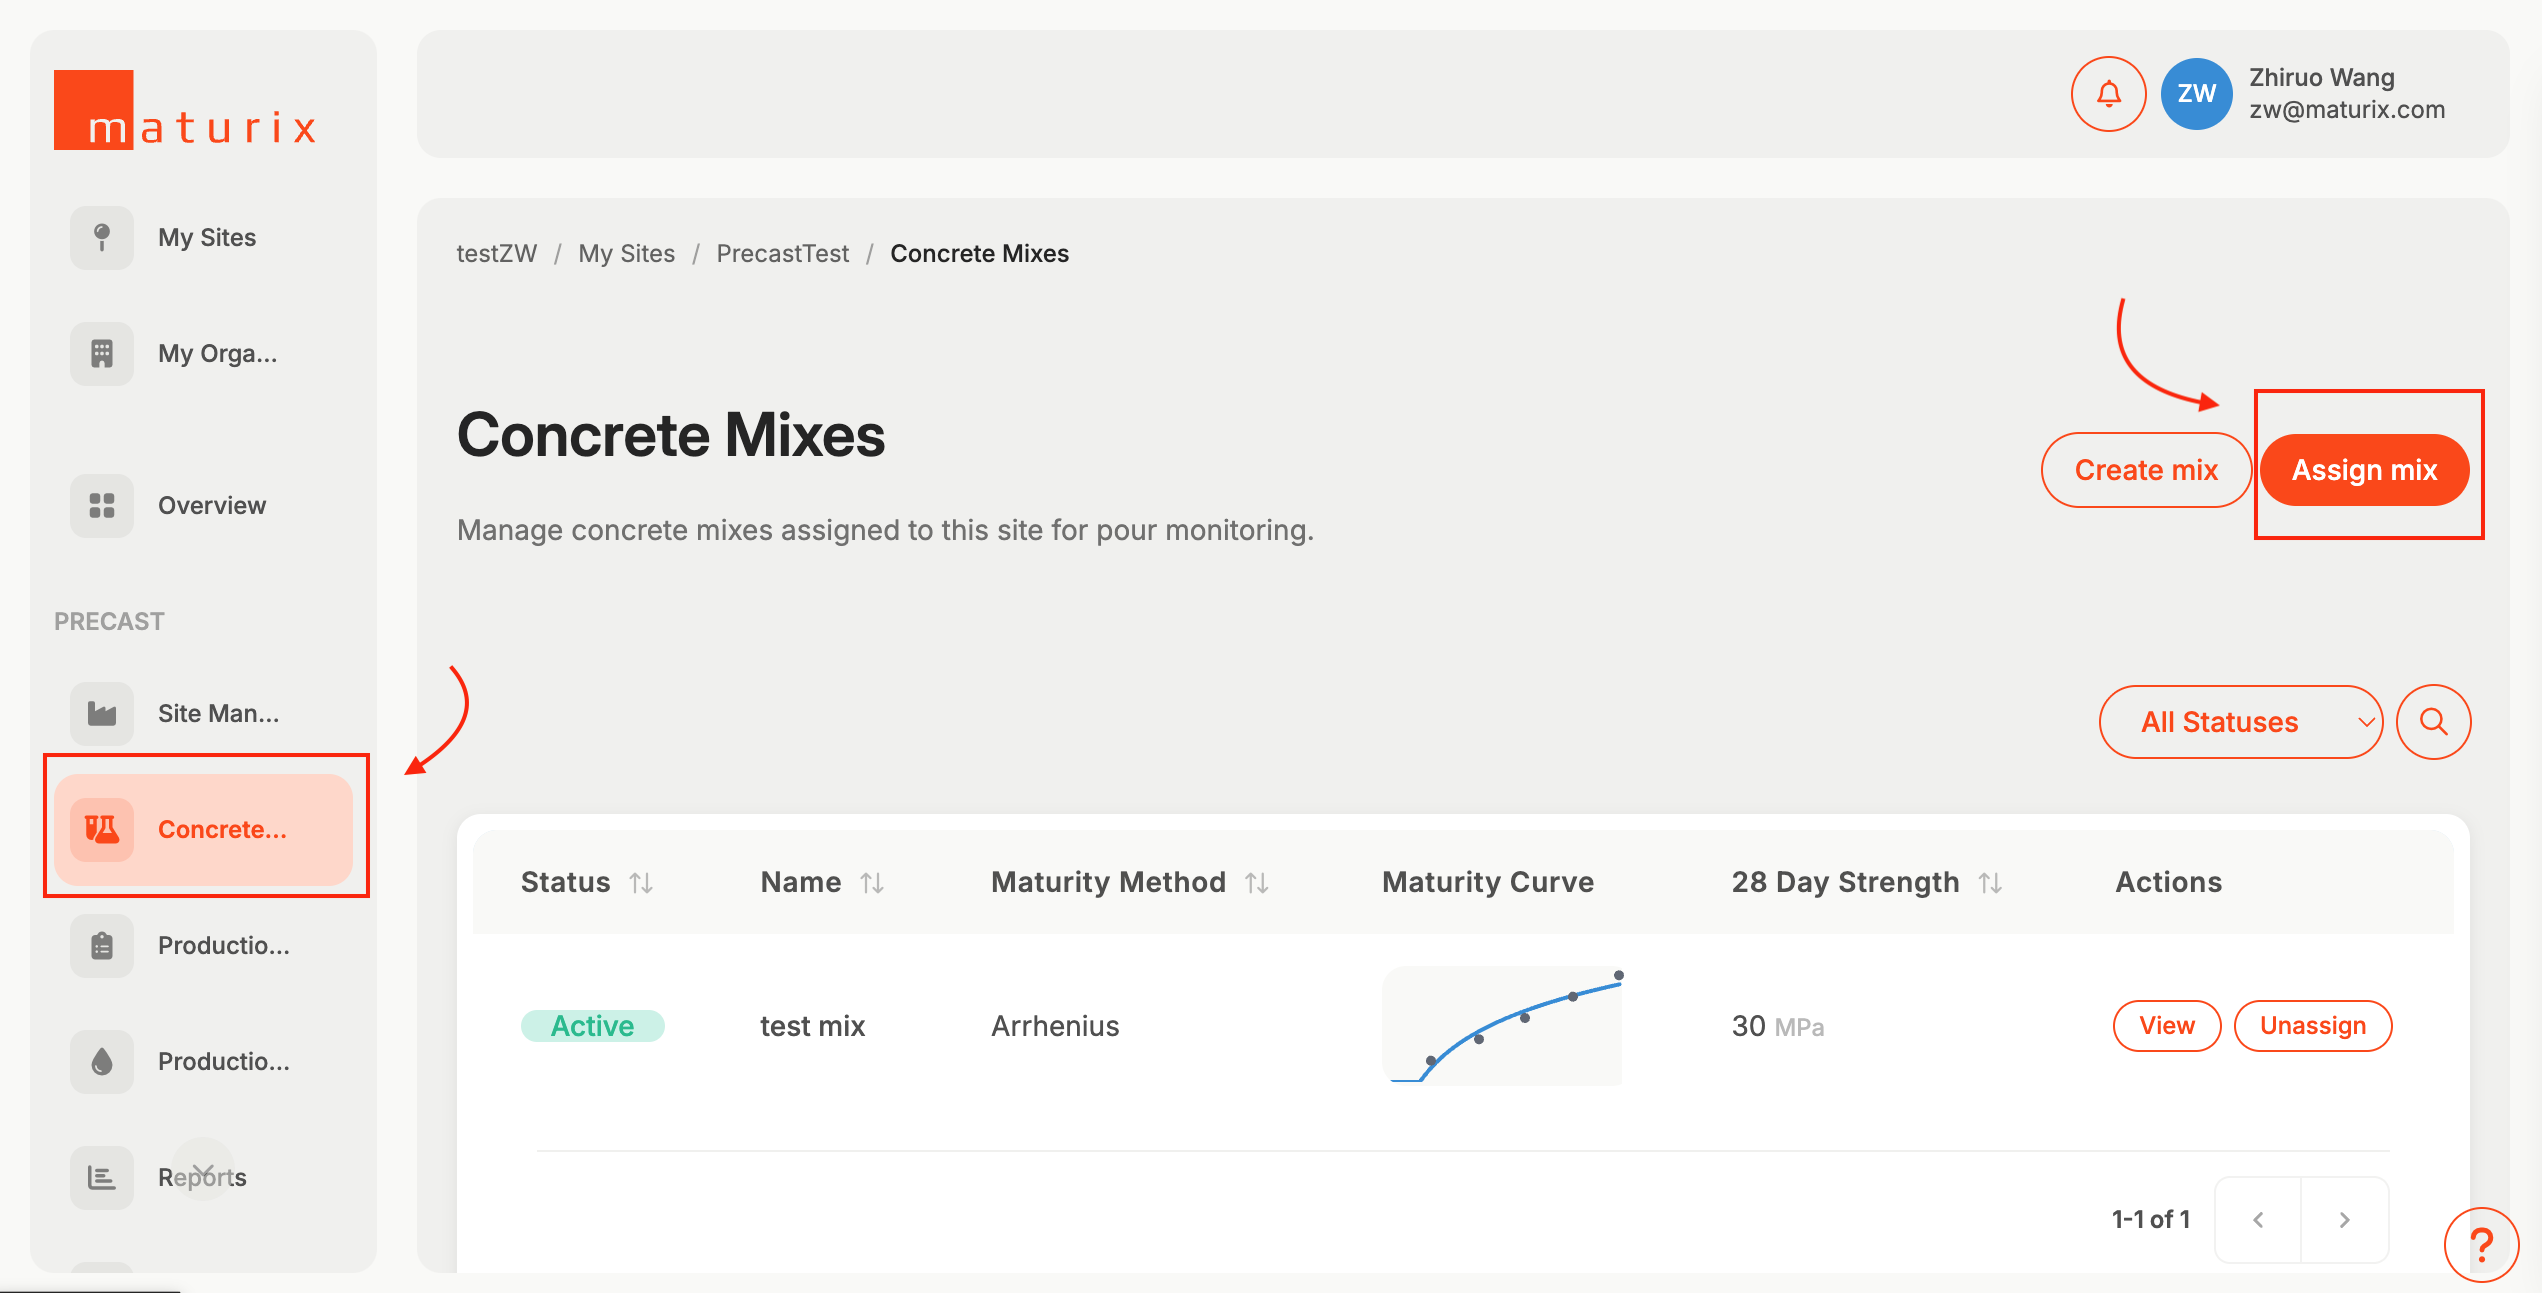
Step 4: Assign a concrete mix to this site. Go to 'Concrete Mix', then click on 'Assign mix'.
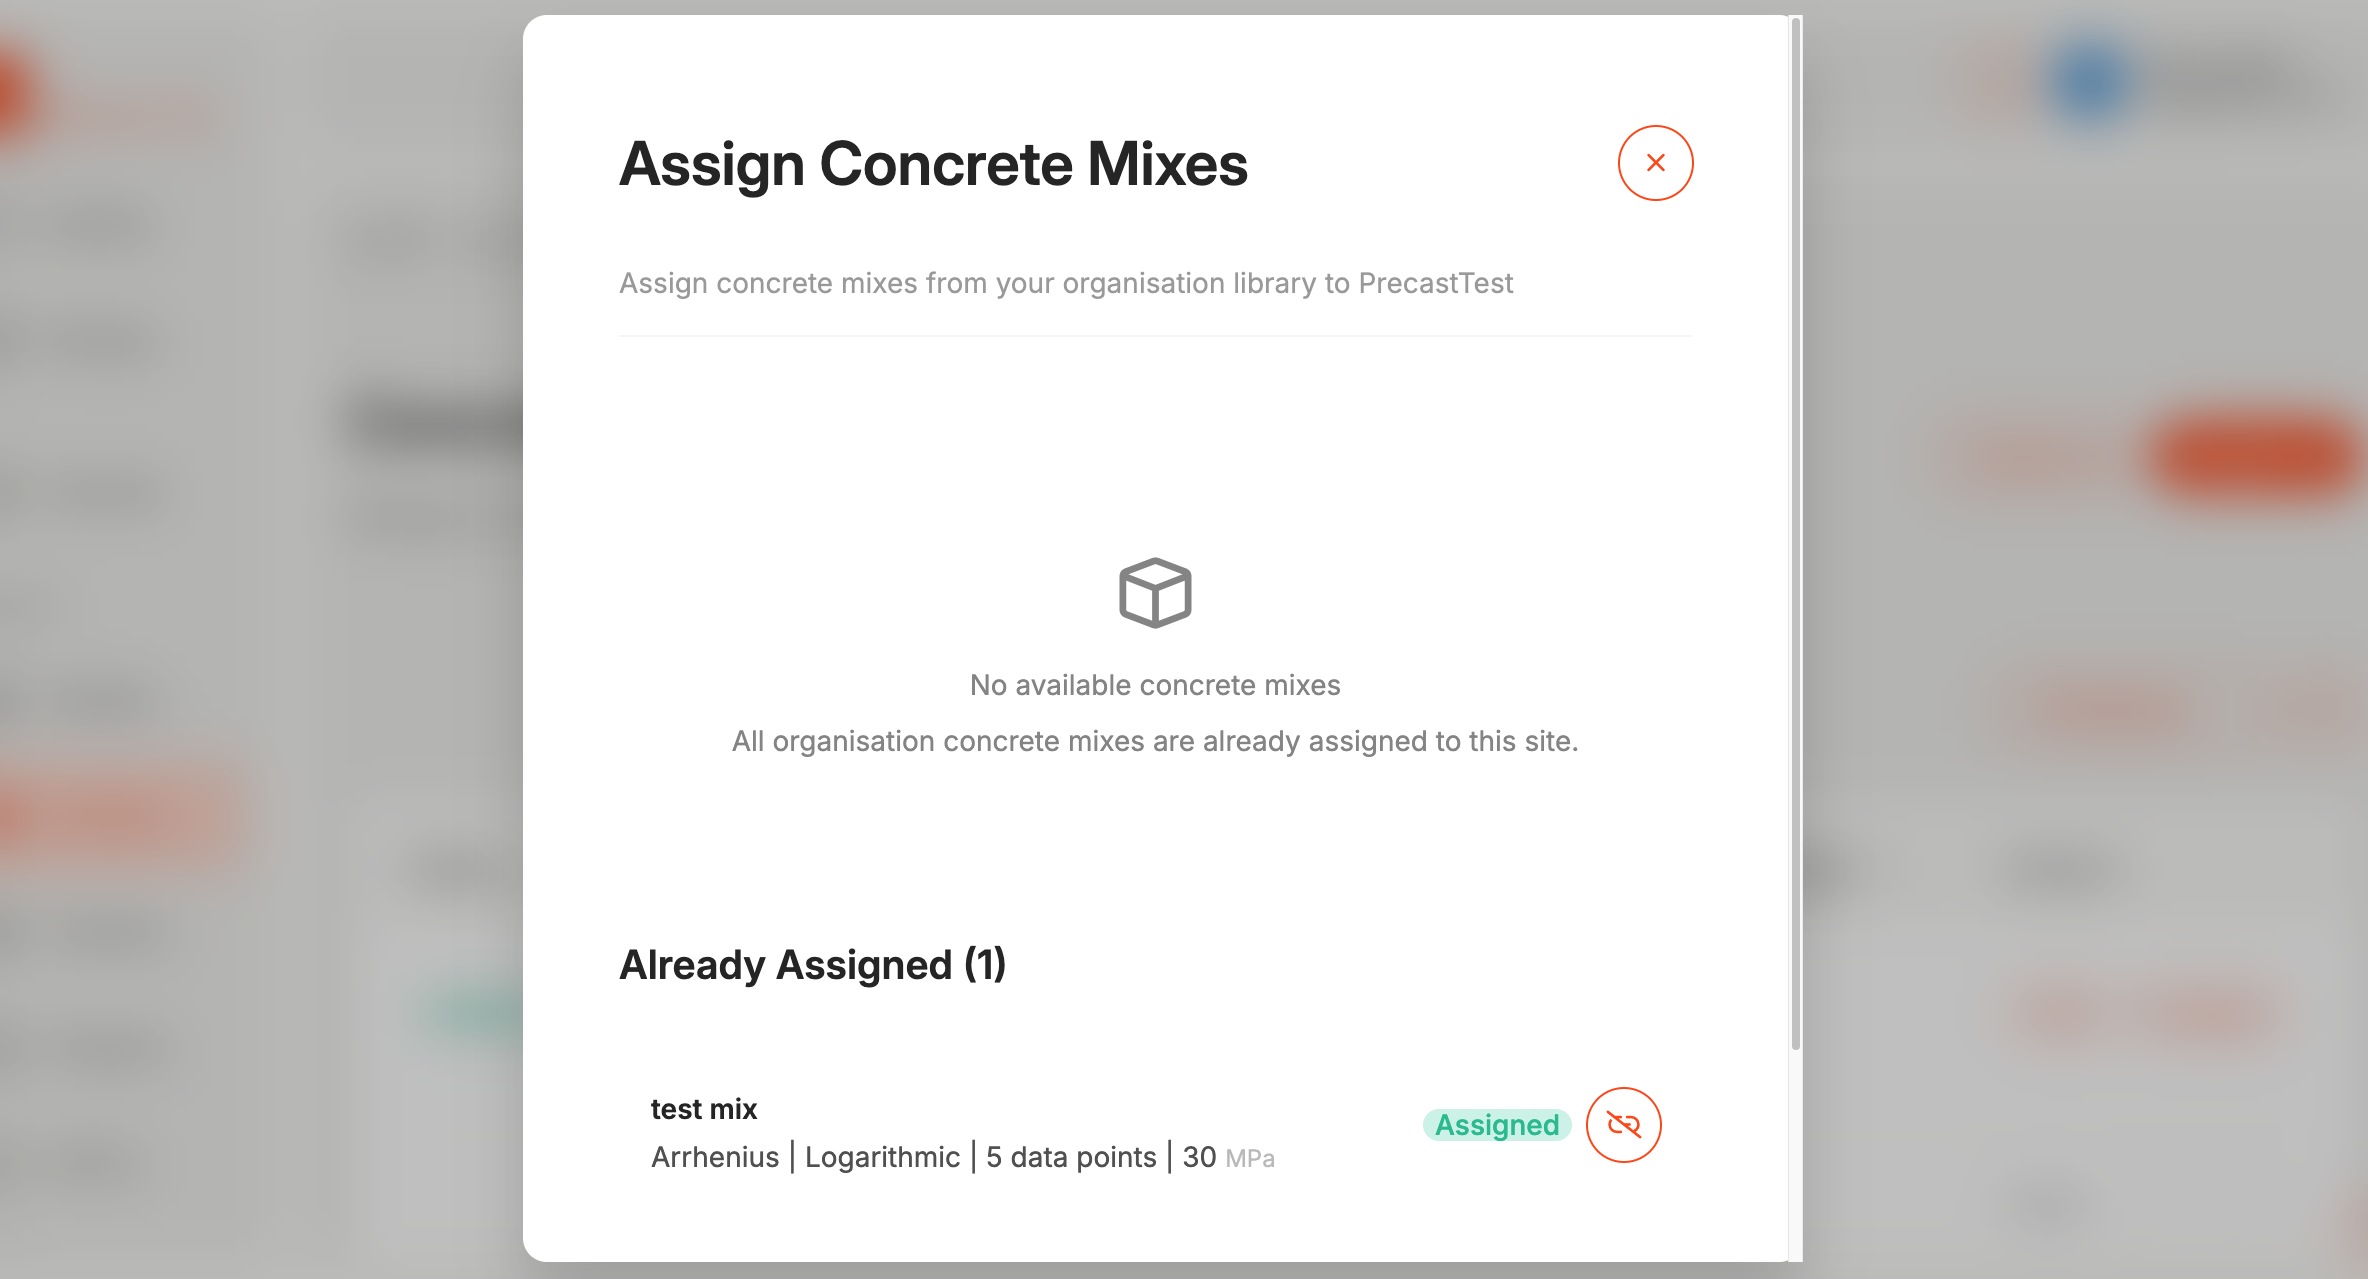
Step 4: Click on 'Assign mix'.
Now let’s plan your production
Set up a production plan

Step 1: Go to 'Production Plan' and click 'New Prodcution'
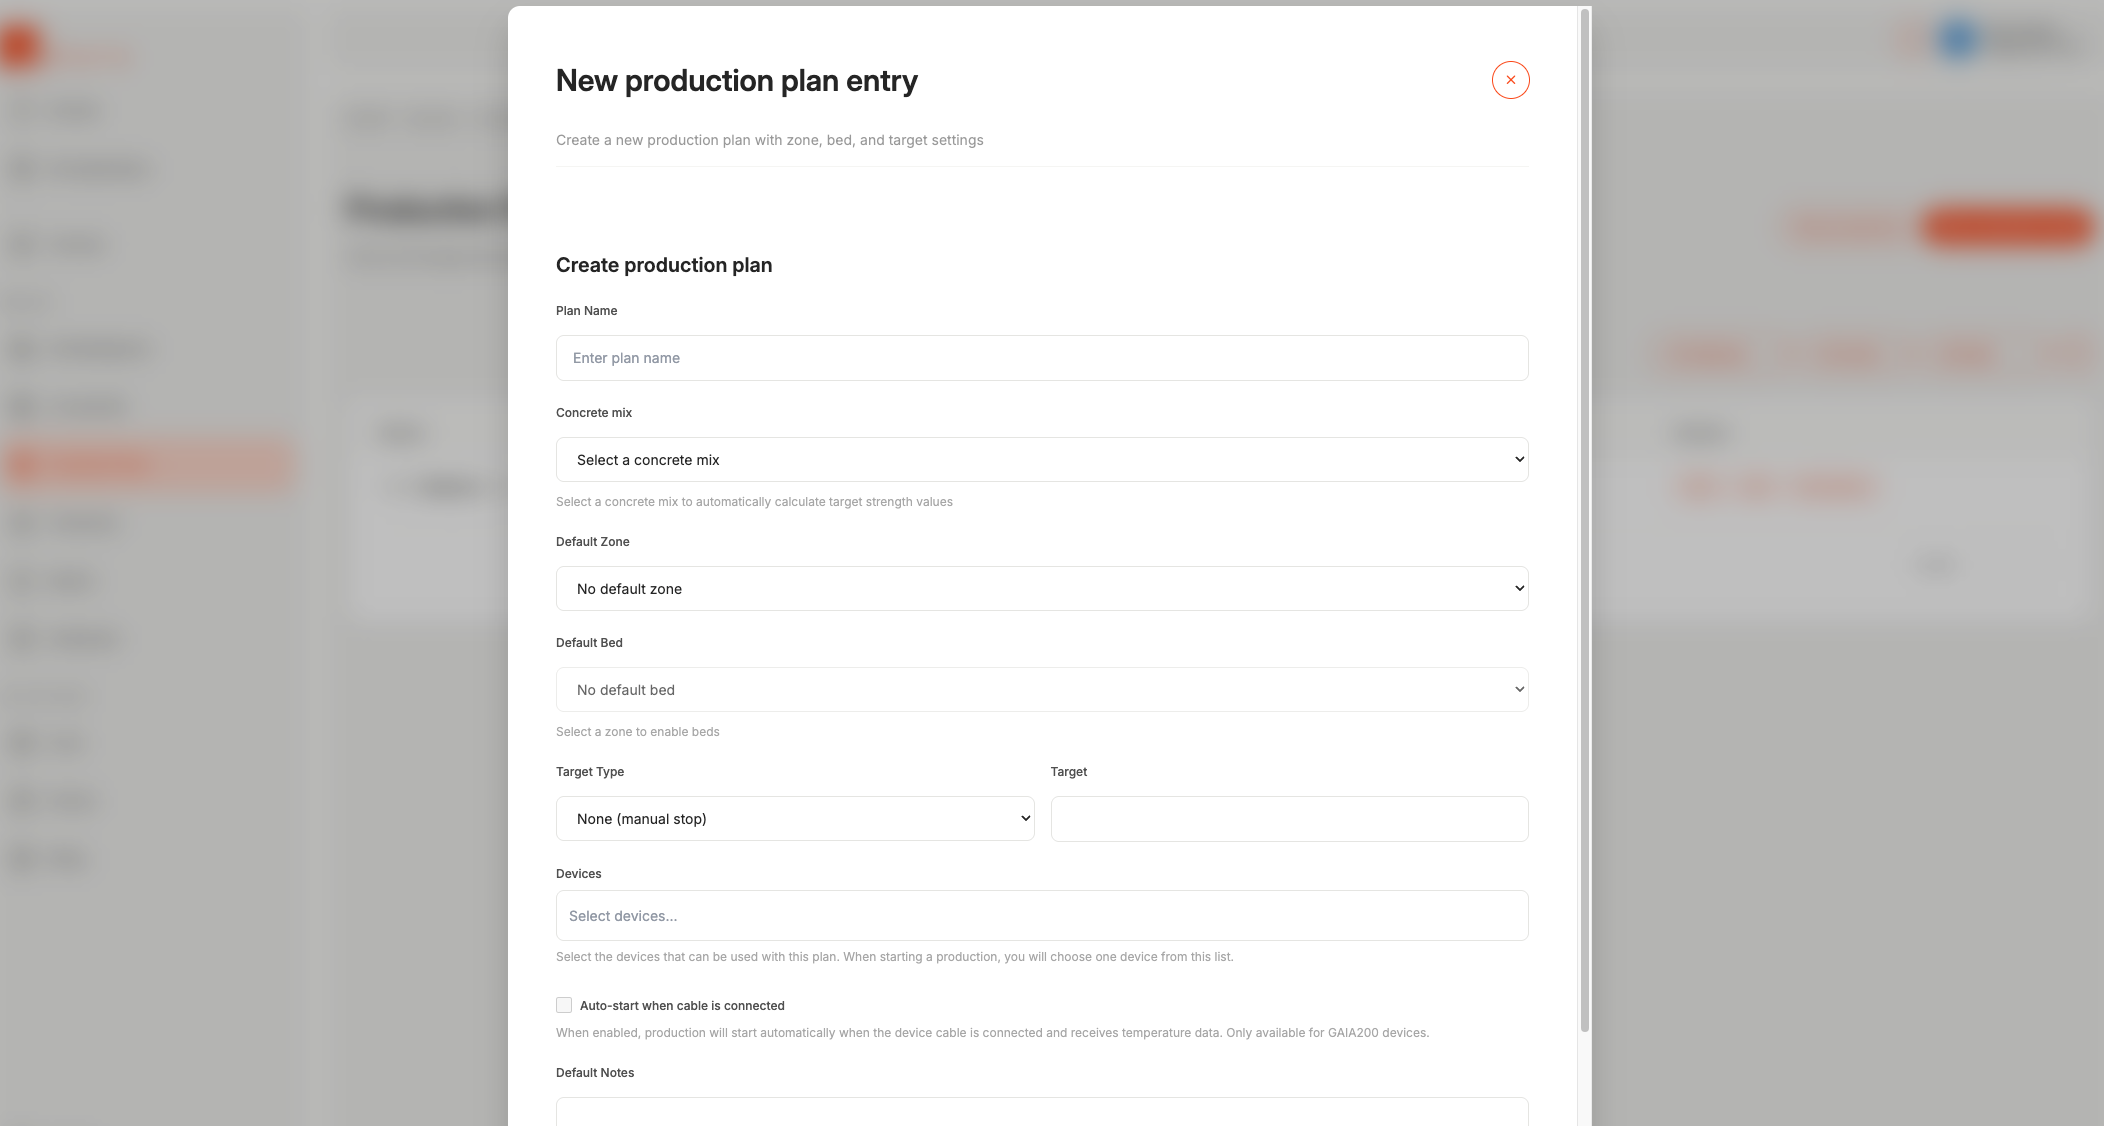
Step 2: Fill out information
- Production Name: Give the production a name
- Concrete Mix: Select a concrete mix from your site's concrete mix
- Default Zone & Bed: Select the default zone and bed this production should be in
- Target Type Select a target type between strength, maturity, age or manual stop
- Device Select the device you want to use for this plan
If you are using Gaia 200, you can set in the production plan that the monitoring should start automatically once the cable is connected!
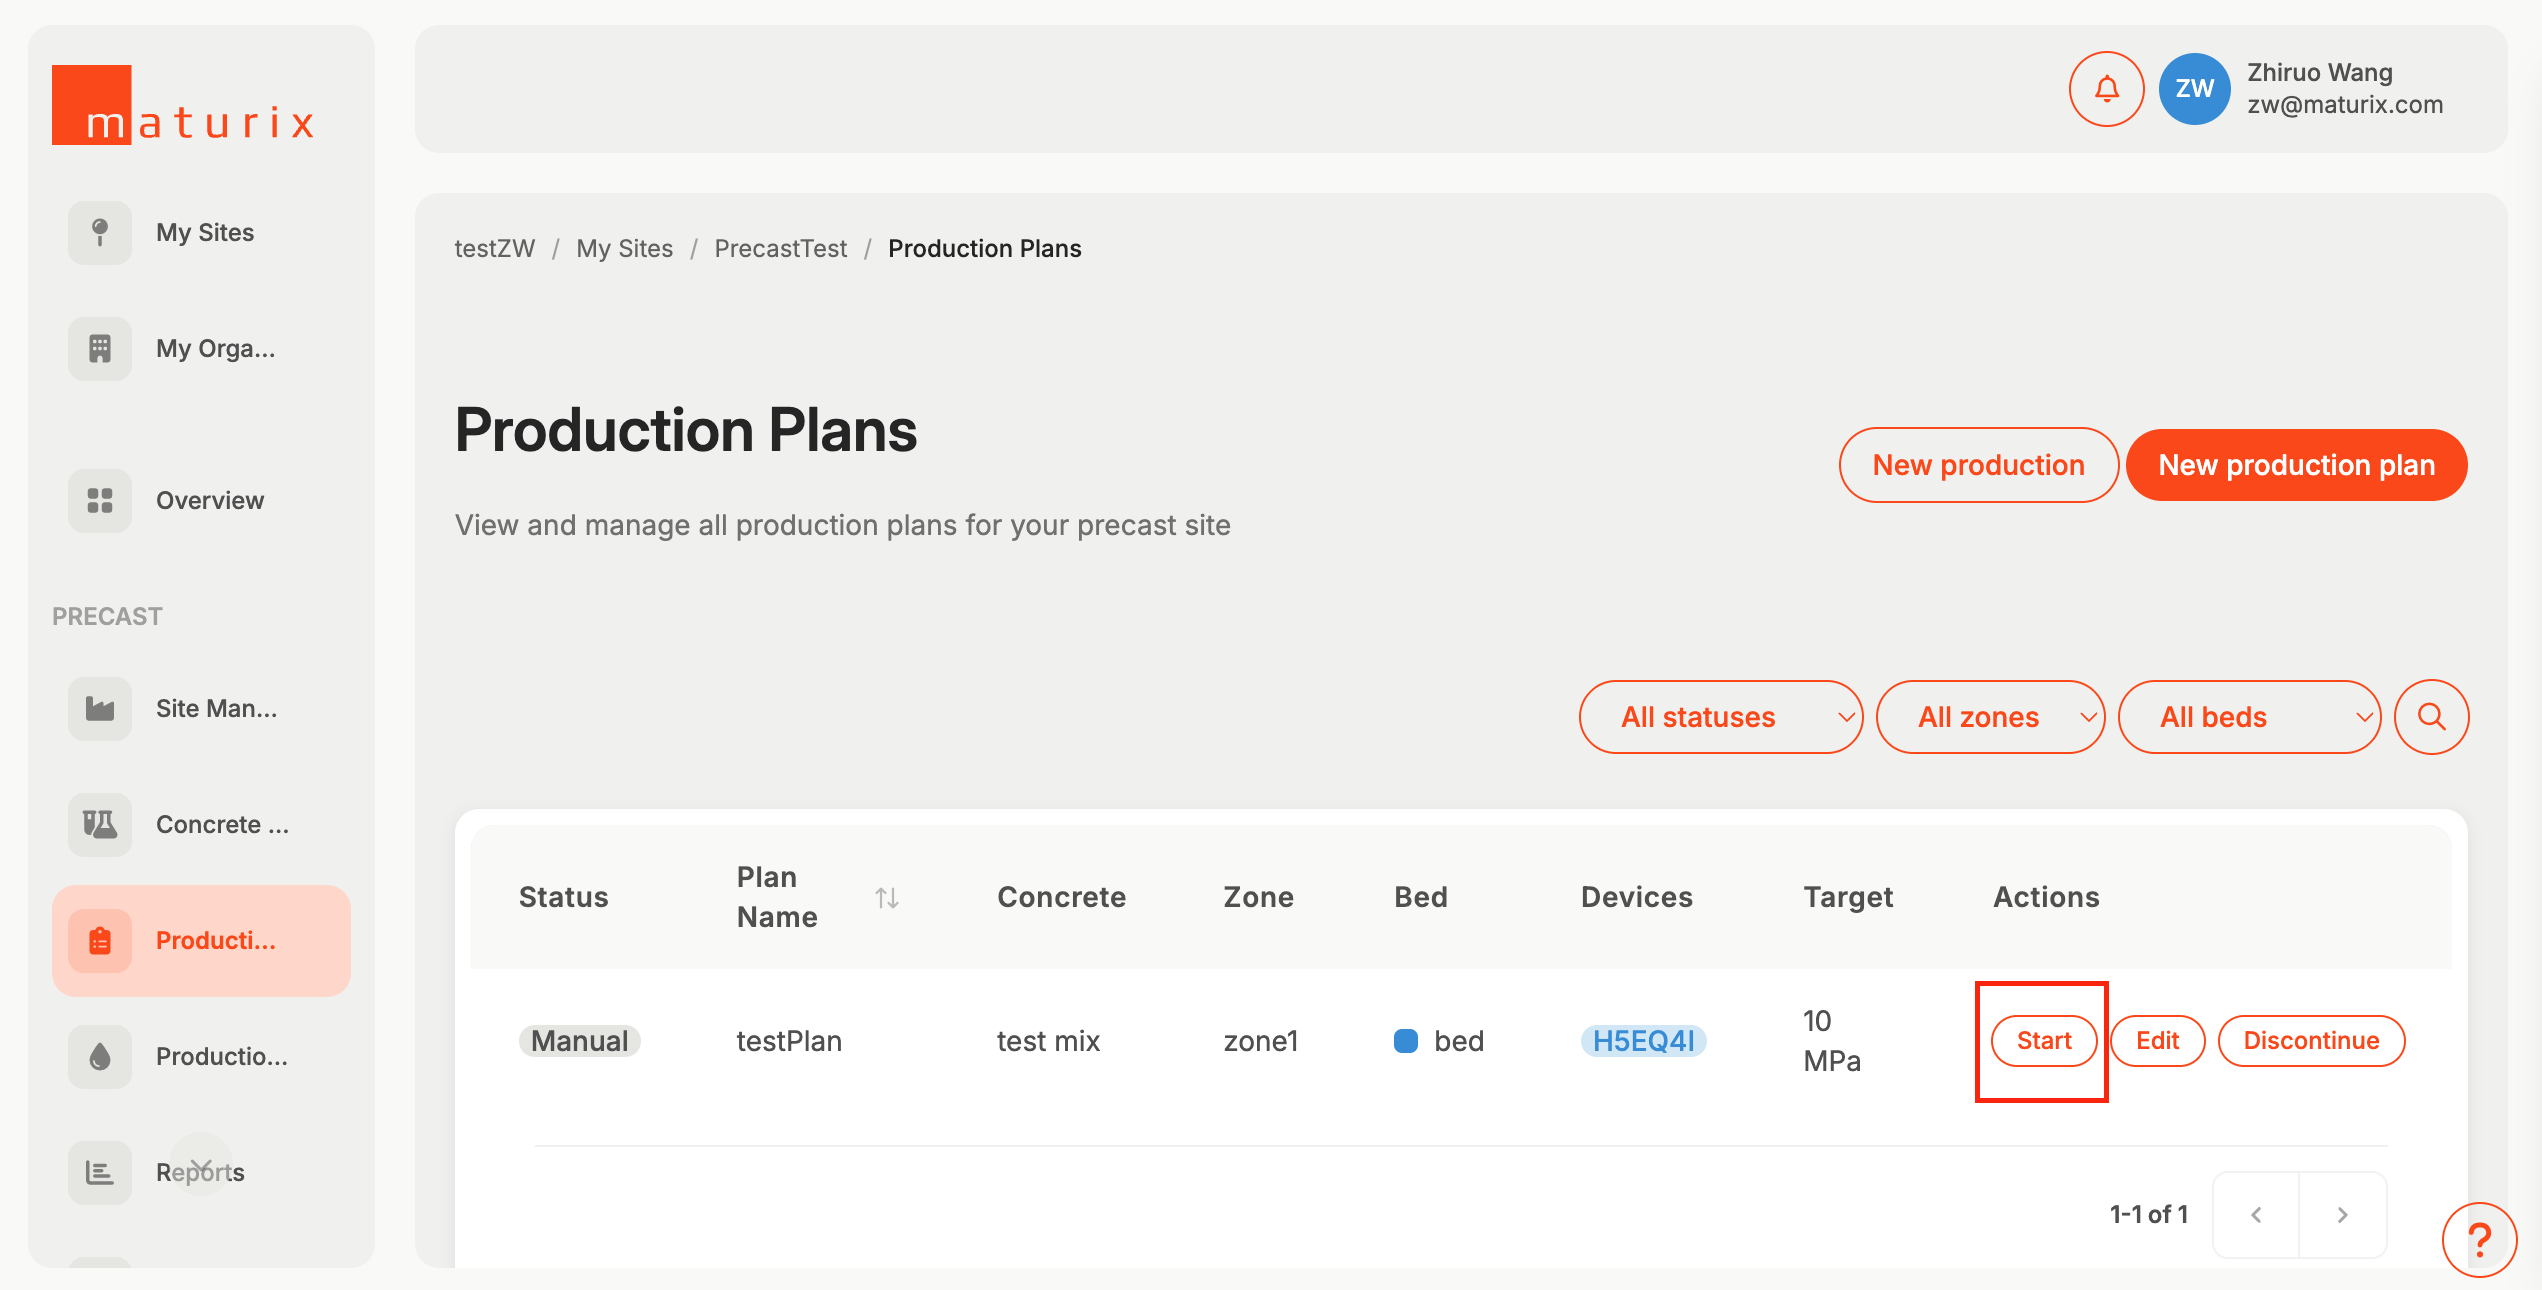
Step 3: Start a production using your production plan by clciking on 'Start'
Good job! Now we are ready to install the devices!
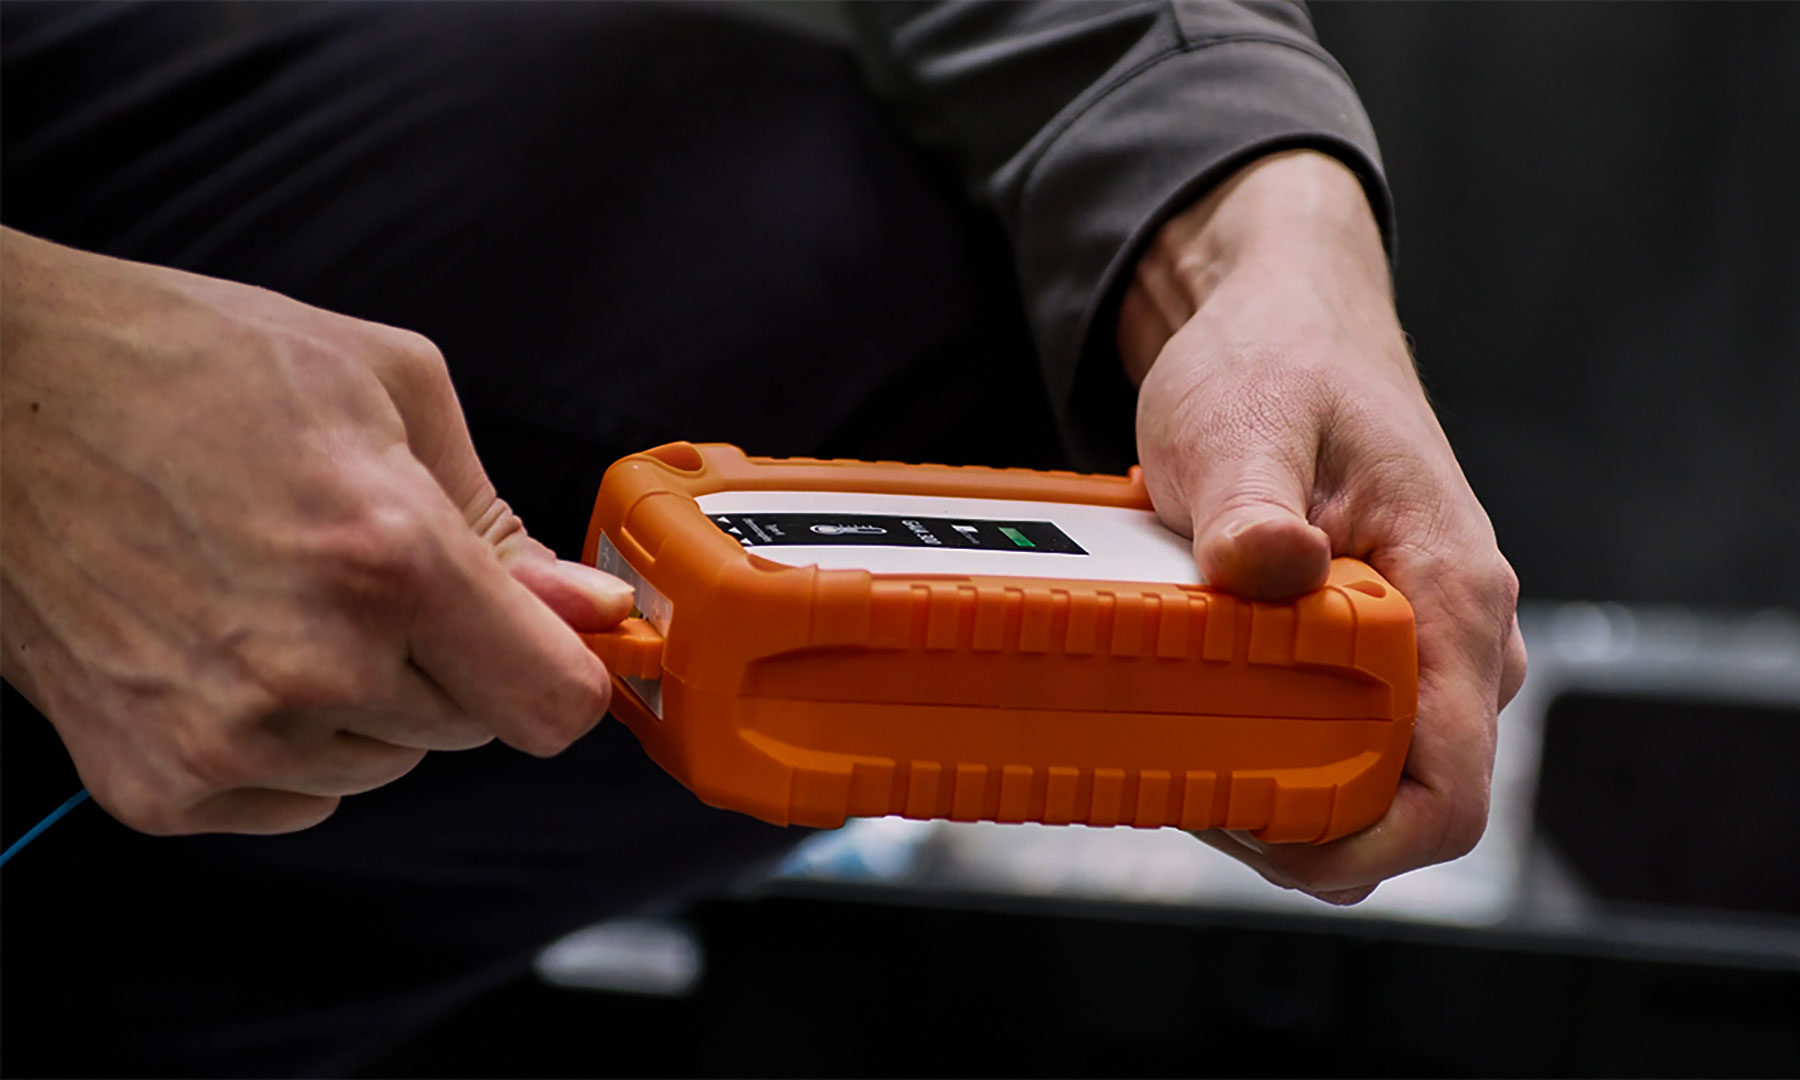
Select the device you want to install:

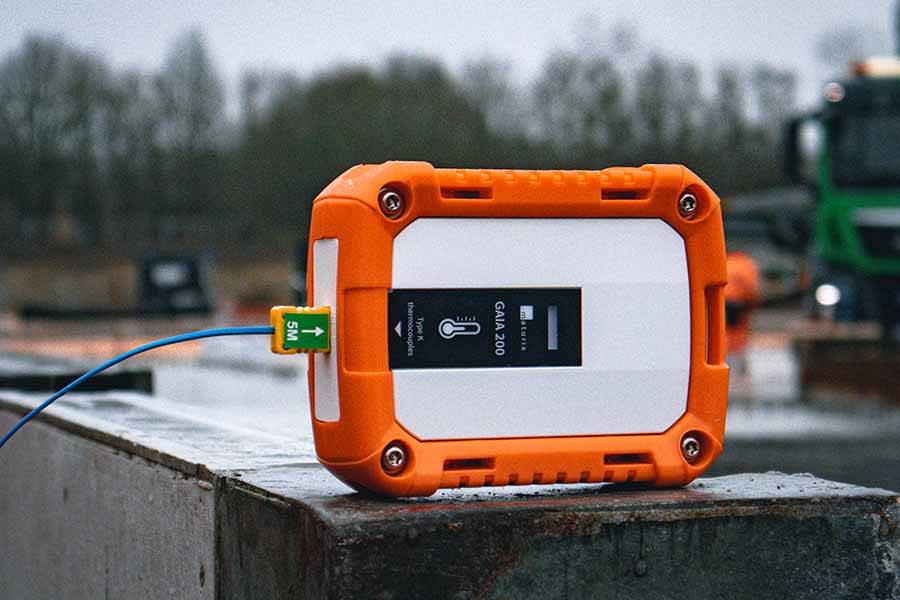
Gaia 200
1-channel transmitter
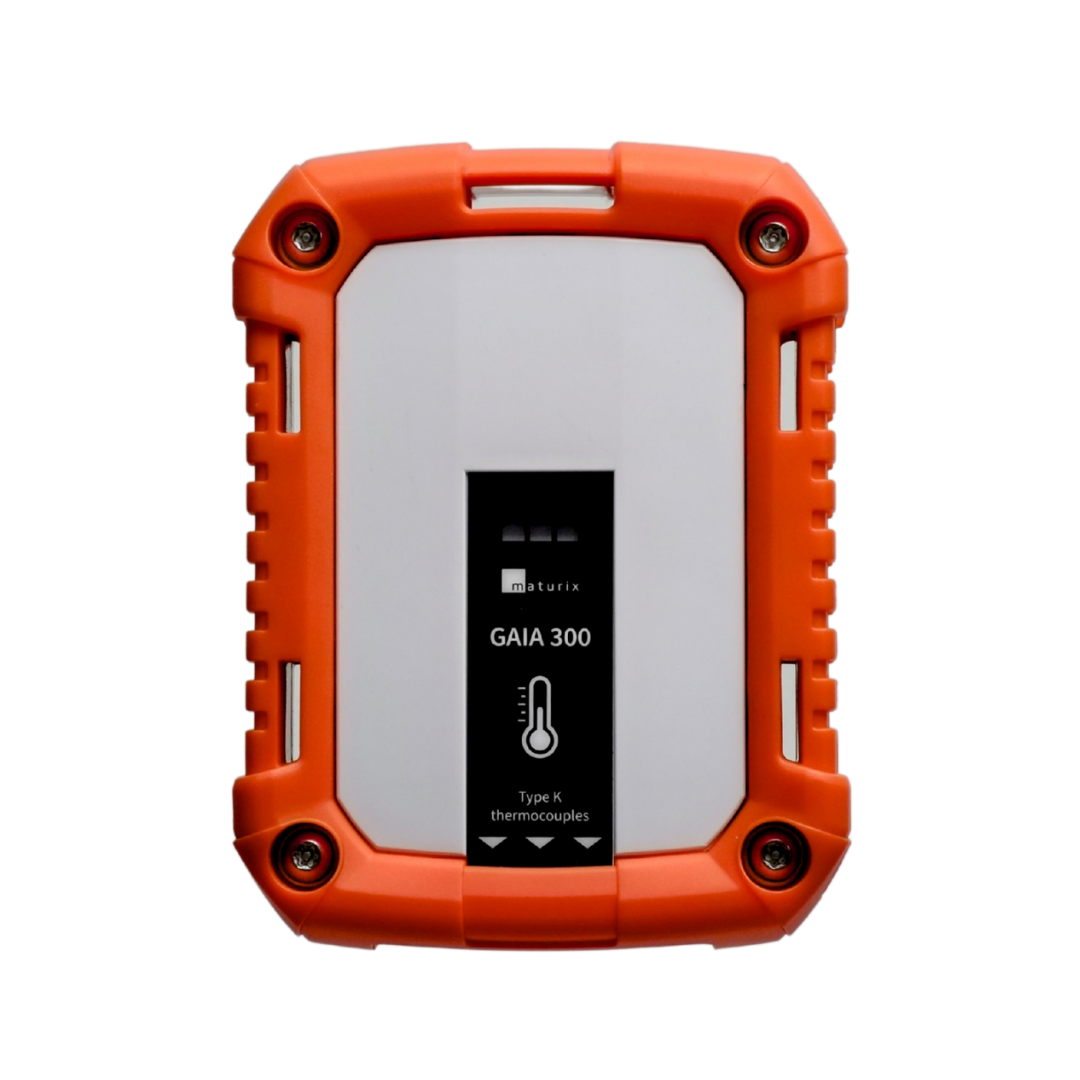
Gaia 300
3-channel transmitter
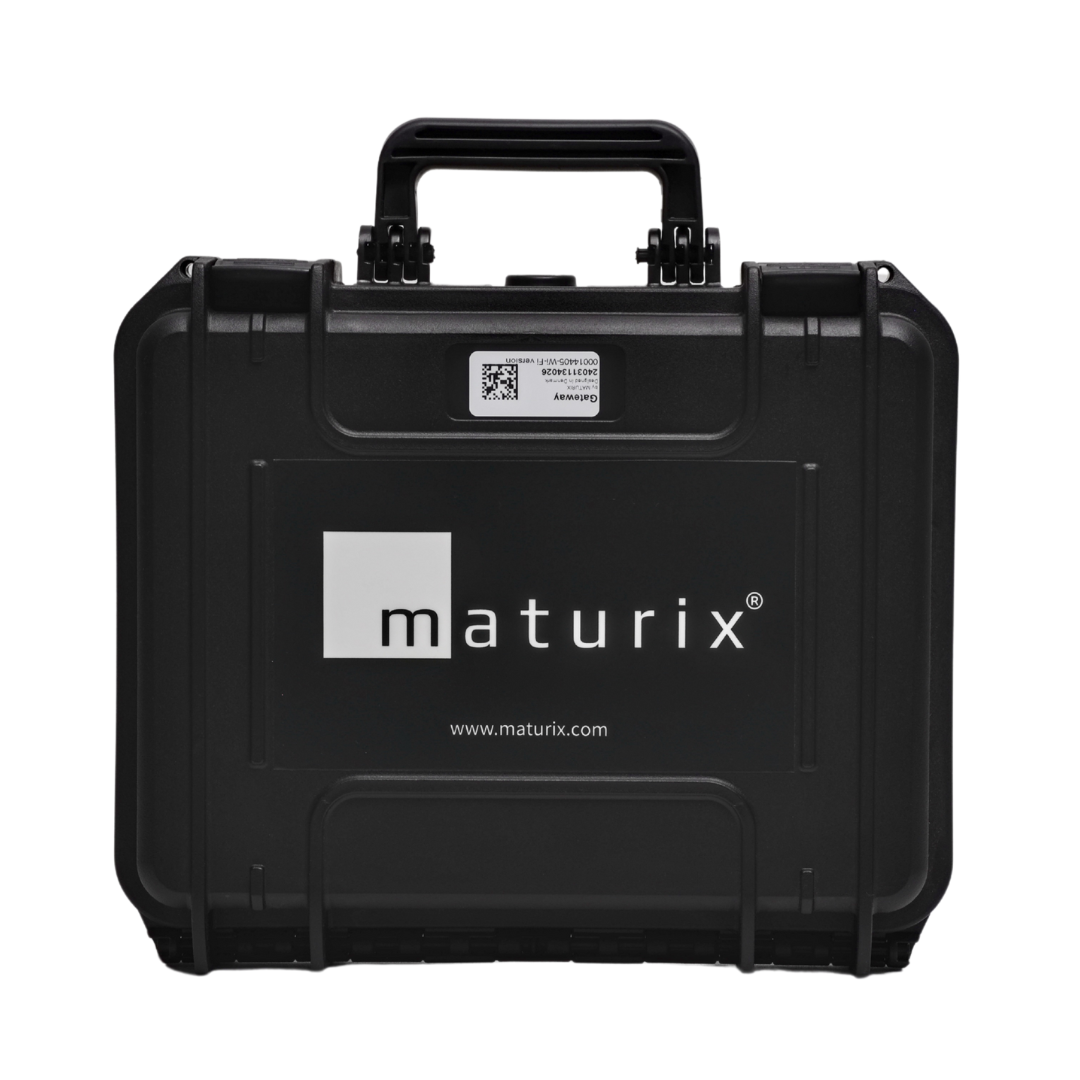
Gateway
Mini Base Station
Now we are ready to start monitoring and view data!
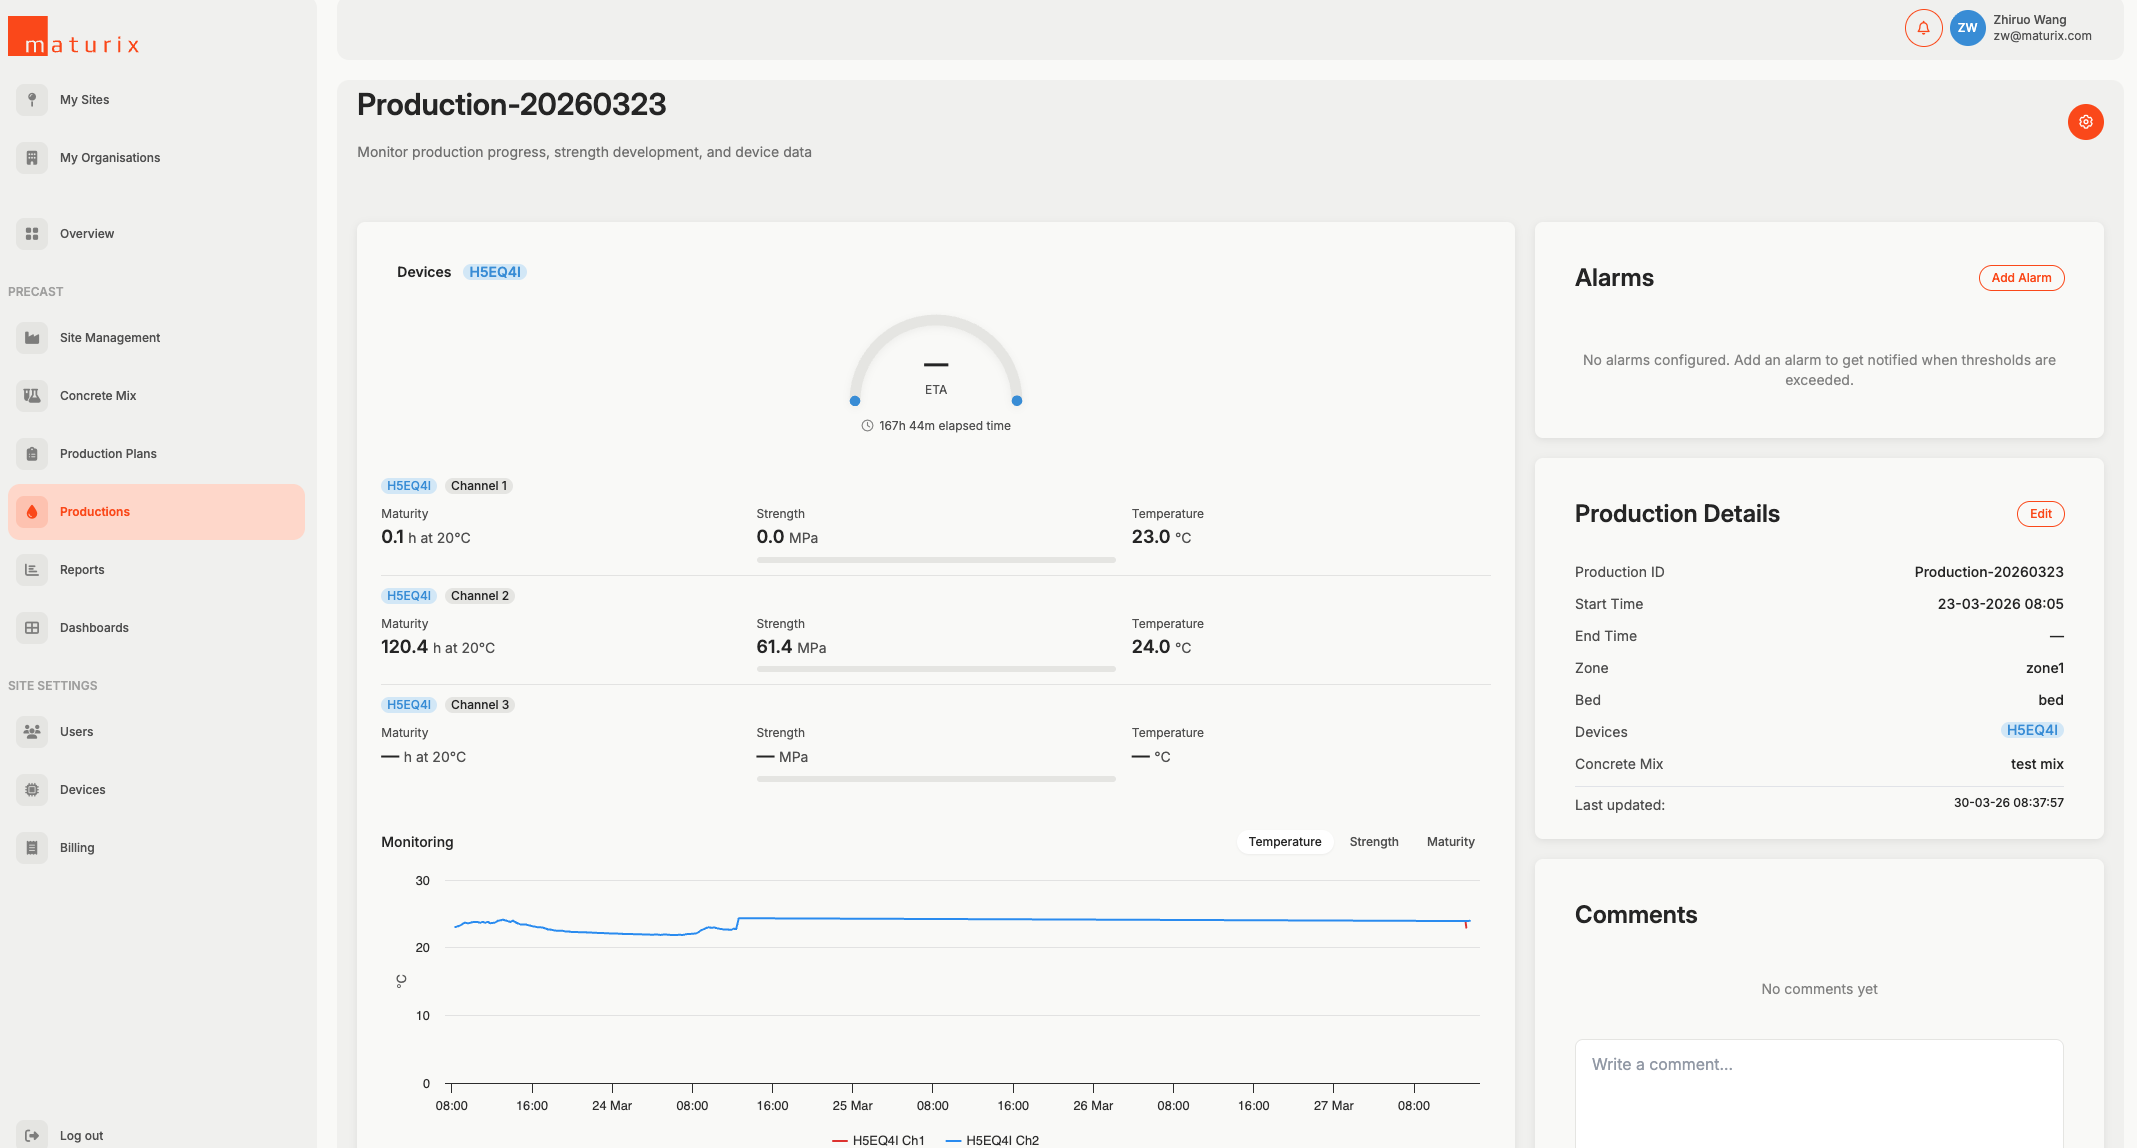
- Go to 'Production'
- Locate your production
- Click on 'Start' - if you did not set up auto-start
- View data by clicking on 'View' after start
Let's set an alarm!
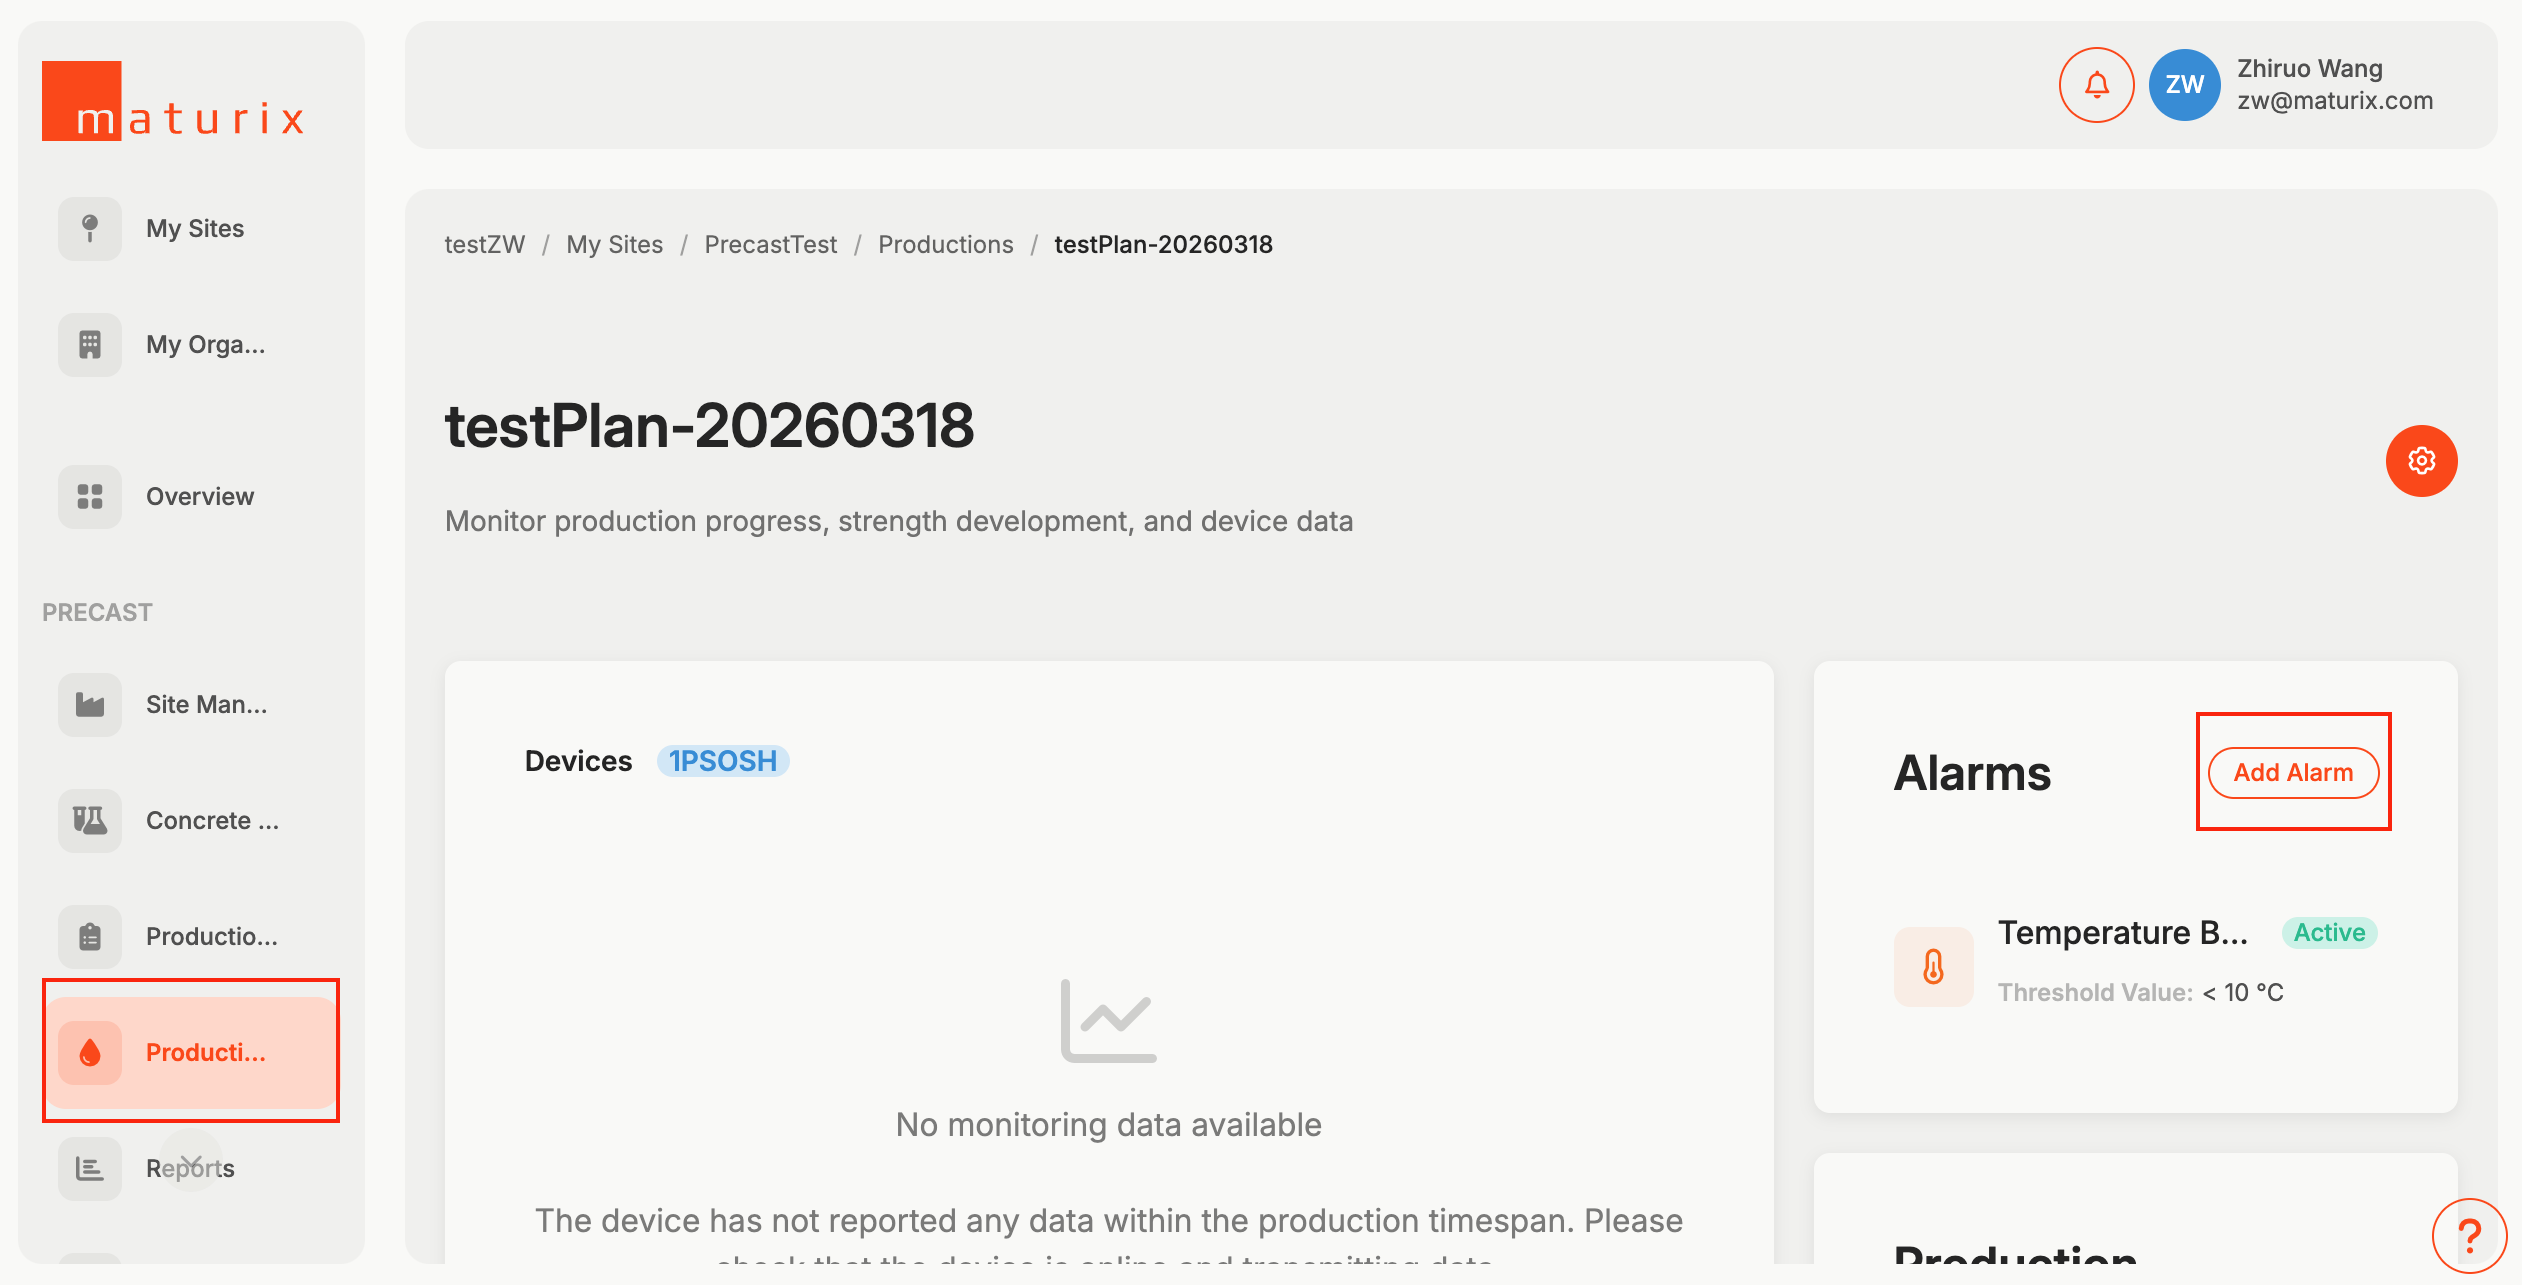
Step 1: Go to the production page, and on the view data page, go to the top right, then click on 'Add Alarms'
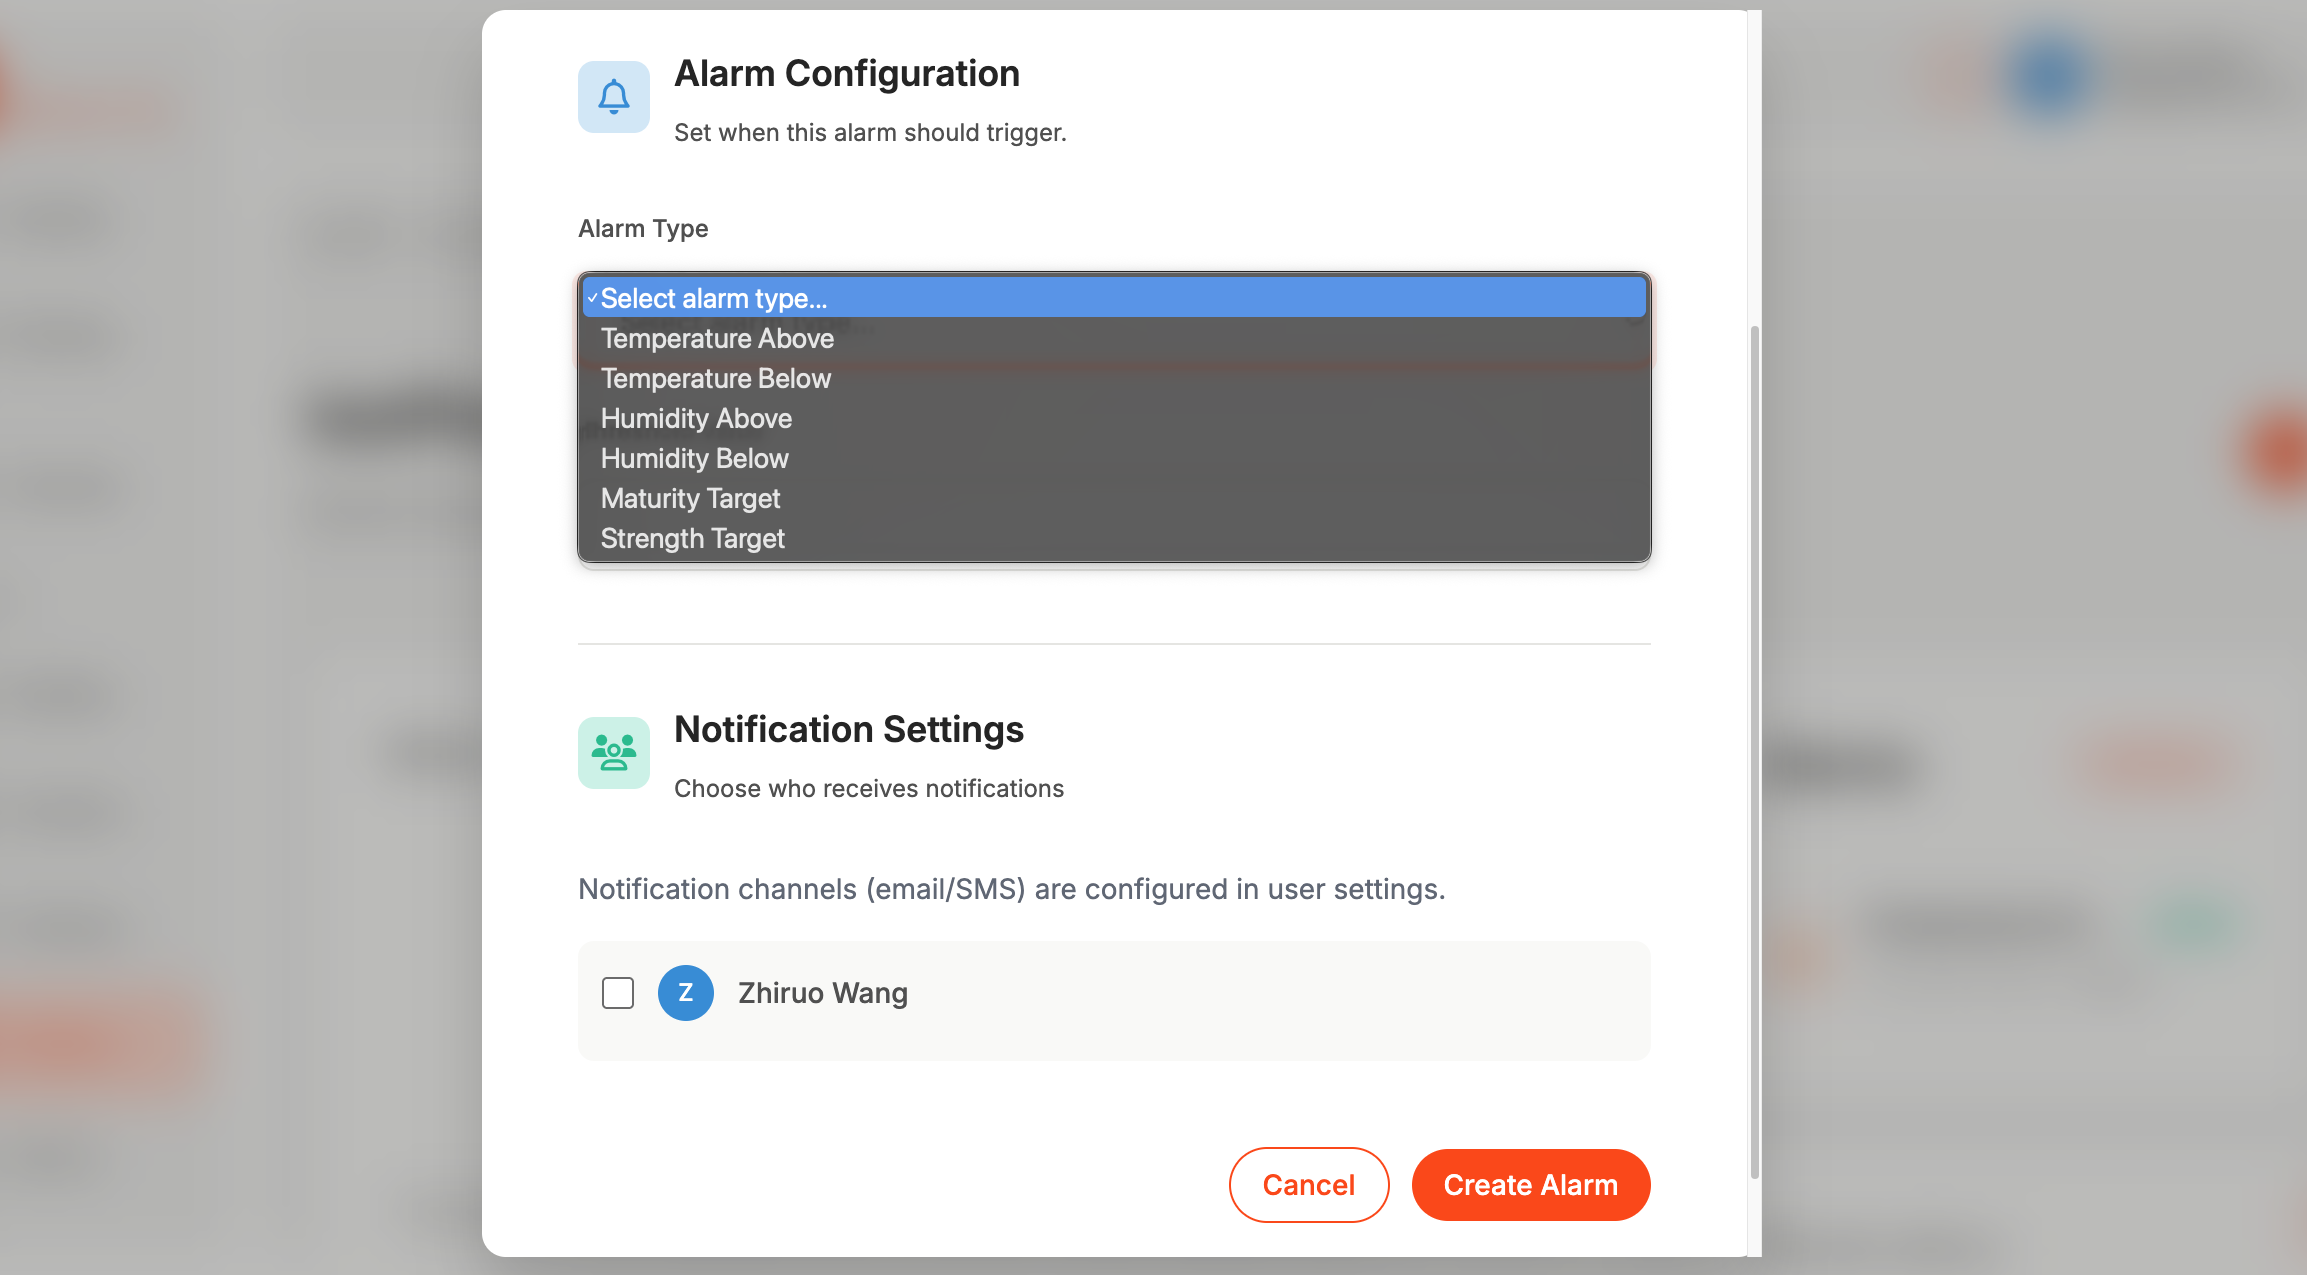
Step 2: Set an alarm
- Alarm Type: Select an alarm type that suits you
- Threashold Value: Set a value
- Notification Settings: Select the person that needs to receive this alarm (everyone who needs to receive alamrs needs to be added on the site)
Notification channels (email/SMS) are configured in user settings
Finished with your production?
Let's export your report!
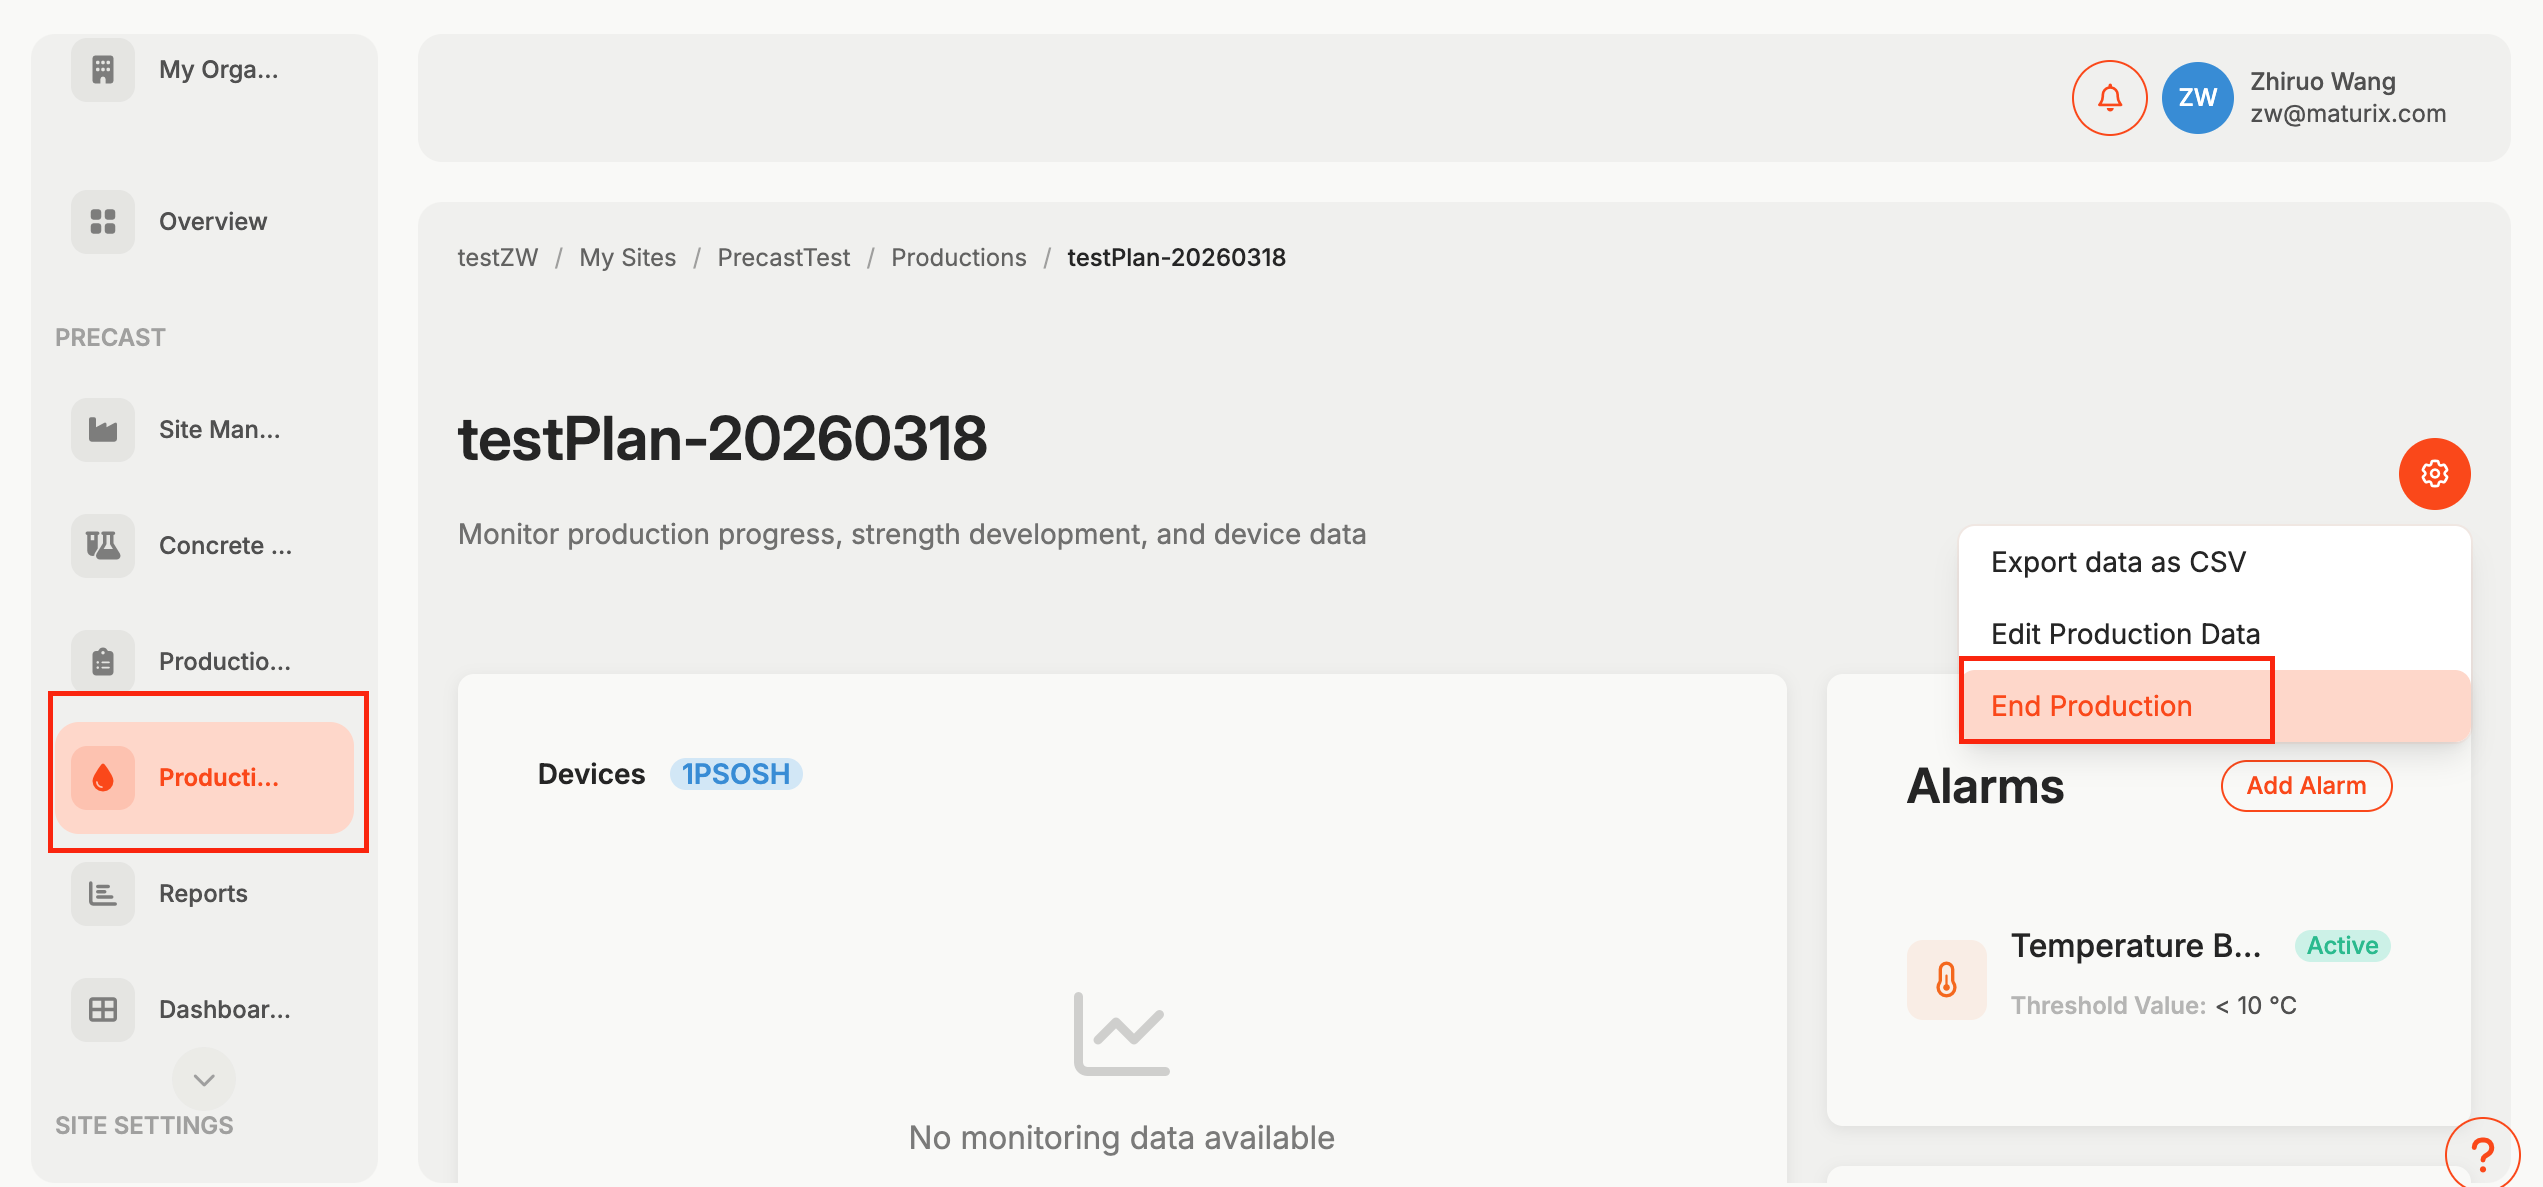
Step 1: End the production
- Go to Production
- Locate your production
- Click on 'View', then click the settings icon (top right) → 'End Production'
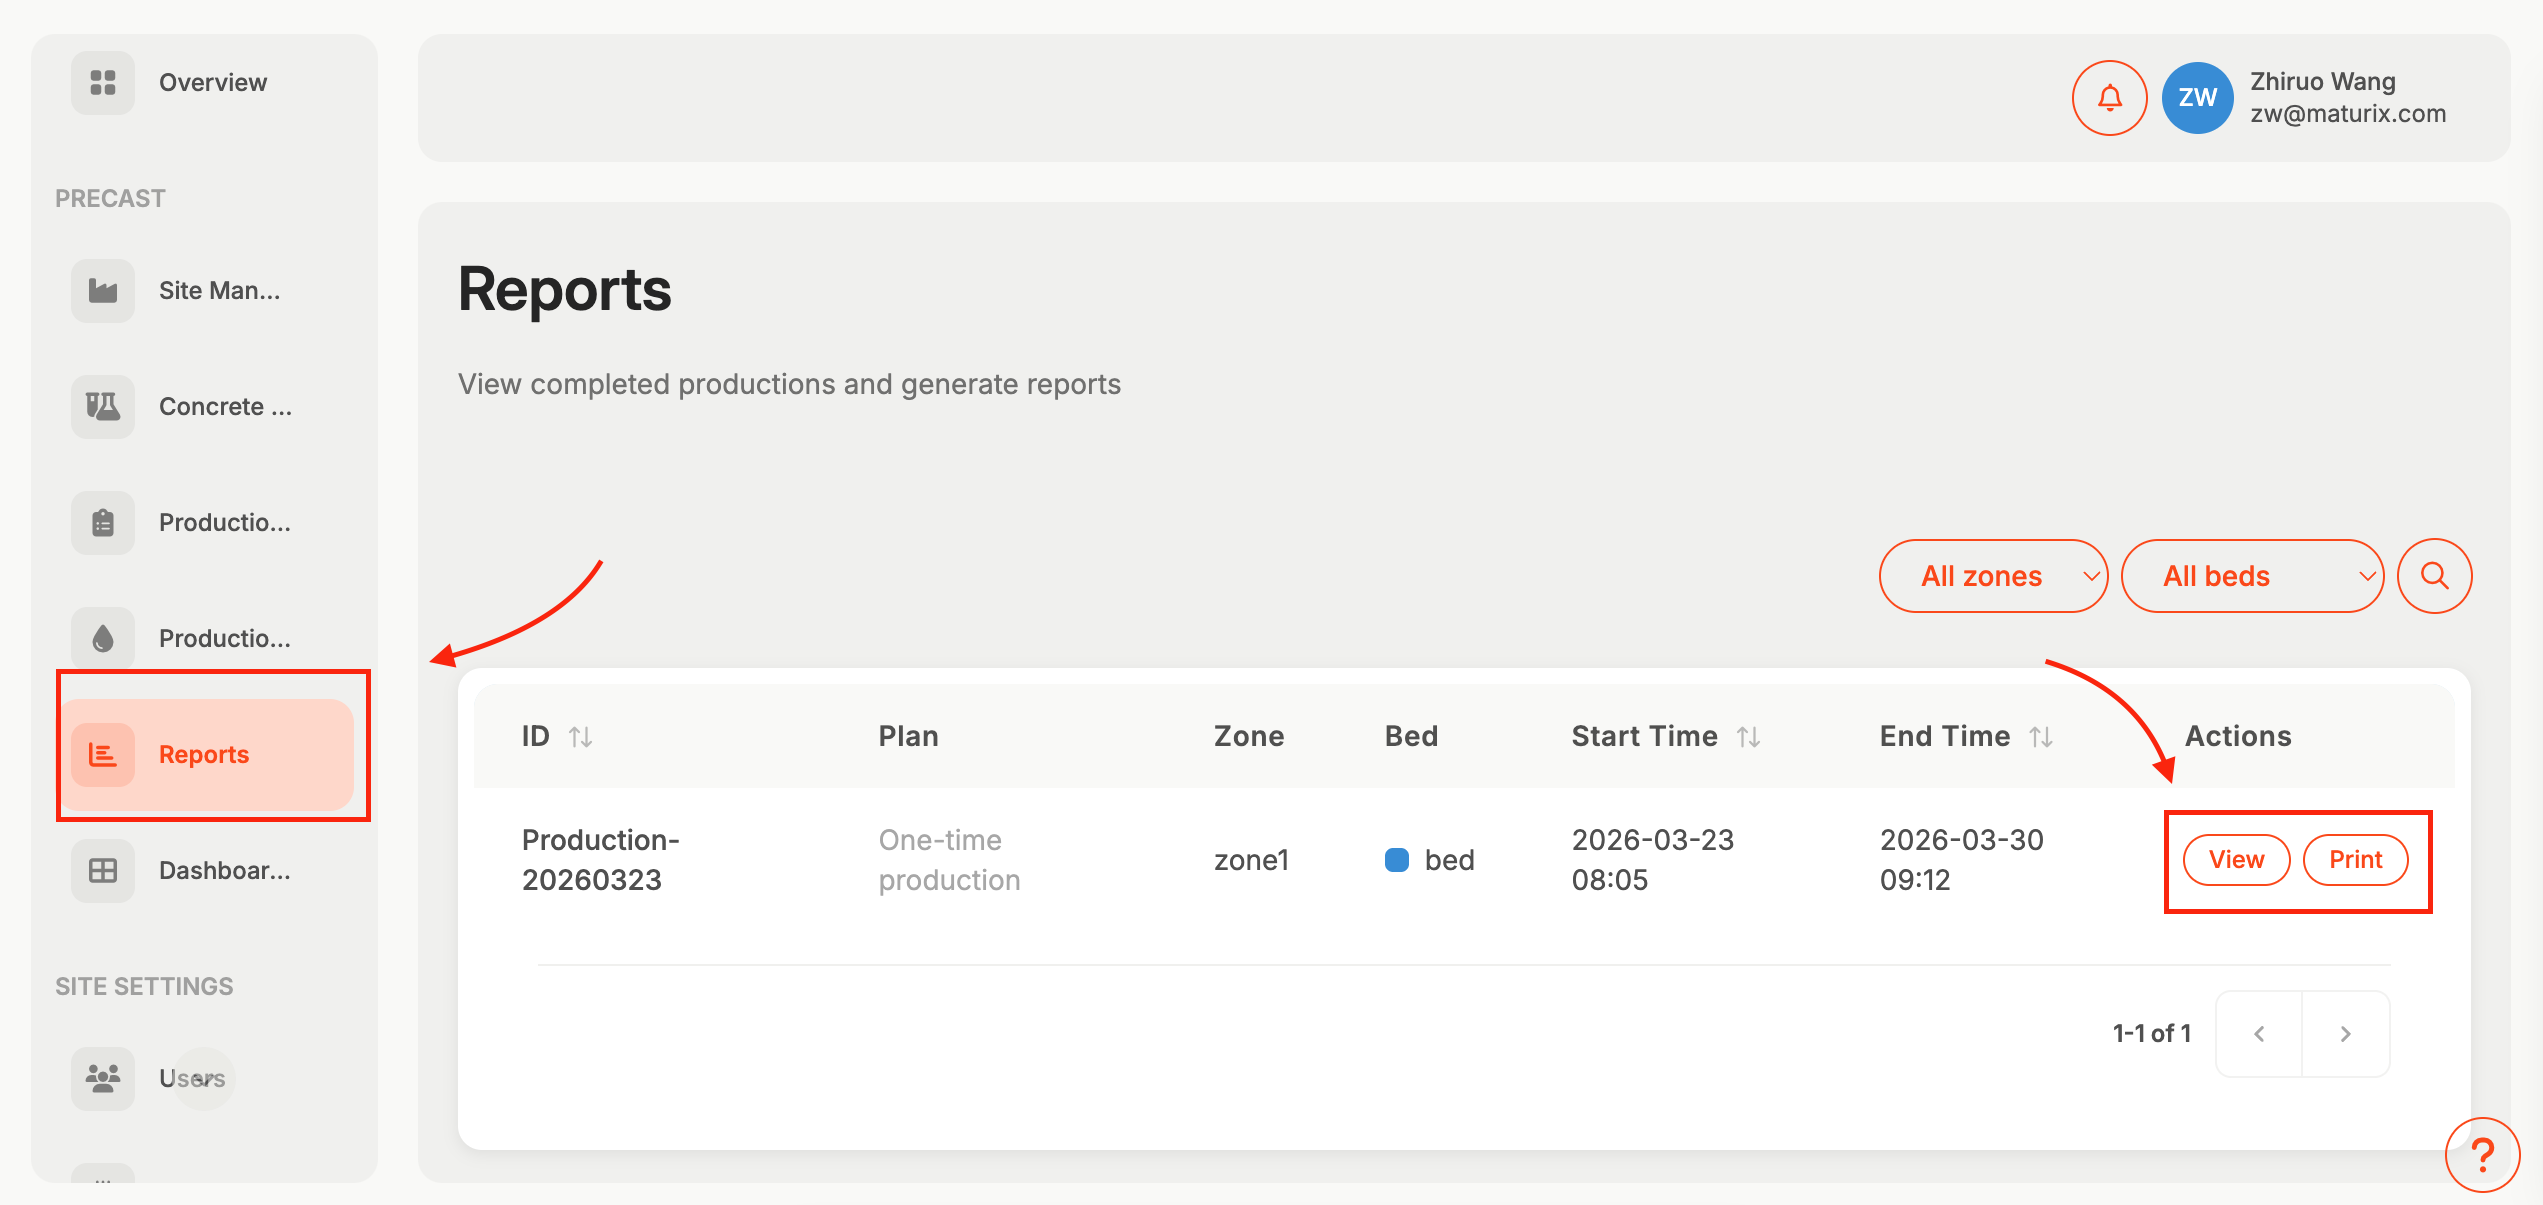
Step 2: Click on 'Reports', then click 'View' to see or 'Print' to export
You’re all set 🎉
Your first site is ready and monitoring is up and running.
You can now follow results in real time, set alarms, and export reports whenever you need.
Write to [email protected] if you have any questions!