In this article, you will learn how you can set up a cast and monitoring and how you can remove them.
Add a cast
Monitorings are collected in “Casts”. Therefore you first need to add a cast in a project:
- Click on Casts in the Project menu
- Click on New cast in the top right corner
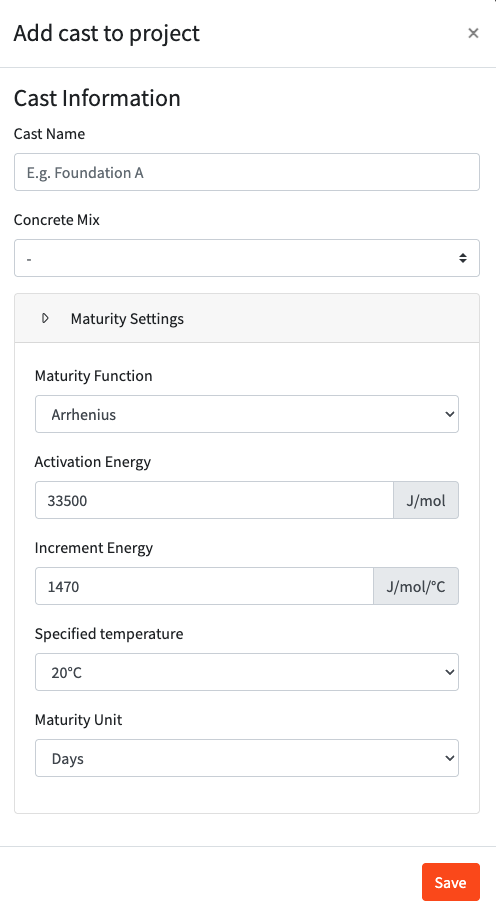
- Fill out the pop-up box
- Cast Name: Give your cast a name
- Concrete Mix: Choose the correct concrete mix (maturity calibration) to be used for the strength estimation
- Notice: Ensure that the selected Concrete Mix is equal to the one used for the cast
- To estimate the concrete strength, you need to enter the needed concrete mix data
- If no Concrete Mix is selected, the system will not be able to determine the strength, but will only be able to show the temperature and maturity
- Maturity Function: Shows the maturity function used for the concrete mix/maturity calibration
- Click on Save
The Concrete Mix can be lefted empty and added later!
Remove a cast
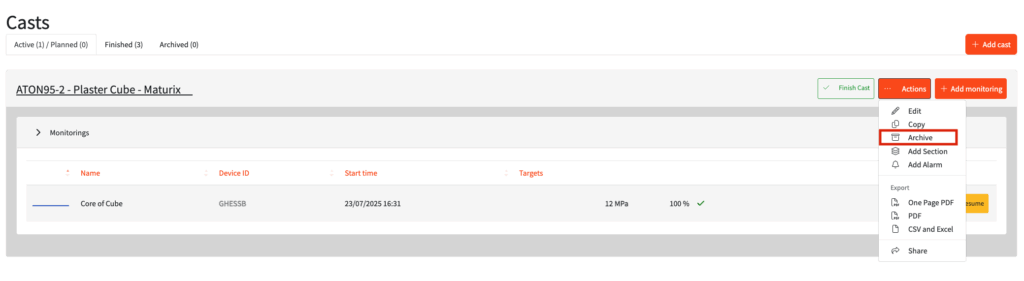
- Click on Casts in the menu
- Find the cast you want to remove, click on the 3 dots button, and click on Archive
- Confirm that you want to archive the cast in the pop-up box
Add a monitoring
Before you can add monitorings, you need to add a cast.
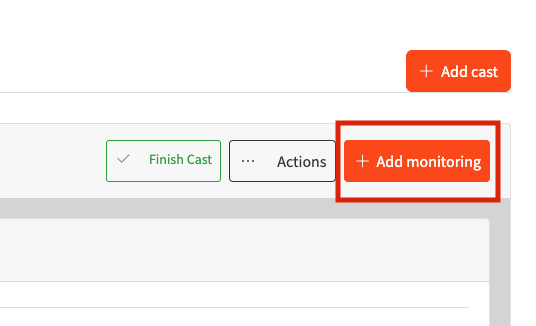
- Click on Casts in the menu
- Find the cast you want to add a monitoring to and click on Add monitoring
3. Fill out the pop-up box
-
- Monitoring Description: Give your monitoring a name
- Monitoring Type: Choose between temperature, maturity, and strength
- Note: If you can’t choose strength, then it is because you haven’t added a concrete mix/maturity calibration to the cast
- Target: If you want to set a target, flip the button, choose between strength and maturity, and enter a target value
- You can only set a target for the monitoring types chosen
- Planned Device (Optional): Select the device you plan to use from the dropdown (can be changed before starting the monitoring)
- Delayed start: If you want the monitoring to start a certain amount of time after you press start, you should write the amount of minutes here.
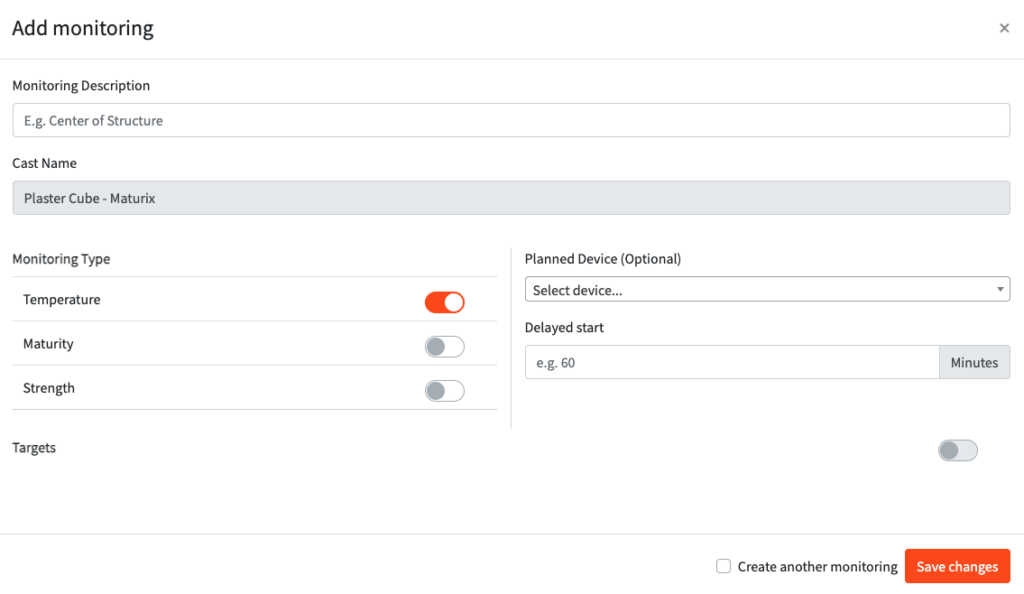
4. If you whish to create multiple monitorings with the same parameters (eg. target, alarms etc.), you should check the Create another monitoring box at the bottom of the page.
5. Click on Save changes
Remove a monitoring
- Click on Casts in the menu
- Find the monitoring you want to remove, click on the 3 dots button, and click on Remove
- Confirm that you want to remove the monitoring in the pop-up box
Add a section
Before you can add sections, you need to add a cast and monitorings.
- Click on Casts in the menu
- Find the cast you want to add the section to and click on Actions
- Select Add Section in the dropdown list. If this option does not appear, it is because you do not have any monitoring in this cast. Create one or more and try again.
- Fill out the pop-up box
- Section Name: Give your section a name
- Section Description: Add a relevant explanation
- Monitorings: Choose which monitorings should be included in the section
- Click on Save section
Remove a section
- Click on Casts in the menu
- Find the cast you want to remove the section from. Then, find the section that needs to be removed.
- Click on the Delete Section button.
- Confirm that you want to remove the section in the pop-up box